
Want to make this Creamy Pumpkin Cheesecake or your favorite cheesecake recipe into smaller bite-sized pieces? If you are offering more than one type of dessert, smaller pieces mean your guests won't have to fill up on one rich slice of cheesecake and instead can take a sampling of all there is to offer. It's a good thing.
(These can also be made ahead and frozen - in fact, I prefer to eat them 5 minutes out of the freezer about halfway between frozen and thawed - yummy!)
Here's how it's done:
1. Line your 9x13 pan with parchment paper so that the parchment is hanging over both long sides of the pan. Use a large paper clip to secure the parchment to the rim of the pan. The parchment will make it easier to lift the cheesecake out of the pan to cut it after it's been frozen and the paper clips keep the parchment from touching the top of the unbaked cheesecake filling.
2. Make 1 1/2 times the crust and press it evenly into the 9x13 pan. Bake as directed in the recipe for about the same amount of time. Keep an eye on the crust. It should be only lightly browned around the edges. You could also use (2) 8x8 or 9x9 pans, dividing the crust and filling between the two, but adjust the baking time to compensate for the smaller pans.
3. Have ready a large roasting pan that the 9x13 pan will fit inside of. This will be for the water bath. I tried to bake one without the water bath and it was a complete flop, so I highly recommend using a water bath even if you have to borrow a roasting pan from a neighbor.
4. Heat a teapot of water while you make the filling.
5. Place the 9x13 pan into the roasting pan and make the filling as directed (no need to increase the filling amount as you did for the crust).
6. Pour the filling over the crust and place the roasting pan on your middle oven rack. Pour hot water into the roasting pan until it comes about halfway up the sides of the 9x13 pan. Bake at 325 degrees F. Check for doneness in about 45 minutes (less for smaller pans). The cheesecake is done when it is just ever-so-slightly wobbly in the center. This could take anywhere from 45 minutes to an hour or more. Just keep checking it by wiggling the pan every so often and see how much it jiggles in the middle. Remove from the oven and run a knife all the way around the sides of the pan and then allow the cheesecake to cool completely, then cover with plastic wrap and place in the freezer for at least two hours or overnight.
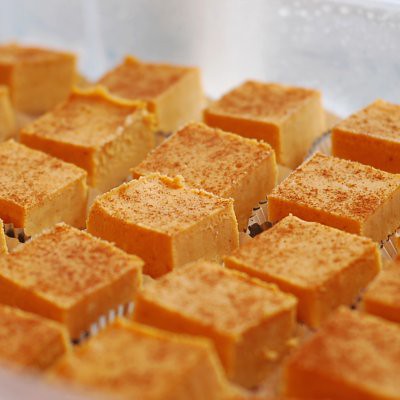
7. After the cheesecake is frozen, lift it out of the pan using the parchment paper as handles onto a large cutting board. Using a sharp chef's knife or serrated bread knife, cut the cheesecake into squares. Wipe the knife or rinse it with hot water between cuts to make the cuts clean and neat. Place the squares into mini cupcake liners and either re-freeze up to 2 weeks or refrigerate up to three days in an airtight container.

I love a good general tip that can apply to a lot of options. We used to make tiny bite-sized bars using this exact method. You got such perfect cuts on your bars, too.
ReplyDeleteHope you're having a great holiday season :)
I may call you in a panic on tueday when I'm trying this!!
ReplyDeleteThanks Irina - Happy Holidays to you too!
ReplyDeleteJoy - call me anytime - in fact, why don't you come to my house to make them? Maybe then I can convince you to put a kitchenaid mixer on your Christmas list! (and the kids can play together too!)
I'm making your cheesecake squares for tonight! I wanted something small and sweet and I thought of you immediately...then I thought of your cheesecake. Ha!
ReplyDelete