Pages

Saturday, June 26, 2010

Fresh Fruit Tart

Fresh Fruit Tart with Lemon Curd

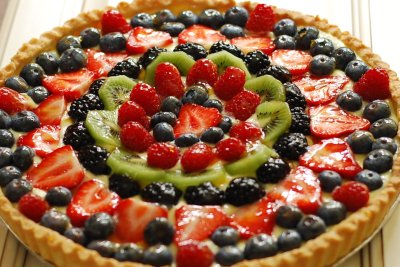
This may be one of the most beautiful desserts I've ever made. I can't take the credit though. The berries get it all. It's the time of year when fresh, beautiful fruit is in abundance and this dessert showcases it like no other.

I used a pate sucree for the tart crust in a 12-inch tart pan, and a lemon curd filling, although you could also use a vanilla pastry cream or a cream cheese filling instead. The fruit is arranged on top and brushed with an apricot jam glaze for a glossy shine.

Almost too beautiful to eat!

Pate Sucree
adapted from The Secrets of Baking by Sherry Yard
enough for two 9- or 10- inch tarts, or 16 mini tarts

1/2 pound butter, softened but still cool
1/2 cup sugar
1/2 teaspoon salt
2 large egg yolks, at room temperature
3 cups pastry flour, sifted
2 tablespoons heavy cream

1. Place the butter in the bowl of a standing mixer fitted with the paddle attachment. Beat on low speed for 2-3 minutes, or until lightly creamed. Stop the mixer and scrape down the sides of the bowl. Add the sugar and mix for 30 seconds.
2. Add the salt and egg yolks, one at a time, scraping down the sides of the bowl after each addition.
3. Add the flour and mix until the dough just about comes together, about 30 seconds. Add the cream, then pulse the mixer on low speed for 15-30 seconds, or until the dough is smooth.
4. Remove the dough from the bowl, divide it in half, and wrap each piece in plastic wrap. Chill for at least 4 hours. At this point, the dough will keep in the refrigerator for up to 3 days or may be rolled out and frozen for up to 1 month.
5. When you remove the dough from the refrigerator, it will be very hard. To make it pliable enough to roll out, you must soften it without warming it up too much. I cut the dough into several pieces and gently kneaded each piece, then gathered the pieces back together into a ball.
6. After rolling the dough out and lining the tart pan, place the tart shell in the freezer until ready to bake, at least 30 minutes (not necessary to wrap), or up to one month, well wrapped in plastic.
7. Place a parchment liner over the dough and fill with dried beans or uncooked rice and bake at 350 degrees F for 15 minutes. Remove the liner and the dried rice/beans, prick the bottom of the tart shell with a fork, and bake for another 10 minutes, or until golden brown. The tart shell may be baked a day ahead.

Lemon Curd
adapted from The Secrets of Baking by Sherry Yard
makes about 2 cups

2/3 cup sugar
2 tablespoons finely chopped or grated lemon zest
3 large eggs
4 large egg yolks
3/4 cups lemon juice, or 1/2 cup lemon juice and 1/4 cup lime juice
8 tablespoons unsalted butter, cut into 1/2-inch cubes

Fill a medium saucepan with about 2 inches of water and bring to a simmer. Combine the sugar and lemon zest in a food processor and pulse for about one minute. Combine the lemon sugar, eggs, and egg yolks in a medium heatproof bowl such as a stainless steel mixing bowl and whisk together for 30 seconds. Place the bowl over the simmering water and immediately begin whisking and stir until the sugar is dissolved. Add the lemon juice and continue to cook and stir with a rubber spatula to scrape the bottom of the bowl, until the curd has thickened and reached a temperature of 160 degrees F.

Rinse and dry the bowl of your food processor. Using a mesh strainer, strain the curd into the food processor bowl. Pulse the food processor while you add the butter a piece at a time, until the texture is homogenous. Transfer the curd to a container with a lid and place a piece of plastic wrap directly on the surface of the lemon curd. Allow the curd to cool completely and then place the lid on your container and place it in the refrigerator to chill for at least 2 hours or up to one week.

Apricot Glaze
1/2 cup apricot jam
1 tablespoon of water

Heat the jam and the water gently in a saucepan until smooth. Strain through a mesh strainer into a bowl. Add more water if needed to adjust the consistency.

To assemble the fruit tart:
Place the tart shell on a serving platter. Fill with tart shell with lemon curd, leaving a little space for the fruit. Arrange your choice of fruit on top of the lemon curd and using a pastry brush, brush the apricot glaze over the fruit. Refrigerate until ready to serve. (This tart is best eaten the same day as it is assembled.)

Monday, June 21, 2010

Mint Bliss Ice Cream with Mint Ganache Sauce

Mint Bliss Ice Cream

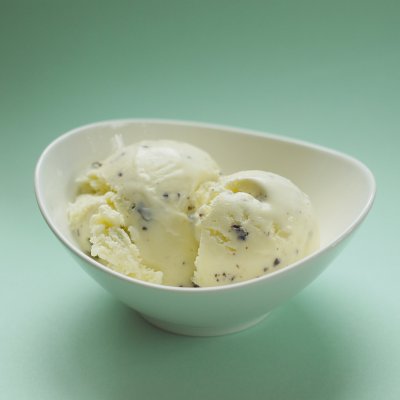
Homemade mint ice cream...

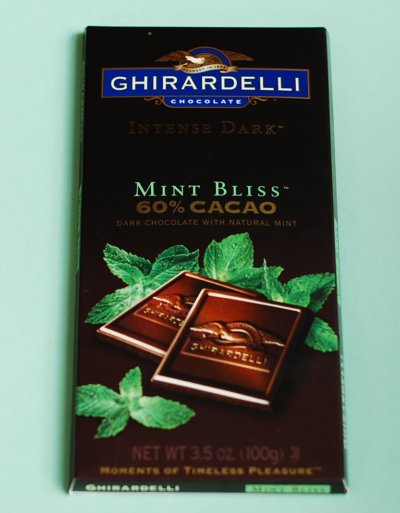
Mint Bliss

...a chopped Mint Bliss chocolate bar...


...and a ganache sauce with creme de menthe...pure heaven!

Mint Chip Ice Cream
from Alton Brown courtesy of The Food Network

3 cups half and half
1 cup heavy cream
8 large egg yolks
9 ounces sugar
1 teaspoon pure peppermint extract
3 ounces chopped Ghirardelli Mint Bliss chocolate, or Andes candies, or semisweet chocolate chunks

Place the half-and-half and the heavy cream into a medium saucepan, over medium heat. Bring the mixture just to a simmer, stirring occasionally, and remove from the heat.

In a medium mixing bowl whisk the egg yolks until they lighten in color. Gradually add the sugar and whisk to combine. Temper the cream mixture into the eggs and sugar by gradually adding small amounts, until about 1/3 of the cream mixture has been added. Pour in the remainder and return the entire mixture to the saucepan and place over low heat. Continue to cook, stirring frequently, until the mixture thickens slightly and coats the back of a spoon and reaches 170 to 175 degrees F. Pour the mixture into a container and allow to sit at room temperature for 30 minutes. Add the peppermint extract and stir to combine. Place the mixture into the refrigerator and once it is cool enough not to form condensation on the lid, cover and store for 4 to 8 hours or until it reaches 40 degrees F or below.

Pour the mixture into an ice cream maker and process according to the manufacturer's directions. This should take approximately 25 minutes. In the last minute or so of freezing, add the chopped chocolate to the ice cream machine. Serve as is for soft serve or freeze for another 3 to 4 hours to allow the ice cream to harden.


Mint Chocolate Ganache
from Baked: New Frontiers in Baking by Matt Lewis and Renato Polafito

6 Ounces / 170g Dark Chocolate (60 to 72% Cacao), coarsely chopped
1/2 Cup Heavy Cream
1 Tblsp Creme de Menthe
1/2 Tsp Peppermint Extract

1. Put the chocolate in a medium bowl and set aside. Bring the cream just to a boil and pour over the chocolate. Let the mixture sit for 2 minutes before gently mixing the chocolate and cream together until emulsified. Add the flavorings and stir to combine.

2. Mix for a couple more minutes to help cool then let the ganache sit for about 15 minutes.

3. If the ganache has cooled enough to become solid, microwave (for only a few seconds) or gently heat the ganache until pourable.

4. Drizzle over Mint Bliss ice cream.

Saturday, June 19, 2010

Grasshopper Cake

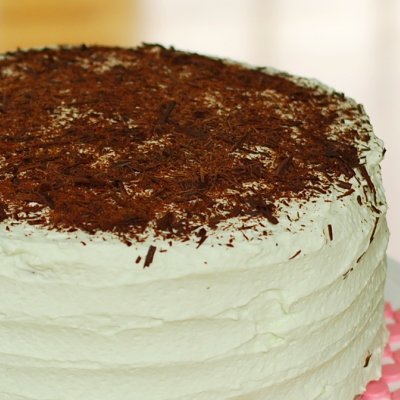
Grasshopper Cake

This mint chocolate delight comes from one of my favorite cookbooks, Baked: New Frontiers in Baking by Matt Lewis and Renato Polafito. The recipe uses green-tinted Creme de Menthe liqueur in the buttercream and in the Chocolate Mint Ganache. Between each layer of chocolate cake is a layer of ganache and a layer of buttercream, and buttercream surrounds the entire cake.

I needed a larger cake than the recipe called for, so I made 1 1/2 times the cake batter and baked it in three 10-inch cake pans. I filled each pan about 1/2 full and made the rest of the batter into cupcakes. I like to weigh my cake pans before they go into the oven just to be sure they all have the same amount of batter for nice even layers. The cakes baked up nice and evenly, no trimming required.

I made 1 1/2 recipes of ganache and had plenty of buttercream with just one recipe, and even had some leftover. If you haven't tried a "boiled flour" frosting yet, try it - It's quite interesting! The consistency is almost like a whipped cream frosting, it's so light and airy, but it keeps at room temperature for 3 days which cannot be said for whipped cream. As with most frostings, at first I didn't think it would come together. It was a runny mess. But I did as the recipe suggested and chilled the buttercream in the mixing bowl for about 20 minutes and then continued beating - magically it started to thicken. I always breathe a HUGE sigh of relief when the frosting comes together!

I used the little bit of extra ganache, warmed for 2 seconds in the microwave, over some homemade Mint Bliss ice cream. Oh yeah! I'll post about that next time!

Grasshopper Cake
From Baked: New Frontiers in Baking by Matt Lewis and Renato Polafito
makes one triple layer 8-inch cake

For the cake:
3/4 Cup Dark Unsweetened Cocoa Powder
1 1/4 Cups Hot Water
2/3 Cup Sour Cream
2 2/3 Cups All-Purpose Flour
2 Tsp Baking Powder
1 Tsp Baking Soda
1/2 Tsp Salt
1 1/4 cups or 2 1/2 Sticks Unsalted Butter, softened
1 1/2 Cups Granulated Sugar
1 Cup Firmly Packed Dark Brown Sugar
3 Large Eggs, room temperature
1 Tblsp Pure Vanilla Extract


1. Preheat the oven to 325F / 160C. Butter three 8 inch round cake pans, line the bottoms with parchment paper and butter this too. Dust with flour knocking out any excess. Set aside.

2. In a medium bowl combine the cocoa, hot water and sour cream. Whisk together and set aside to cool.

3. Sift the flour, baking powder, baking soda, salt into a medium bowl and set aside.

4. Add the butter and shortening to a stand mixer fitted with the paddle and beat on medium until light, fluffy and ribbonlike, around 5 minutes. Add the sugars and beat for about another 5 minutes until light and fluffy.

5. Add the eggs, one at a time, beating well after each addition. Add the vanilla and beat until combined. Give the sides of the bowl a scrape and give one last mix for 30 seconds.

6. Add the flour mixture in three additions alternating with the cocoa mixture, starting and ending with the flour.

7. Divide the batter equally among the three pans and smooth the tops. Bake for 35 to 4o minutes until a toothpick inserted into the middle comes out clean. Cool the cakes in the pans on a wire rack for 20 minutes before inverting out to cool completely.

for the Creme de Menthe Buttercream:
2 1/4 Cups Sugar
1/2 Cup All-Purpose Flour
2 1/4 Cups Milk
1/2 Cup Heavy Cream
4 1/2 Sticks / 510g Unsalted Butter, soft but cool, cut into small pieces
2 Tbslp Creme de Menthe
2 1/4 Tsp Peppermint Extract

1. Add the sugar and flour to a medium saucepan and whisk together. Add the milk and cream and cook over medium heat whisking occasionally for about 20 minutes until thickened.

2. Transfer the mixture to your mixer and beat, with the paddle, on high speed until cooled to room temperature. Turn the mixer to low and add the butter beat on low until thoroughly incorporated and then turn the mixer to medium high and beat until light and fluffy. If the frosting is too soft, place the bowl in the refrigerator to chill slightly, then beat again until the frosting is light and fluffy. Be patient, this could take several minutes.

3. Add in the flavouring and beat to combine. Put the buttercream aside while you make the ganache.

for the Mint Chocolate Ganache:
6 Ounces / 170g Dark Chocolate (60 to 72% Cacao), coarsely chopped
1/2 Cup Heavy Cream
1 Tblsp Creme de Menthe
1/2 Tsp Peppermint Extract

1. Put the chocolate in a medium bowl and set aside. Bring the cream just to a boil and pour over the chocolate. Let the mixture sit for 2 minutes before gently mixing the chocolate and cream together until emulsified. Add the flavorings and stir to combine.

2. Mix for a couple more minutes to help cool then let the ganache sit for about 15 minutes.

Assembling the cake:
1. Place the first cake layer on a serving plate or cake round. Trim the top if not level. Using a small offset spatula spread about 1/4 cup of ganache on top of the cake layer. Put the cake in the fridge for 1 minute to firm up. Spread about 1 1/4 cups of buttercream on top of the ganache. Top with the second round and repeat. Add the third layer and trim.

2. Crumb coat the cake and refrigerate for 15 minutes. Frost the the side and top of the cake with the remaining frosting and decorate as you desire. The cake will keep very well, if covered, for 3 days. If the room is not cool or is humid you can keep covered in the fridge but remove the cake at least 2 hours before serving.
SaveSave

Wednesday, June 16, 2010

We Have Babies!

Baby Birds

We finally have babies! Aren't they cute? Just open wide...and they will come to feed you.

Father Wren
Here's daddy flycatcher. He waited nervously for about two weeks on this trellis adjacent to our back patio where he built the nest. I mean he barely moved from this spot for two weeks! Waiting, waiting, waiting for his work to begin while mommy flycatcher sat on the eggs.

Fortunately she didn't get all that spooked when curious people with large cameras came near.

DSC_0165

Congratulations flycatchers! I'm glad you chose our patio to have your babies. And thanks for reducing our bug population too!


Monday, June 14, 2010

Friday, June 11, 2010

Lemon Cupcakes with Lemon Cream Cheese Icing

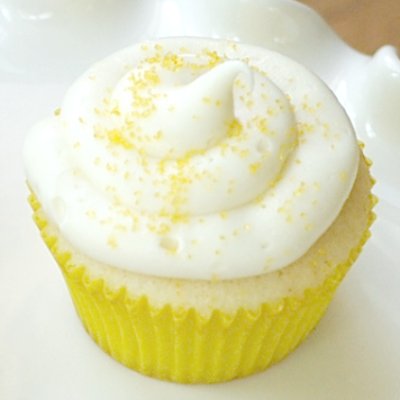
Lemon Cream Cheese Cupcakes

This post completes the Cupcake Quartet series where I show how to make four cupcake flavors out of two batters and two icings. Here are the links to the first and second of the three posts.

Last time, I gave you the recipe to make wonderful Vanilla Cupcakes with Real Strawberry Buttercream. To make half of the cupcakes lemon, place half of the vanilla batter in a bowl and add a tablespoon of lemon zest and bake as directed.

The cupcakes are magnificent with cream cheese icing! I used a half batch of the icing recipe in Martha Stewart's Cupcakes. I added lemon zest and pure lemon extract to the icing and it was perfect.

Lemon Cream Cheese Icing
adapted from Martha Stewart's Cupcakes

1 stick or 4 ounces unsalted butter, room temperature
6 ounces cream cheese, room temperature
1/2 pound (2 cups) confectioners’ sugar, sifted
1/2 teaspoon vanilla extract
1 tablespoon finely grated lemon zest
1/2 teaspoon pure lemon extract

With an electric mixer on medium-high speed, beat butter and cream cheese until fluffy, 2 to 3 minutes. Reduce speed to low. Add sugar, ½ cup at a time, and then vanilla, lemon zest and lemon extract and mix until smooth and combined, scraping down sides of bowl as needed.

Pipe the icing onto the cupcakes using a large plain tip and sprinkle with yellow sugar crystals if desired.

Cupcakes

Wednesday, June 9, 2010

Vanilla Cupcakes with Strawberry Buttercream

Vanilla Strawberry Cupcakes

This is a continuation of my Cupcake Quartet post - or how to make four flavors of cupcakes out of two batters and two frostings. For the chocolate cupcakes how-to, see the original post here.

Cupcakes

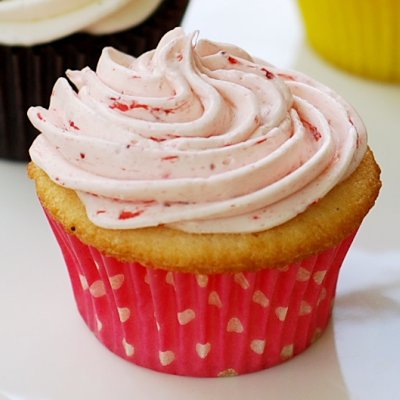
The strawberry cupcakes are made using vanilla cake batter (recipe follows) and the last third of the vanilla buttercream you made for the chocolate cupcakes (see previous post). Add real strawberry puree to the icing and it flavors the icing and tints it pink for an all-natural treat! Be sure to flavor half the vanilla batter with lemon zest if you plan to make half of the cupcakes lemon. In my next post, I will give you the recipe for the lemon cream cheese icing to finish off the cupcake quartet!

Vanilla Bean Cupcakes
makes about 35 cupcakes

3 cups cake flour
2 cups sugar
4 1/2 teaspoons baking powder
1/2 teaspoon salt
1 whole vanilla bean, split in half lengthwise (may be omitted if you have no vanilla beans)
2 sticks plus 2 tablespoons (9 ounces) unsalted butter at room temperature
1 1/3 cups milk
5 egg whites
1 tablespoon vanilla extract

1 tablespoon of finely grated lemon zest to make half the cupcakes lemon-flavored

Preheat the oven to 350 degrees F. Line cupcake pans with paper liners and set aside.
Place the flour, sugar, baking powder, and salt in a large mixer bowl. With the mixer on low speed, blend well. With the tip of a small knife, scrape the tiny seeds from inside the vanilla bean into the bowl; discard the outer pod or reserve for another use. Add the butter and 1 cup of the milk and mix to blend. Raise the mixer speed to medium and beat until the batter is light and fluffy, about 2 minutes. In a mixing bowl, whisk the egg whites with the vanilla extract and the remaining 1/3 cup milk. Add this to the batter in 2 or 3 additions, scraping down the bowl well and mixing only to incorporate.

{If you plan to make the lemon cupcakes, divide the batter in half and add a tablespoon of grated lemon zest to one half of the batter.}

Fill the cupcake liners 2/3 full and bake for about 20 minutes or until the cake springs back when lightly touched. Allow to cool 10 minutes, then transfer the cupcakes to a cooling rack to cool completely.

Strawberry Buttercream Icing

1/4 cup of strawberry puree made from pureeing fresh or frozen strawberries in a food processor

Drain any watery liquid from the strawberry puree and fold the puree into the buttercream until well combined. Pipe onto the cupcakes using a large star tip.

Monday, June 7, 2010

A Cupcake Quartet

Cupcakes

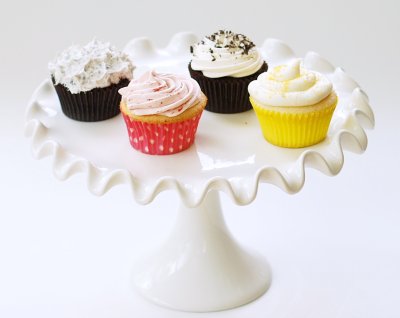
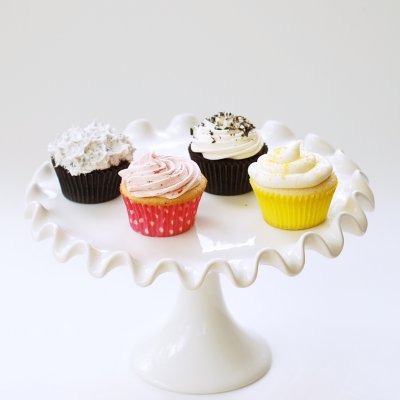
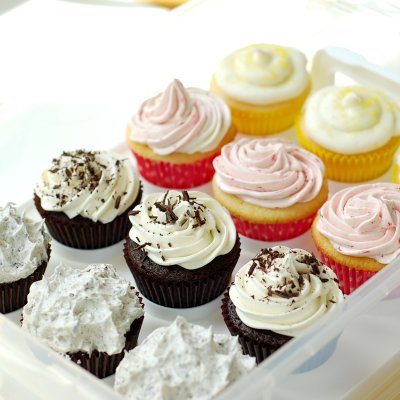
Last month I made some cupcakes for a birthday party. I made four flavors by combining two cake batters - chocolate and vanilla - and two icings - vanilla buttercream and cream cheese icing with various add-ins. 

The flavors:
Chocolate with Cookies and Cream Icing
Vanilla with Real Strawberry Icing
Chocolate with Vanilla Icing and Shaved Chocolate
Lemon Cupcakes with Lemon Cream Cheese Icing

Cupcakes

For the two chocolate cupcakes, make one recipe of chocolate cake and one recipe of vanilla buttercream icing (recipes below). Divide the buttercream into thirds. Add crushed Oreo cookies to one third of the icing and spackle it onto half of the chocolate cupcakes. Pipe another third of the plain vanilla icing onto the other half of the chocolate cupcakes and sprinkle with shaved chocolate (made by using a vegetable peeler on the edge of a bar of high quality dark chocolate). Save the other third of the vanilla icing for the strawberry cupcakes.

I'll tell you how to make the lemon and strawberry cupcakes in my next two posts.

Chocolate Cupcakes
adapted from Sky High: Irresistible Triple Layer Cakes
makes about 40 cupcakes
2 1/4 cups all purpose flour
1 cup unsweetened cocoa powder
2 1/4 teaspoons baking soda
1 1/4 teaspoons baking powder
1 teaspoon salt
2 1/2 ounces unsweetened chocolate, coarsely chopped
1 cup milk
1 1/4 cups hot, strongly brewed coffee
2 eggs
1 cup real mayonnaise
1 1/2 teaspoons vanilla extract
2 1/4 cups sugar

1. Preheat the oven to 350 degrees F. Line cupcake pans with paper liners and set aside.
2. Brew the strong coffee. While the coffee is brewing, sift together the flour, cocoa, baking soda and powder, and salt and set aside.
3. Put the chocolate in a large heatproof bowl. Bring the milk to a simmer. Pour the hot coffee and milk over the chocolate and let stand for a minute. Then whisk the mixture until smooth and set aside to cool slightly.
4. In a mixer bowl, beat together the eggs, mayonnaise, and vanilla until well blended. Gradually beat in the sugar. Add the dry ingredients and mocha liquid alternately in 2 or 3 additions, beating until smooth and well blended. Fill the cupcake liners about 2/3 full.
5. Bake for 20 minutes, or until the cake springs back when lightly touched. Let the cupcakes cool in their pans on wire racks for 10 minutes. Transfer to cooling racks and let cool completely.

Vanilla Buttercream Frosting
by Katherine Seeley/Fine Cooking

Yields 7-1/2 to 8 cups enough to fill and frost a 9-inch four-layer cake or about 5 dozen cupcakes

5 large egg whites
1-1/4 cups granulated sugar
1/2 cup plus 2 Tbs. light corn syrup
1 lb., 4 oz. (2-1/2 cups) unsalted butter, at room temperature
1 Tbs. vanilla extract

Place the egg whites in the clean bowl of a stand mixer fitted with the whisk attachment and whisk on medium-high speed until foamy. Sprinkle in 6 Tbs. of the sugar and beat on high speed to medium peaks (the whites should be smooth, full, and shiny, and the peaks should curl a little). Turn off the mixer.

Combine the remaining 3/4 cup plus 2 Tbs. sugar and the corn syrup in a medium (3-quart) saucepan over medium high heat, stirring briefly to dissolve the sugar. Continue to cook just until the mixture comes to a rolling boil.

Immediately remove the syrup from the heat, turn the mixer onto medium-high speed, and slowly pour the syrup down the side of the bowl in a steady stream, being very careful not to let the syrup hit the whisk.

Reduce the speed to medium and continue whisking until the whites are barely warm, 5 to 7 minutes. Add the butter 1 Tbs. at a time. Add the vanilla, change the beater to the paddle attachment, and continue beating until the frosting is smooth and creamy.

Thursday, June 3, 2010

Daring Bakers Croquembouche

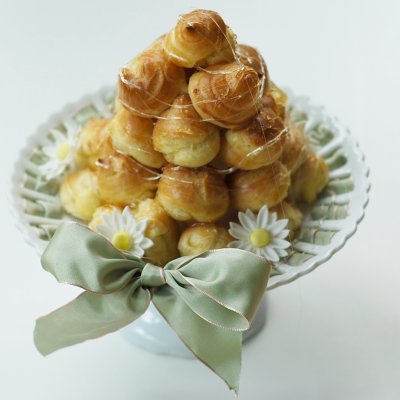
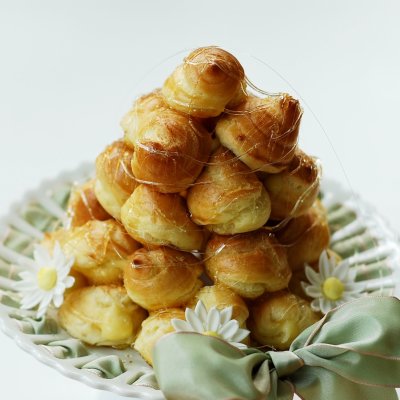
Croquembouche

The May 2010 Daring Bakers’ challenge was hosted by Cat of Little Miss Cupcake. Cat challenged everyone to make a piece montée, or croquembouche, based on recipes from Peter Kump’s Baking School in Manhattan and Nick Malgieri.

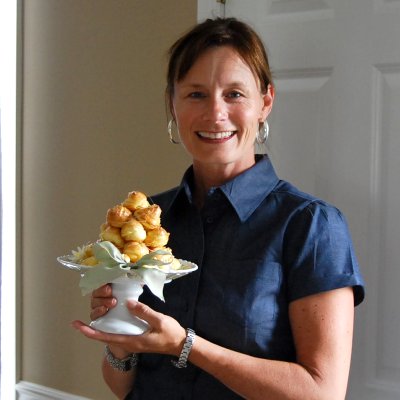
Croquembouche is a tower of cream puffs held together by a thin coating of crunchy caramel and adorned with spun sugar. The word "croquembouche" literally means "crunch in the mouth". It is the traditional wedding cake in France and is used in many communions and baptisms as well. I gave mine to my good friend, thetreatgirl, for her birthday. She loves special treats! Happy Birthday!

Pam and the birthday croquembouche

The components used in this dessert are:
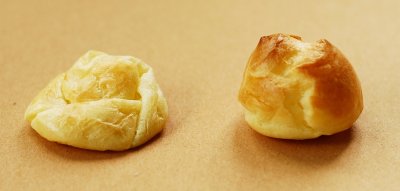
1. Pate a choux made into small, round puffs. I used a pastry bag to pipe 1-inch rounds onto a cookie sheet lined with a Silpat. I brushed the cream puffs with egg wash before baking to attain a shiny browned color. As Sherry Yard suggests in her book The Secrets of Baking, I placed a pan on the oven floor and poured about a cup of hot water into the pan just before closing the oven door. Be sure to bake the puffs until they are nice and brown. Undercooked puffs will deflate and look like a pancake, like the puff on the left in the photo below. The puffs will stay puffed if cooked long enough, like the one on the right.

Pate a choux

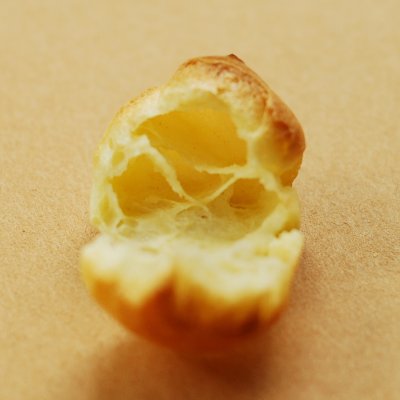
The puff will be hollow inside, like in the next picture. It can then be filled with a vanilla or other flavored pastry cream.

Pate a choux

2. Pastry Cream - I chose to make a vanilla pastry cream, but I'm sure the chocolate or coffee-flavored pastry cream would be delicious too. I used a pastry bag fitted with a plain tip to fill the puffs. After filling, cover the cream puffs and place them in the refrigerator until ready to assemble.

3. Caramel - cooked to hard crack stage or 325 degrees F on a candy thermometer. Have all the filled cream puffs ready to go before starting the caramel. Work carefully but quickly so that all the cream puffs can be assembled before the caramel starts to thicken. If the caramel cools too much, it can be reheated over low heat until useable again. After the croquembouche was assembled, I drizzled the extra caramel on top.


Croquembouche

Vanilla Crème Patissiere
1 cup (225 ml.) whole milk
2 Tbsp. cornstarch
6 Tbsp. (100 g.) sugar
1 large egg
2 large egg yolks
2 Tbsp. (30 g.) unsalted butter
1 Tsp. Vanilla

Dissolve cornstarch in ¼ cup of milk. Combine the remaining milk with the sugar in a saucepan; bring to boil; remove from heat.

Beat the whole egg, then the yolks into the cornstarch mixture. Pour 1/3 of boiling milk into the egg mixture, whisking constantly so that the eggs do not begin to cook.

Return the remaining milk to boil. Pour in the hot egg mixture in a stream, continuing whisking.

Continue whisking (this is important – you do not want the eggs to solidify/cook) until the cream thickens and comes to a boil. Remove from heat and beat in the butter and vanilla.

Pour cream into a stainless steel/ceramic bowl. Press plastic wrap firmly against the surface. Chill immediately and until ready to use.

Chocolate Pastry Cream
Bring ¼ cup (about 50 cl.) milk to a boil in a small pan; remove from heat and add in 3 ounces (about 80 g.) semisweet chocolate, finely chopped, and mix until smooth. Whisk into pastry cream when you add the butter and vanilla.

Coffee Pastry Cream
Dissolve 1 ½ teaspoons instant espresso powder in 1 ½ teaspoons boiling water. Whisk into pastry cream with butter and vanilla.

Pate a Choux
(Yield: About 28)

¾ cup (175 ml.) water
6 Tbsp. (85 g.) unsalted butter
¼ Tsp. salt
1 Tbsp. sugar
1 cup (125 g.) all-purpose flour
4 large eggs

Egg Wash:
1 egg and pinch of salt

Pre-heat oven to 425◦F/220◦C degrees. Line two baking sheets with parchment paper.

Preparing batter:
Combine water, butter, salt and sugar in a saucepan over medium heat. Bring to a boil and stir occasionally. At boil, remove from heat and sift in the flour, stirring to combine completely.

Return to heat and cook, stirring constantly until the batter dries slightly and begins to pull away from the sides of the pan.

Transfer to a bowl and stir with a wooden spoon 1 minute to cool slightly.

Add 1 egg. The batter will appear loose and shiny. As you stir, the batter will become dry-looking like lightly buttered mashed potatoes. It is at this point that you will add in the next egg. Repeat until you have incorporated all the eggs.

Piping:
Transfer batter to a pastry bag fitted with a large open tip (I piped directly from the bag opening without a tip). Pipe choux about 1 inch-part in the baking sheets. Choux should be about 1 inch high and about 1 inch wide.

Using a clean finger dipped in hot water, gently press down on any tips that have formed on the top of choux when piping. You want them to retain their ball shape, but be smoothly curved on top. Brush tops with egg wash.

Baking:
Bake the choux at 425◦F/220◦C degrees until well-puffed and turning lightly golden in color, about 10 minutes.

Lower the temperature to 350◦F/180◦C degrees and continue baking until well-colored and dry, about 20 minutes more. Remove to a rack and cool.
Can be stored in a airtight box overnight.

Filling:
When you are ready to assemble your piece montée, using a plain pastry tip, pierce the bottom of each choux. Fill the choux with pastry cream using either the same tip or a star tip, and place on a paper-lined sheet. Choux can be refrigerated briefly at this point while you make your glaze.

Use one of these to top your choux and assemble your piece montée.

Chocolate Glaze:
8 ounces/200 g. finely chopped chocolate (use the finest quality you can afford as the taste will be quite pronounced; I recommend semi-sweet)

Melt chocolate in microwave or double boiler. Stir at regular intervals to avoid burning. Use the best quality chocolate you can afford. Use immediately.

Hard Caramel Glaze:
1 cup (225 g.) sugar
½ teaspoon lemon juice

Combine sugar and lemon juice in a saucepan with a metal kitchen spoon stirring until the sugar resembles wet sand. Place on medium heat; heat without stirring until sugar starts to melt around the sides of the pan and the center begins to smoke. Begin to stir sugar. Continue heating, stirring occasionally until the sugar is a clear, amber color. Remove from heat and use immediately.

Assembly of your Piece Montée:
You may want to lay out your unfilled, unglazed choux in a practice design to get a feel for how to assemble the final dessert. For example, if making a conical shape, trace a circle (no bigger than 8 inches) on a piece of parchment to use as a pattern. Then take some of the larger choux and assemble them in the circle for the bottom layer. Practice seeing which pieces fit together best.

Once you are ready to assemble your piece montée, dip the top of each choux in your glaze (careful it may be still hot!), and start assembling on your cake board/plate/sheet. Continue dipping and adding choux in levels using the glaze to hold them together as you build up. (You may want to use toothpicks to hold them in place).

When you have finished the design of your piece montée, you may drizzle with remaining glaze or use ribbons, sugar cookie cut-outs, almonds, flowers, etc. to decorate. Bon appétit!