
These cupcakes are so incredible! (Read: these are nothing like the store bought ones.) And I'm going to teach you my method for making them. I love to share my recipes and I don't believe in keeping recipes secret - until it came to this recipe, that is. I'm not sure why, but this recipe is so perfect and so special that I didn't want to share. But I'm over it, so consider this your lucky day!
{I don't generally have the patience to take step-by-step photos, but I thought I'd try it here because frankly, I don't know how I'd explain the process using only words. Some of the photos are a little blurry, but hopefully you'll get the idea. I have whole new respect for you bloggers who take a picture of every step of a recipe!}
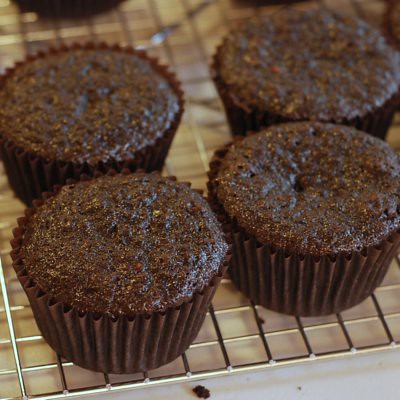
First, make the retro vanilla filling and the chocolate glaze (recipes follow). These can be made a day ahead. Then bake your cupcakes. The recipe below makes about 45 cupcakes. You want a nice flat cupcake, not a domed one. The secret is not to fill the liners too full - 1/2 to 2/3 full at the most. It's always tempting to fill the liners a bit more, but please try to resist!
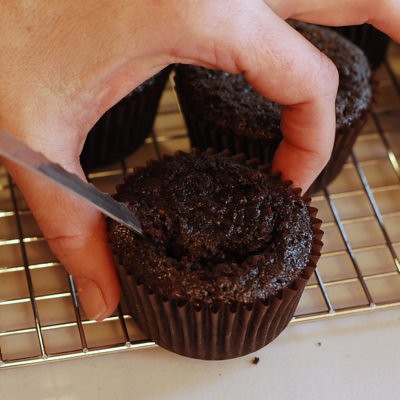
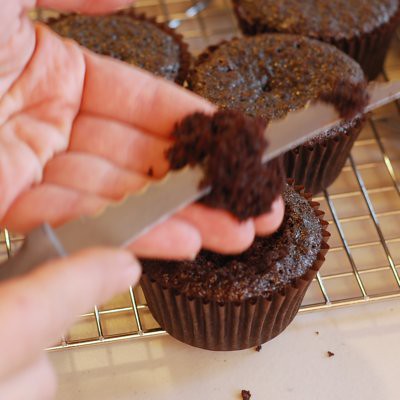
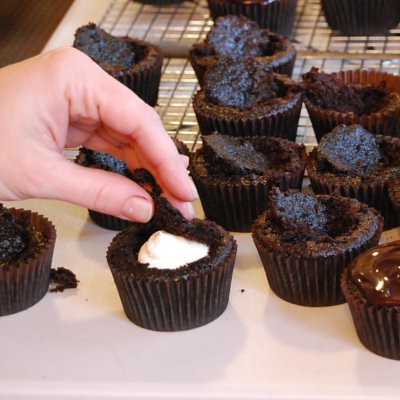
After the cupcakes are completely cool, take a thin knife - this $5 Rada tomato knife is perfect - and cut at an angle, with the point of the knife near the bottom center of the cupcake, all the way around until you've cut an upside-down cone shape out of the cupcake.
See how it comes to a point at the bottom?
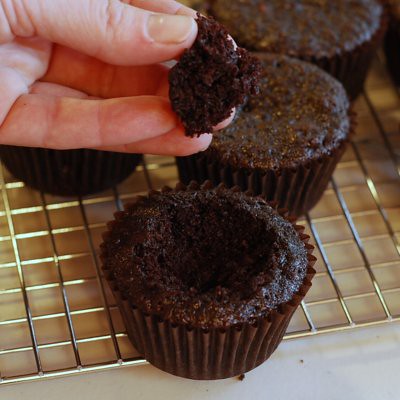
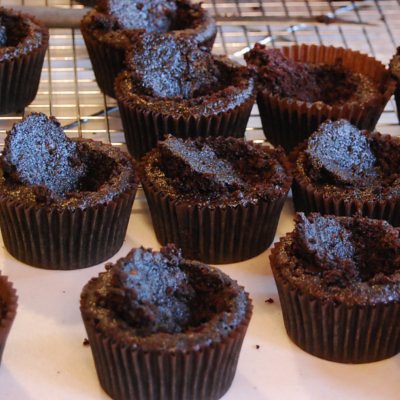
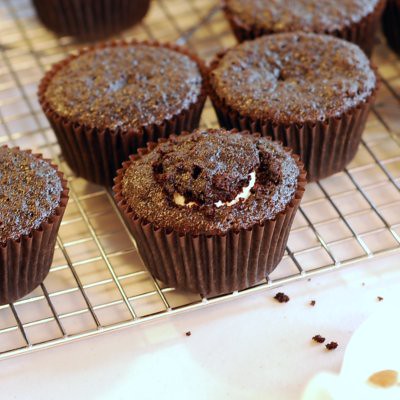
Holding the cone with the pointed end up, slice off the pointed end with your knife. You'll end up with just the top layer of the cupcake plug. Discard the cutaway scraps. Rest the "lid" on top of your cupcake and cut the remaining cupcakes in the same manner.
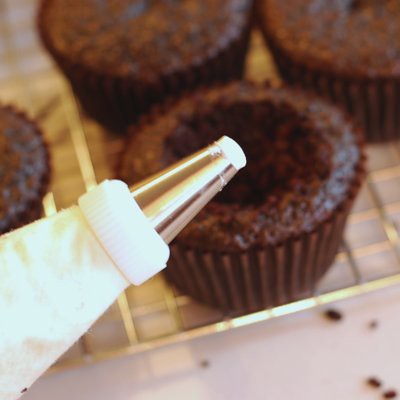
Fit a piping bag with a coupler and a medium-sized round tip and fill the bag with your vanilla retro filling.
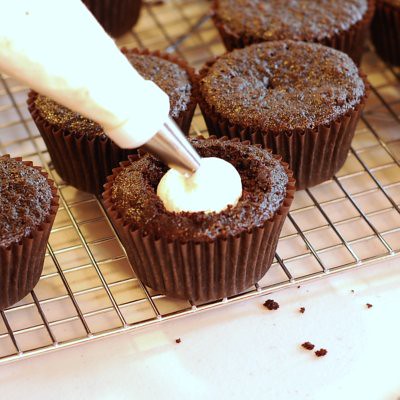
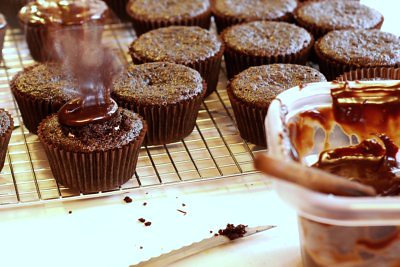
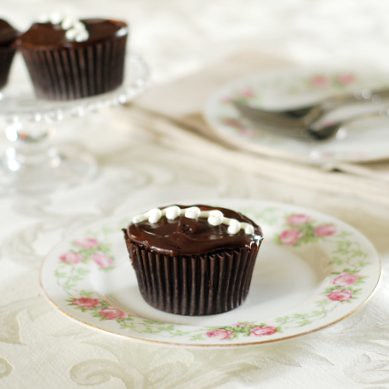
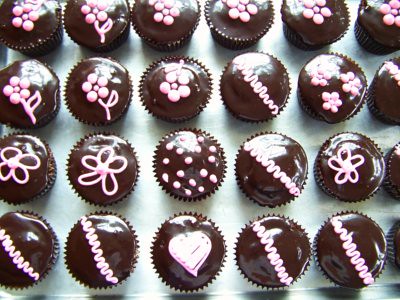
Dollop a spoonful of chocolate glaze on the top of the cupcake and spread it out with a small spatula or butter knife. Let this set for a few minutes before decorating.
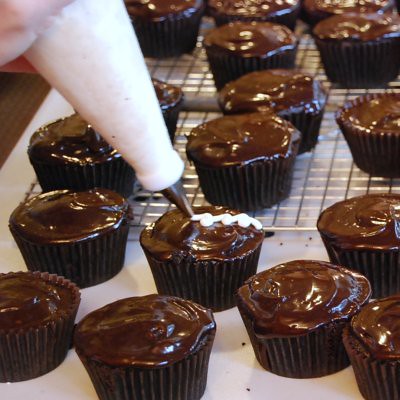
Swap the tip of your piping bag filled with retro filling to a small round tip - around size 3 or so. Using a coupler on the piping bag makes it easy to change tips. Then pipe the characteristic squiggly on top,

I'm pretty sure I could open a shop that sold only these cupcakes and it would be a roaring success...

But for now I'll settle for just eating them. Oh, and grab a fork - they're oooey, gooey, and delicious - the perfect meld of vanilla and chocolate with a hint of espresso!
Chocolate Cake
from Sky High by Alisa Huntsman and Peter Wynne
Makes a 9-inch triple layer cake, Serves 16-20
2 1/4 cups all purpose flour
1 cup unsweetened cocoa powder
2 1/4 teaspoons baking soda
1 1/4 teaspoons baking powder
1 teaspoon salt
2 1/2 ounces unsweetened chocolate, coarsely chopped
1 cup milk
1 1/4 cups hot, strongly brewed coffee
2 eggs
1 cup real mayonnaise
1 1/2 teaspoons vanilla extract
2 1/4 cups sugar
1. Preheat the oven to 350 degrees F. Butter three 9-inch round cake pans, line the bottoms with parchment and spray the parchment with cooking spray.
2. Brew the strong coffee. While the coffee is brewing, sift together the flour, cocoa, baking soda and powder, salt, and cinnamon and set aside.
3. Put the chocolate in a large heatproof bowl. Bring the milk to a simmer. Pour the hot coffee and milk over the chocolate and let stand for a minute. Then whisk the mixture until smooth and set aside to cool slightly.
4. In a mixer bowl, beat together the eggs, mayonnaise, and vanilla until well blended. Gradually beat in the sugar. Add the dry ingredients and mocha liquid alternately in 2 or 3 additions, beating until smooth and well blended. Divide the batter among the 3 cake pans.
5. Bake for 25-28 minutes, or until a cake tester inserted in the center comes out almost clean. (I also lightly press a finger on top of the cake and if it springs back, it's done.) Let the cakes cool in their pans on wire racks for 10-15 minutes. Unmold onto racks; carefully peel off the parchment and let cool completely, at least one hour.
6. To assemble the cake, place one layer on a cake stand. Cover the top evenly with half the White Chocolate Mousse, leaving a 1/4 -inch margin around the edge. Repeat with the second layer and the remaining mousse. Set the third layer on top and pour half the Sour Cream Chocolate Icing over the filled cake. Spread all over the sides and top. Don't worry if some of the cake shows through. Refrigerate, uncovered, for at least 30 minutes to allow the icing to set. Cover the rest of the icing and set aside at room temperature.
7. Frost the top and sides of the cake with the remaining icing, which should have the consistency of mayonnaise. If the icing is too soft, chill briefly. If it is too stiff, microwave on high for just 2-3 seconds to soften, then stir to mix well. Use an offset spatula to swirl the frosting around the cake.
Retro Vanilla Filling
1/4 pound or one stick of unsalted butter, at room temperature
1/2 cup or 2oz powdered sugar
1/8 teaspoon salt
1/4 teaspoon vanilla extract
8 oz marshmallow creme (marshmallow fluff)
In the bowl of an electric mixer, beat the butter and sugar until light and fluffy. Add the vanilla and salt and blend well. Add the marshmallow cream and beat only until combined. Store at room temperature.
Chocolate Glaze
8 ounces or 1 cup sugar
3 ounces espresso
1/2 pound bittersweet chocolate, chopped
2 ounces unsweetened chocolate, chopped
1/4 cup or 1 ounce unsweetened cocoa
1/2 teaspoon salt
1/2 cup light corn syrup
1 cup or 2 sticks butter
In a medium saucepan, bring the sugar and espresso to a boil. Whisk in the chocolates, cocoa powder, and salt until smooth.
Place the mixture in the bowl of an electric mixer fitted with the paddle attachment. On low speed, add the corn syrup and butter. Beat until smooth and cool. Store at room temperature. The mixture should be somewhat liquid so that it makes a smooth icing on the cupcake, but not so runny that it drips down the sides. If it is too stiff, you can microwave it for about 10 seconds once or twice until it is the correct consistency.

These look so good! I love marshmallow fluff fillings in chocolate cakes.
ReplyDeleteThey do look wonderful. Thanks for sharing your secret recipe!
ReplyDeleteOh this look the best! Thanks for sharing. i am off to Google Marshmallow Creme now!
ReplyDeleteThat's brilliant, I have to try funky stuff like that with my cupcakes. You are so talented!!!
ReplyDeleteThese cupcakes look so delicious. I love the marshmallow creme too.
ReplyDeleteI’d love for you to submit one of your beautiful photos, and a link to your post, to my new baking photo gallery showcasing the beautiful baking, sweets and desserts.
we love a good hostess, devils food cupcake. you have reminded me that i need to make these again. yours look fantastic!
ReplyDeleteThese are so, so pretty, and I love how the glaze keeps such a high shine. And I definitely commiserate with you about the step-by-step. It can be a pain, but that is how everyone can see what you're up to. Your photos make it crystal clear.
ReplyDeleteYum!!! They look delicious!!
ReplyDeleteOh yes- these are going on the list of 'to do' this week! Just what a girl needs who is getting over a big toothache!
ReplyDeleteOh these sure sound good! Thanks for your recipe to try, going to surprise my husband with his favorite snack.
ReplyDeleteThere is a guy in my house who would love to get his hands on one of these. They look absolutely delicious!
ReplyDeleteMuch better than the original. They look great.
ReplyDeleteBelieve me, these were so delicious!
ReplyDeleteThese look SO delicious! I may make some... TONIGHT!!
ReplyDelete