Showing posts with label chocolate. Show all posts

Saturday, January 25, 2014

Chocolate Peppermint Ganache Layer Cake


Valentine's Day is quickly approaching and I can't think of a better way to show love than a chocolate peppermint ganache layer cake.  This recipe always gets rave reviews from family and friends.

I made this cake gluten-free by using Cup4Cup gluten-free flour substitute and it turned out great. You'd never know it was gluten-free.

Make a heart on top by sprinkling crushed peppermints in the shape of a heart (use a stencil or template made of parchment for the perfect heart shape).   Have a Happy Valentine's Day!

Chocolate Peppermint Ganache Layer Cake
Make one 3-layer 6-inch cake

For the chocolate cake:
1/4 cup plus 2 Tablespoons dark unsweetened cocoa
1/2 cup plus 2 Tablespoons hot water
1/3 cup sour cream
1 1/3 cups all-purpose flour (substitute Cup 4 Cup flour for gluten-free version)
1 tsp baking powder
1/2 tsp baking soda
1/4 tsp salt
10 Tablespoons unsalted butter, room temperature
3/4 cup sugar
1/2 cup dark brown sugar
1 1/2 tsp vanilla extract
2 large eggs
peppermint ganache, recipe follows
peppermint buttercream, recipe follow
crushed peppermint candies for garnish

Preheat oven to 350 degrees F, or 325 degrees for convection setting.

Coat three 6-inch round cake pans with spray oil, line the bottoms with rounds of parchment, and spray the parchment.

In a bowl, combine the cocoa, hot water, and sour cream with a whisk and set aside to cool.

In a medium bowl, whisk together the flour, baking powder, baking soda, and salt.

In a mixer fitted with the paddle attachment, cream the butter, sugars and vanilla until light and fluffy, about 5 minutes.

Add the eggs, one at a time, mixing well, and scraping the sides of the bowl as needed.

While the mixer is running on low speed, alternate adding the flour mixture in 3 additions and the chocolate mixture in 2 additions, beginning and ending with the flour.  Increase the mixer speed to medium and mix until just combined.  Scrape the sides of the bowl and mix again until batter is homogenous.

Divide the batter evenly among the 3 pans and bake in preheated oven until a toothpick inserted comes out clean, about 25 minutes.  Allow to cool in the pans for 15 minutes, then remove the cakes from the pans and cool completely.

For the peppermint buttercream:
3 large egg whites
3/4 cup sugar
pinch of salt
2 sticks or 1 cup unsalted butter, at cool room temperature
1/2 teaspoon peppermint extract

Fill a medium saucepan with about an inch of water and bring the water to a boil, then reduce to a simmer (this will be your double boiler).

Whisk together the egg whites, sugar, and salt in the metal bowl of your stand mixer and place the bowl over the simmering water but do not let the bowl touch the water.  Whisk the mixture while cooking until the mixture reaches 140 degrees F.

Remove the bowl from the double boiler and place it in your stand mixer fitted with the whisk attachment.  Whisk the egg mixture on medium high speed until the outside of the bowl is room temperature.

With the mixer running on medium low speed, slowly add the butter one tablespoon at a time, allowing each piece of butter to become incorporated before adding the next.  After all the butter is added, increase the mixer speed to med-high and beat until the mixture is stiff and smooth, another minute or two.  Add the peppermint extract and mix to combine.  More extract can be added to taste.  Use at room temperature.

For the peppermint ganache:
4 ounces bittersweet or semi-sweet chocolate, coarsely chopped
1/3 cup heavy cream
2 teaspoons creme de menthe liqueur or 1/2 teaspoon peppermint extract

Place the chocolate in a small heat-proof bowl.  Heat the heavy cream in a small saucepan until just simmering around the edges of the pan.  It should be hot but not boiling.  Pour the cream over the chocolate and let stand for 2 minutes.  Whisk the mixture together briskly starting with small strokes at the center of the mixture until the mixture is shiny and smooth.  Whisk in the creme de menthe or extract and set aside to cool until the mixture is firm but still spreadable.

To assemble the cake:
Place one cake layer on a cake stand.  Spread about one half of the ganache on the bottom layer, then spread a thin layer of buttercream.  Repeat this with the second cake layer, and then place the third layer on top.  Cover entire cake with buttercream and garnish with crushed peppermint candies.


Thursday, November 11, 2010

Chocolate Caramel Mini Tartlets with Sea Salt

Chocolate Caramel Tartlets

Sweet and salty is all the rage right now and these bite-sized Chocolate Caramel Tartlets with Sea Salt are an impressive addition to your chocolate sampler tray next to your Chocolate Raspberry Truffles and Chocolate-Dipped Coconut Macaroons.

If you've tried your hand at ganache, caramel, and pastry then these will be a snap to make. If you haven't mastered these yet, then these tartlets are a good reason to try these techniques again. Use a 9" tart pan if you're not into making dozens of tiny tart shells.

I've had these little mini tartlet molds ever since I took a cooking class in a little local kitchen shop about 15 years ago. I'm embarassed to say that this is the first time I've used them. But then again, I got a little busy in those 15 years...(my kids are 14, 11, and 8!)

The tartlet shells are a sweet pate sucree dough. I pricked to bottoms with a fork to eliminate the possibility of air pockets. No need for pie weights with a shell this small but if you are making a larger tart, bake the shell for half the total baking time lined with parchment and pie weights, then remove the paper and weights and continue baking until golden brown.

I thought the tart shells looked just like sunflowers...

Chocolate Caramel Tartlets

Spoon in the caramel filling...

Chocolate Caramel Tartlets

And then top with chocolate ganache and a sprinkling of gourmet sea salt. I picked up this pink Himalayan Sea Salt at Marshall's. If you look closely, you can see a hint of pink.

Chocolate Caramel Tartlets

Place your chocolate goodies on a pretty platter. Now who could resist these?

Chocolate Caramel Tart with Sea Salt
Makes one 9-inch tart or about 24 mini tartlets
Note: to make the mini tart shells, I cut circles out of the rolled-out dough and worked the dough into the tartlet molds. Prick the bottoms with a fork and bake until golden, about 8-10 minutes.


1 9-inch pre-baked pate sucree tart shell or 24 mini tart shells

for the chocolate ganache:
8 ounces bittersweet chocolate, finely chopped
1 cup heavy cream

Sea Salt for garnish


Place the chocolate into a medium heat-proof bowl. Heat the heavy cream in a small saucepan until just boiling. Pour the heavy cream over the chocolate and let it sit for one minute. Stir with a rubber spatula or whisk in a small, quick circular motion, starting in the center of the bowl and working your way out until the ganache is shiny and all the chocolate has melted.

Assemble the tart:
Pour enough caramel into the tart shell to come up about 1/3 of the way up the sides of the tart shell. Refrigerate the tart for 30 minutes to harden the caramel. Pour the chocolate ganache over the caramel to fill about 2/3 of the tart shell. Sprinkle with sea salt and allow to set for 30 minutes in the refrigerator or 2 hours at room temperature.


Tuesday, November 9, 2010

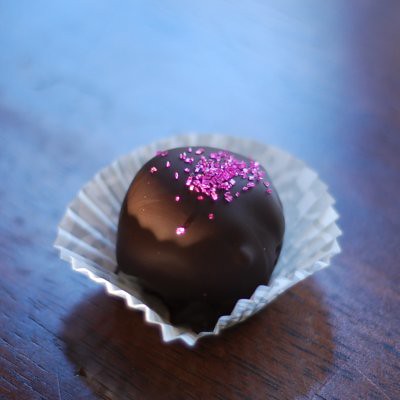
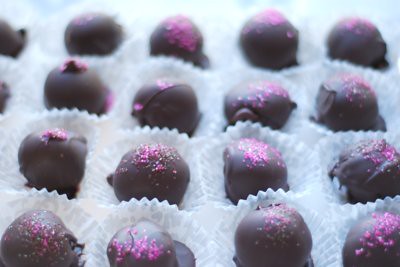
Chocolate Raspberry Truffles

Raspberry Truffles

When is the last time you threw a real party? For us it's been quite a while. Of course we've had friends over for summer campfires and we've had family at the house for small birthday parties. A small party doesn't need to be fussy - some wine, a simple, delicious dinner and dessert doesn't require that much planning or energy.

But I can't remember the last time we had a "50 of your closest friends, neighbors, and co-workers party". We've been busy moving and doing new house stuff and old house stuff and kids' school stuff... oh, and working. We're just too exhausted to do anything else.

But one of our new neighbors threw a party like that last weekend. It was a "wine, cheese, and chocolate" party. She hired a caterer for the savory stuff, bought the wine, made adorable fall themed wine glass charms and made up the cheese plates herself, and asked me to help with the chocolate portion. So I hope you don't mind if the next few posts revolve around bite-sized chocolate goodies. (I didn't think so!)

So, first up....Raspberry Truffles! My first attempt at tempering chocolate and my thermometer goes on the blitz...actually two of my thermometers went on the blitz during my chocolate week, but all turned out ok in the end.

Raspberry Truffles

These truffles are flavored with strained raspberry jam and chambord. Of all the chocolate goodies I made for the party, these were the most time consuming, but well worth it!

Chocolate Raspberry Truffles

7 ounces dark chocolate, chopped (I used Callebeaut semi-sweet)
1/2 cup heavy cream
1 1/2 tablespoons strained raspberry jam
1 tablespoon Chambord or other raspberry-flavored liqueur
1/2 tsp pure vanilla extract

Tempered chocolate for dipping
Pink sugar crystals for garnish
Mini cupcake liners (these are made by Reynolds and can be found in the supermarket)

Bring the heavy cream just to a boil and pour it over the chopped chocolate in a bowl. Whisk until shiny and chocolate has melted completely. Stir in the jam, Chambord, and vanilla. Cover the bowl and chill at least 45 minutes. With a small ice cream scoop, make rounds of chocolate and place them on a baking sheet. Chill for another 45 minutes or freeze until ready to dip. Dip in tempered chocolate and sprinkle on the sugar crystals before the chocolate sets. After the chocolate has set, then transfer the truffles to mini cupcake liners. Store in the refrigerator.

LinkWithin

Related Posts Widget for Blogs by LinkWithin