Showing posts with label Make and Freeze. Show all posts

Friday, January 21, 2011

Spaghetti and Meatballs


After a very busy December, I am enjoying the slower pace of life. I have never liked cold weather or the shorter days, but I think I've finally made my peace with it. The lack of sunlight doesn't affect me like it used to and I've learned to embrace the grayness that is winter in Pittsburgh. And when the bright sun does happen to come out, I take notice and appreciate it that much more.

Unlike in the summer, I have an excuse to stay inside, within the coziness of a warm kitchen while the snow falls quietly outside the kitchen window. So while I am hibernating this month, I am taking the opportunity to make some of my family's longtime favorite recipes (like this one), along with trying some new ones, and freezing the leftovers when possible for that inevitable day when things are crazy again and there is no time to cook.


Homemade marinara sauce freezes wonderfully and the best way to freeze meatballs is right in the sauce, so make a double batch of this recipe and freeze the rest in quart sized containers. Square Ziploc containers are my favorite for freezing. I use a permanent marker on peel-off address labels to label the containers with the contents and date. When thawing, either take the container out of the freezer and place in the refrigerator overnight, or run hot water over the bottom of the container and transfer the sauce and meatballs to a bowl to heat in the microwave, or to a pot to reheat over the stove. (Never heat plastic containers in the microwave, especially with tomato sauce. The plastic will get pitted and stained.)

Spaghetti and Meatballs
adapted from a little pamphlet-type cookbook called Pasta Favorites

Note: My kids like a smooth sauce with absolutely no chunks, so often I will use only garlic and spices in the sauce and omit the onion. Alternatively, if you are not chunky-averse, you could also add a diced carrot or two along with the onion to increase the veggie content of the recipe. Just be sure to cook the carrots until they are pretty soft before adding the garlic and spices.

For the Sauce:
3 Tablespoons olive oil
1 onion, chopped (see note above)
2 large cloves garlic (more if desired)
1/4 teaspoon crushed red pepper (optional)
28-ounce can crushed tomatoes in puree
2 16-ounce cans plain tomato sauce (not marinara sauce)
1 teaspoon sugar
1 teaspoon dried oregano, rubbed between your fingers to release flavor
3/4 teaspoon salt
1/2 teaspoon pepper
1 bay leaf (if you have it on hand)

For the Meatballs:
Note: my supermarket sells packaged ground meat labeled meatloaf mix which is a combination of beef, pork and veal side by side in one package. It works quite well in this recipe.  You could also use any combination of only beef and pork.

1 pound lean ground chuck
1/4 pound ground veal
1/4 pound ground pork
1 large egg
1/2 cup fresh or dried plain breadcrumbs
2 tablespoons grated parmesan cheese
2 tablespoons fresh parsley, finely chopped
1 teaspoon basil
1/2 teaspoon salt
1/4 teaspoon pepper

1 pound of spaghetti

To make the sauce:
Heat the oil in a large saucepan. Add the onion and carrots, if using (see note above), and cook over low heat until the onion is translucent and the carrots are soft, about 5 minutes or so. Add the garlic and red pepper flakes and cook for one minute more. Add the remaining sauce ingredients and simmer, uncovered, for 15 minutes while you make the meatballs. This is a good time to start heating the water for the pasta.

To make the meatballs:
Place all of the meatball ingredients into a large bowl. Using clean hands, gently mix and fold the ingredients until they are well combined, but be careful not to overwork the mixture. It should stay relatively loose. Form the mixture into balls about 1 1/2 inches in diameter (or use a medium cookie scoop to portion the meatballs). Gently place the meatballs directly into the simmering sauce. When all of the meatballs are added, carefully push any exposed meatballs down into the sauce so that all the meatballs are covered. Continue to simmer, partially covered if the sauce is thick enough or uncovered if the sauce still needs to thicken more, for 15 minutes or until the meatballs are cooked through. Remove and discard the bay leaf and spoon off any excess fat that rises to the surface. Serve over hot cooked spaghetti with some grated parmesan cheese for sprinkling.


Saturday, January 15, 2011

Slow-Cooker Chili and Amish Cornbread


In my last post, I mentioned how we were still waiting for that big snowfall. Well, we finally got some snow and the kids got their snow day! Of course, the kids think the snow day came because they went to bed with their jammies inside out and slept with a wooden spoon under their pillows. (Think about this the next time your wooden spoons go missing!)

I couldn't have planned it better. The snow day happened on Wednesday - the perfect mid-week break. We got just about 6 inches of snow - enough to get you out of school and plenty for sledding, but not enough to break your back trying to shovel it all. The snow started to fall and after an hour, we had about an inch already.

I just love this cute little bird - this is just where I would hang out too if the snow was coming down that quickly - a nibble of food whenever you get hungry and a roof to stay dry - or maybe he's just trying to peek through my kitchen window to see what's baking. I'm not sure he'd like the chili, but maybe the cornbread??

Slow-Cooked Chili
Serves 10

Note: This is your basic chili recipe, tried and true. The recipe came from my husband's Aunt Donna. (Thanks, Donna!) It freezes well too, so you could make this when your green peppers are plentiful in your garden and freeze it until the cold weather comes along.

2 pounds ground beef
1 28-ounce can whole tomatoes, undrained
1 1/2 cups chopped onion
1 cup chopped green pepper
1 jalapeno pepper, minced (optional)
2 garlic cloves, minced
2 16-ounce cans kidney beans or beans of your choice, undrained, or one cup
         soaked and cooked dried beans
2 teaspoons salt
1 1/2 tablespoons chili powder
1 teaspoon ground black pepper
1 teaspoon ground cumin

Brown the ground beef in a pan and discard the rendered fat. Transfer the browned meat to the slow cooker. Using a clean pair of kitchen shears, coarsely slice the tomatoes into smaller chunks right in the can and then add them to the slow cooker. Add the remaining ingredients and stir to combine. Cover and cook on low setting for 7 to 10 hours. Add a little water if the chili seems too thick, or cook uncovered toward the end of cooking time if the chili seems too thin. Keep in mind that it will thicken as it cools.

Amish Cornbread
Note:This cornbread is the best - moist and delicious - and super easy. The cornbread recipe came from my good friend at Joy Beadworks who came upon the recipe when buying cornmeal from an Amish grower at a farmer's market. Make the cornbread the day you are going to eat it, or it will become dry. (Nothing a few seconds in the microwave and a spoonful of honey can't fix though.)

1 cup coarsely ground corn meal
1 cup flour
1/2 cup sugar
4 tsp. baking powder
1 tsp. salt
1 cup plus 2 tblsp. milk
4 tblsp. oil
1 egg

Preheat oven to 400 degrees F. (The original recipe stated 450, but that seemed a little high to me.) Spray an 8" square baking pan with Pam.
In a bowl, combine the cornmeal, flour, sugar, baking powder and salt. In a separate bowl, whisk together the milk, oil and egg. Make a well in the center of the dry mixture and pour in the milk mixture; stir until blended. Pour into pan, bake for 25 minutes, or just until a toothpick inserted into the middle comes out clean and the top is lightly browned.

Thursday, December 16, 2010

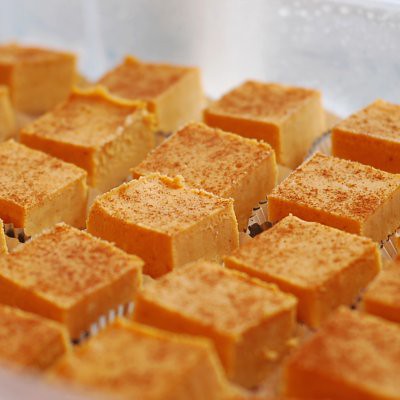
How to Make Any Cheesecake Recipe into Cheesecake Bars

DSC_0223

Want to make this Creamy Pumpkin Cheesecake or your favorite cheesecake recipe into smaller bite-sized pieces? If you are offering more than one type of dessert, smaller pieces mean your guests won't have to fill up on one rich slice of cheesecake and instead can take a sampling of all there is to offer. It's a good thing.

(These can also be made ahead and frozen - in fact, I prefer to eat them 5 minutes out of the freezer about halfway between frozen and thawed - yummy!)

Here's how it's done:

1. Line your 9x13 pan with parchment paper so that the parchment is hanging over both long sides of the pan. Use a large paper clip to secure the parchment to the rim of the pan. The parchment will make it easier to lift the cheesecake out of the pan to cut it after it's been frozen and the paper clips keep the parchment from touching the top of the unbaked cheesecake filling.

2. Make 1 1/2 times the crust and press it evenly into the 9x13 pan.  Bake as directed in the recipe for about the same amount of time. Keep an eye on the crust. It should be only lightly browned around the edges. You could also use (2) 8x8 or 9x9 pans, dividing the crust and filling between the two, but adjust the baking time to compensate for the smaller pans.

3. Have ready a large roasting pan that the 9x13 pan will fit inside of. This will be for the water bath. I tried to bake one without the water bath and it was a complete flop, so I highly recommend using a water bath even if you have to borrow a roasting pan from a neighbor.

4. Heat a teapot of water while you make the filling.

5. Place the 9x13 pan into the roasting pan and make the filling as directed (no need to increase the filling amount as you did for the crust).

6. Pour the filling over the crust and place the roasting pan on your middle oven rack. Pour hot water into the roasting pan until it comes about halfway up the sides of the 9x13 pan. Bake at 325 degrees F. Check for doneness in about 45 minutes (less for smaller pans). The cheesecake is done when it is just ever-so-slightly wobbly in the center. This could take anywhere from 45 minutes to an hour or more. Just keep checking it by wiggling the pan every so often and see how much it jiggles in the middle. Remove from the oven and run a knife all the way around the sides of the pan and then allow the cheesecake to cool completely, then cover with plastic wrap and place in the freezer for at least two hours or overnight.

7. After the cheesecake is frozen, lift it out of the pan using the parchment paper as handles onto a large cutting board. Using a sharp chef's knife or serrated bread knife, cut the cheesecake into squares. Wipe the knife or rinse it with hot water between cuts to make the cuts clean and neat. Place the squares into mini cupcake liners and either re-freeze up to 2 weeks or refrigerate up to three days in an airtight container.

Monday, December 6, 2010

Creamy Pumpkin Cheesecake

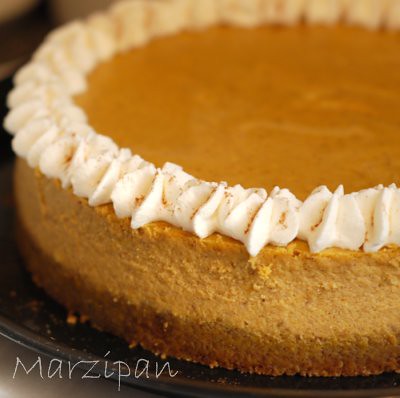
Pumpkin Cheesecake

If you're looking for a great make-ahead dessert for the holidays, look no further! Make this creamy pumpkin cheesecake, let it cool to room temperature and then wrap and freeze it, right in the springform pan if you want. Thaw it in the refrigerator overnight and you've got yourself an impressive dessert with no last minute prep - maybe just a dollop of freshly whipped cream and a sprinkling of cinnamon to top it off.

This cheesecake is so creamy and light, your guests will have a hard time believing that there is even cream cheese in it. I have made this recipe using both crusts and they are both wonderful. The ginger pecan pastry crust makes the cheesecake a little more like a pumpkin pie while the gingersnap crust gives a more sandy texture to the crust which pairs nicely with the creamy spiced filling.

Pumpkin Cheesecake with Ginger-Pecan Pastry Crust or Gingersnap Crust
adapted slightly from The Cake Book by Tish Boyle

(makes one 9-inch cheesecake)

For the Ginger-Pecan Pastry Crust
1 cup all-purpose flour
1/4 cup firmly packed light brown sugar
1/8 tsp salt
1 teaspoon ground ginger (or use 1/4 cup finely chopped crystallized ginger if you want a more pronounced ginger flavor)
1/3 cup pecans
1/2 cup unsalted butter, cold & cut into 1/2 inch cubes
1 tbsp cold water

For the Gingersnap Crust
1 1/2 cups finely crushed gingersnaps (I used a food processor)
4 tablespoons melted butter
1 tablespoon sugar

For the filling
1 cup pumpkin puree
1/2 cup heavy cream
2 tsp vanilla extract
1 tsp ground cinnamon
1/2 tsp ground ginger
1/4 tsp ground nutmeg
1/4 tsp ground cloves
1/8 tsp allspice (optional)
1/4 tsp salt
1 1/4 lbs cream cheese, at room temperature (it is very important that the cream cheese be soft before you start the recipe)
1/2 cup granulated sugar
1/2 cup firmly packed light brown sugar
1 tbsp cornstarch
4 large eggs, at room temp.

Position oven rack in the center and preheat oven to 350F. Grease the bottom and sides of a 9x3 inch springform pan. Wrap the outside of the pan with 2-3 layers of heavy duty aluminum foil. Trust me, this is an important step to prevent a soggy cheesecake. Have ready a large roasting pan that the springform pan will fit into and put your teapot on the stove and start heating up some water for the water bath.

If making the ginger-pecan pastry crust:
Place the flour, sugar, salt, ginger, and pecans in the bowl of a food processor. Process until the pecans are finely ground. Add the cold butter cubes and pulse until the mixture forms coarse crumbs. Add the cold water slowly until the dough just comes together. Press the dough into the bottom of your prepared pan. Bake for 25-30 minutes until the crust just starts to brown. Cool crust completely on a wire rack.

If making the gingersnap crust:
Place the cookies in a food processor and process the cookies to fine crumbs. Measure out 1 1/2 cups and place them in a bowl. Add the melted butter and sugar and stir until combined. Press the crumb mixture evenly into the bottom of the springform pan, pressing with the bottom of a flat-bottomed measuring cup to pack it down and make it level. Bake for 10-15 minutes or until fragrant and slightly browned.

To make the filling
Reduce oven temperature to 325F. In a bowl, whisk together pumpkin, heavy cream, vanilla, cinnamon, ginger, nutmeg, cloves, allspice and salt. Set aside.

In the bowl of a stand mixer, beat the cream cheese on medium-low speed until creamy, about 2 minutes. Add the sugars and beat on low speed until smooth, scraping the side of the bowl a few times as necessary. Mix in the pumpkin mixture, then add the cornstarch and mix until just blended. Scrape down the sides of the bowl again.

Add the eggs, one at a time, mixing until just combined. Scrape down the sides of the bowl and do a final mix by hand to make sure all the ingredients are well incorporated.

Pour the filling in the cooled crust. Set the foil-wrapped springform pan in a large roasting pan. Carefully pour enough hot water into the large pan to come 1 inch up the sides of the springform pan. Bake for 70 to 80 minutes until the center is set but still a bit wobbly.

Remove cheesecake from water bath to a cooling rack. Carefully remove the foil and run a thin knife tip around the edge of the cake. This will loosen the cake and help prevent the top from cracking. Cool completely at room temperature. Refrigerate the cooled cheesecake overnight or freeze up to one month.

Tuesday, November 30, 2010

Make and Freeze...Applesauce

Apples

Our new house has four huge oak trees on the property. Two are registered more than 200 years old and the other two are probably as old as our 80-year-old house. These oaks produce a ton of acorns and the squirrels have been scurrying around trying to collect what they can before winter settles in.

As I watch the squirrels do their thing, it occurred to me that I'm a little like that too. I hoard seasonal foods when they are plentiful and store them in my freezers to eat all winter long. When strawberries are plentiful, I'm freezing bags and bags of them to use in smoothies. When tomatoes are abundant, I make and freeze tomato puree for use in soups and sauces, and I freeze pizza sauce and marinara sauce in containers just the right size to serve my family one meal. I freeze raspberries for pies, locally raised chickens for roasting and local organic beef in 40-pound installments. I've got two full upright freezers and two refrigerator freezers and they're nice and full this time of year.

I thought some of you might be interested in some basic freezing advice and so I'm starting a new series called "Make and Freeze". Here I will highlight recipes and techniques for freezing foods that are in season for use throughout the year. If you have anything to add, or if you do it a little differently, I'd love to hear about it in your comments! So grab a bunch of apples and let's make and freeze some applesauce!

Choose your apples...
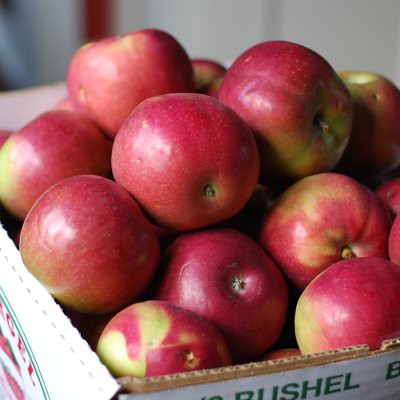
To make smooth applesauce, choose an apple variety which is soft and sweet such as Macintosh (used here), Galas or Fuji, or use any combination of these or other varieties of apples. If you're looking for more information, Pickyourown.org lists many of the varieties of apples and what they are best used for.

Prepare the apples...
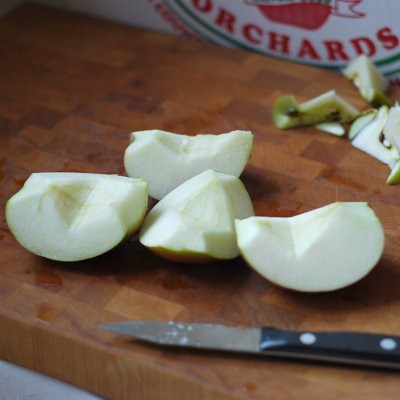
Wash the apples in a tub of water, quarter them and remove the core. Some may think it's not necessary to remove the core, but I like to remove it just to be sure there won't be any hard bits of core that end up in the sauce. If you have a food mill, you can leave the skins on which will save you a lot of time. If you do not have a food mill, you can peel the apples and use a food processor or even a potato masher after the apples have been cooked.

Making Applesauce

Cook the apples...
Place the apples in a large stock pot and add just enough water or apple cider to coat the bottom of the pan to prevent scorching. I added about 1/4 cup of water. Place a tight-fitting lid on the pot and cook over med-high heat. Stir once or twice in the beginning until the apples start to release their juices, then lower the heat to medium and keep the lid on until the apples are completely steamed through. This might take 15 to 20 minutes or so.

Making Applesauce

When the apples are cooked, the applesauce aroma will start to fill the kitchen and they should look like the photo below. Give the apples one more stir to feel for any apples which are not quite cooked. If you feel any uncooked apple chunks, cook for another 5 minutes or so with the lid on until all the apples are soft.

Making Applesauce

Mash the apples...
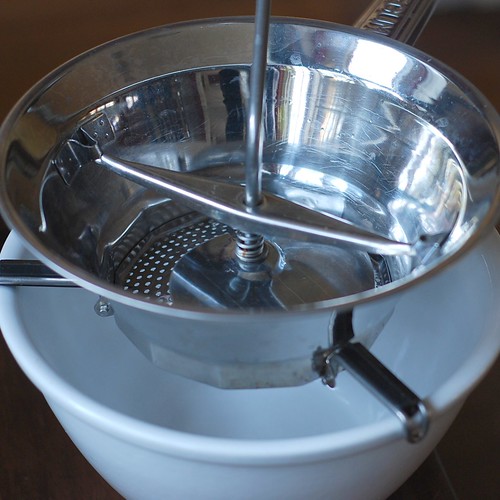
While still hot, spoon the apples into a food mill. I use the disc with medium holes since I like my applesauce not too chunky and not too smooth. If you have peeled your apples, you can let them cool a bit and use a food processor or simply mash them with a potato masher right in the pot.

Making Applesauce

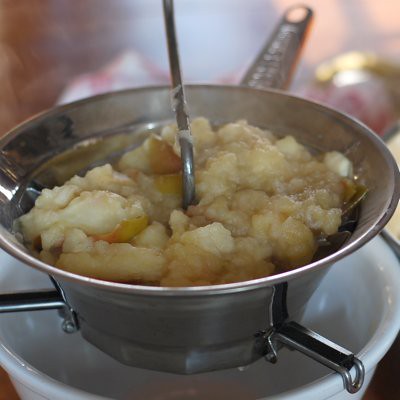
Kids love to help turn the crank on the food mill so if you've got any kids around, put them to work! Here are the apples - skins and all - ready for milling.

Making Applesauce

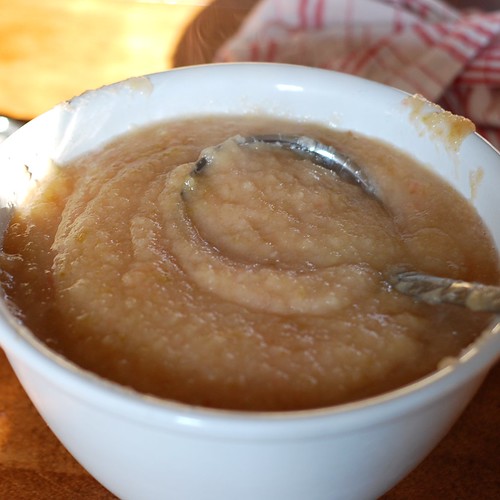
After the apples go through the mill, they will look like this.

Making Applesauce

Sweeten and spice up your applesauce...
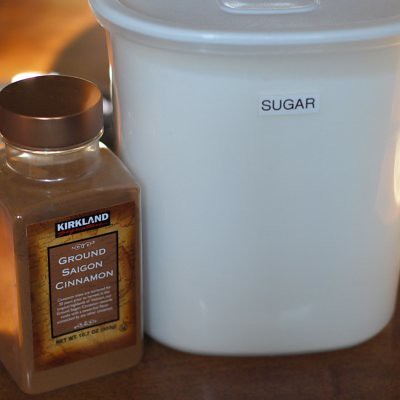
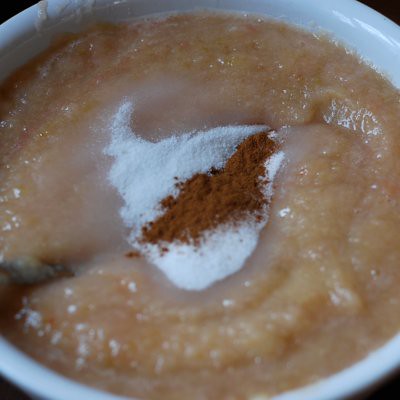
While the applesauce is still hot, you can add the cinnamon and sugar if you like. I prefer to leave them unsweetened these days, but if you want to add sugar,  add it when the sauce is still warm so the sugar will dissolve completely. Add just a little at a time and taste it as you go until the applesauce is just as sweet as you like it.  

Making Applesauce

Do the same for the cinnamon. Cinnamon is not optional in my opinion, and if you add cinnamon, you might find you don't need to add as much sugar.  I like plenty of cinnamon, but you could omit it or add it later if you prefer.

Making Applesauce

Contain and freeze your applesauce...
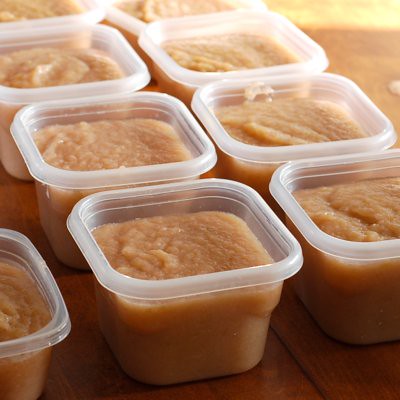
Place your applesauce in containers and let them cool to room temperature with the lids off until they come to room temperature or are just slightly warm, then cover and freeze. I love these Ziploc square quart-size containers. They stack nice and neat in the freezer and hold just the right amount to serve our family of 5 with dinner. A half bushel yielded about 10 quarts of applesauce and I filled about 3 stockpots full of uncooked apples.

Making Applesauce

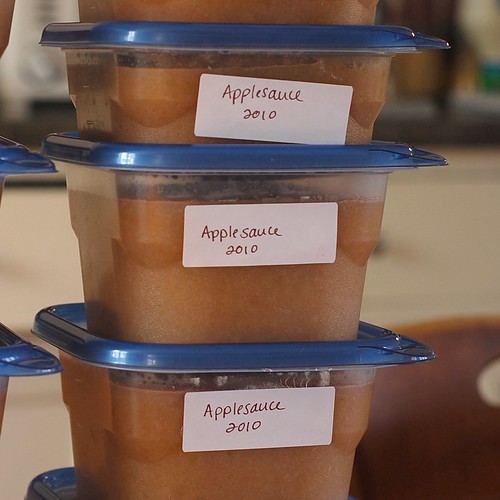
Be sure to label the containers with the contents and the date. This applesauce is so much more flavorful and thicker than the applesauce from the supermarket.  If you've got extra apples, make a little or a lot and freeze the extra.

Making Applesauce

Eat your applesauce...
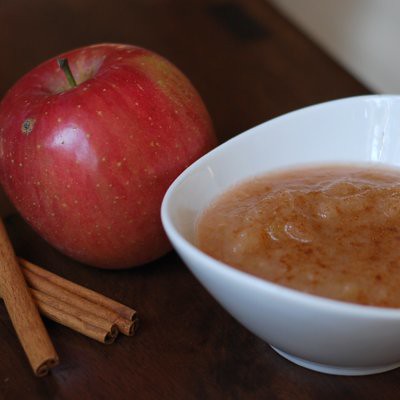
I like to add just a sprinkling more cinnamon just for good measure!

Making Appplesauce

LinkWithin

Related Posts Widget for Blogs by LinkWithin