Showing posts with label Cookies and Bars. Show all posts

Monday, September 17, 2018

Flourless Cashew Butter Chocolate Chip Cookies


You know a recipe is good when every time you make them, your friends ask beg for the recipe!  You can find cashew butter at Trader Joe's or Whole Foods, or substitute your favorite nut butter.  You'll never miss the flour in these!

Flourless Cashew Butter Chocolate Chip Cookies
adapted from theviewfromgreatisland.com
makes about 18 cookies

1 egg
1/3 to 1/2 cup sugar (or substitute coconut sugar, or granulated monk fruit/erythritol, such as Lakanto)
1 teaspoon baking soda
1 Tablespoon molasses (optional)
1/2 teaspoon pure vanilla extract
1/4 teaspoon salt if nut butter is unsalted
1 cup unsweetened cashew butter (or nut butter of choice)
3/4 cup chocolate chips

Preheat oven to 350 degrees F.  In a mixing bowl, whisk together the egg, sugar, baking soda, molasses, vanilla, and salt.  Add nut butter and stir until well combined.  Fold in the chocolate chips.  Using a 1 1/2" cookie scoop, scoop the dough into balls and place on a baking sheet 2 inches apart.  Flatten the dough slightly with your fingers or a spatula.  Bake for 12-13 minutes or until they are golden around the edges.  Allow to cool for a few minutes before transferring the cookies to a cooling rack to cool completely.


Sunday, April 8, 2018

Lemon Coconut Bars


A nice twist on the traditional lemon bar with the addition of coconut.  I made these bars for a luncheon and had more than enough to share with my bookclub that evening.  They are so easy and so delicious.  They are perfect for Spring - should it ever get here!


Lemon Coconut Bars
adapted from Sweet Gratitude by Judith Sutton

Shortbread Crust
1/2 pound (2 sticks) unsalted butter, at room temperature
1/2 cup confectioners sugar
grated zest of one lemon
scant 1/4 tsp salt
2 cups all-purpose gluten free flour mix, or all purpose flour

Lemon Coconut Filling
4 large eggs
1 cup granulated sugar
1/4 cup all-purpose gluten free flour mix, or all purpose flour
1/2 tsp baking powder
grated zest of one lemon
1/4 cup plus 2 tablespoons fresh lemon juice
2 3/4 cups (7 ounce package) sweetened shredded coconut

Preheat oven to 350 degrees F.  Line a 9x13 pan with parchment paper with opposite sides hanging over the pan.  Butter all 4 sides of the pan, but not the bottom of the pan.
In a bowl of a stand mixer, beat the butter and confectioners sugar on medium speed until well blended.  Beat in the lemon zest and salt.  On low speed, add the flour in two additions and beat until just mixed.  Press the crust mixture evenly over the bottom of the prepared pan.  Bake for 15-18 minutes or until the crust is golden around the edges.
While the crust is baking, make the lemon coconut filling.  In the bowl of a stand mixer, beat the eggs and sugar until light.  Add the flour and baking powder, then beat in the lemon zest and juice.  Stir in the coconut.  Pour the topping over the hot crust and bake for 25-28 minutes or until the topping is lightly colored and no longer jiggly, and the outside edges are golden brown.  Cool completely, then refrigerate until chilled.
Pull the bars out of the pan by pulling gently on the parchment overhang "handles".  Carefully peel off the parchment and place on a cutting board.  Using a sharp knife, cut into 24 squares.  Uneaten lemon bars can be refrigerated for a week or frozen up to one month.


Thursday, December 18, 2014

Mexican Wedding Cookies


When Christmas comes around, I always ask the kids what treats they most want to make for Christmas.  Here's "the list" for 2014 and it's a good one!

English Toffee
Peanut Butter Blossoms
Orange Cookies
Caramel Brownies
Cinnamon Rolls
Gingerbread Men
Mexican Wedding Cookies (recipe below)
Pizzelles

Although I have no less than 4 recipes for cinnamon rolls/sticky buns on this blog, I just realized that I am currently using a 5th recipe!  I'll have to share that with you soon.  The only cookie on the list that I haven't shared with you are these Mexican Wedding Cookies, or Butterballs.  They are a bite-sized morsels of buttery, nutty goodness... kind of like Butter Pecan ice cream in cookie form!

Mexican Wedding Cookies
Makes about 40 1-inch cookies

2 cups all-purpose flour
1/4 teaspoon salt
2/3 cup confectioners sugar, divided, plus more for rolling
1 cup pecans (or almonds or walnuts)
8 ounces (2 sticks) unsalted butter, at room temperature
1 teaspoon vanilla extract

Preheat the oven to 325 degrees F.  Line 2 large baking sheets with parchment or silicone liners.

Sift together the flour and salt and set aside.  Process the pecans and 1/3 cup confectioners sugar in a food processor until finely ground.

In the bowl of a stand mixer fitted with the paddle attachment, beat together the butter and remaining 1/3 cup sugar until light and fluffy.  Add the nut mixture and the vanilla and beat until well combined.  Add the flour and mix until just combined.

Using a small cookie scoop to portion and using your hands to roll, form the dough into smooth 1-inch balls and place on the cookie sheet.  Bake the cookies for 15 minutes or until beginning to lightly brown on the bottom.  Remove the cookies from the oven and immediately sift confectioners sugar on the cookies.  Allow the cookies to cool completely on the cookie sheet.  When the cookies are cool, roll them in a bowl of powdered sugar until well coated on all sides.  Store in an airtight container.


Tuesday, September 30, 2014

Banana Pecan Oat Bars


Looking for a healthier treat to take to a meeting or get-together?  These delicious banana oat bars are a great alternative to those sweeter snacks that are made with refined sugar and flour.  You could even grab a bar for a quick breakfast on the go, and they are great with a cup of tea in the afternoon.  They are also wheat and dairy-free.  Enjoy!

Banana Pecan Oat Bars
adapted from Naturally Sweet and Gluten-Free by Ricki Heller
Makes 12-16 bars

1/2 cup coconut sugar
1 Tablespoon maple syrup
1 Tablespoon finely ground flaxseed
1/4 cup coconut or almond milk
1/4 cup avocado oil or melted coconut oil
1 teaspoon pure vanilla extract
1 Tablespoon natural smooth nut butter, sunflower butter, or coconut butter
2 medium, very ripe bananas
1/3 cup raisins or dried cranberries
1 1/2 cups rolled oats (not quick-cooking)
1/2 cup unsweetened shredded coconut
1/4 cup whole oat flour
1/2 tsp baking powder
1/4 tsp fine sea salt
1/2 cup chopped pecans

Preheat the oven to 350 degrees F.  Line an 8-inch square pan with parchment or coat the pan with coconut oil.

In a medium bowl, whisk together the coconut sugar, maple syrup, flaxseeds, milk, oil, vanilla, and almond butter until sugar is dissolved.

Cut the bananas into chunks and add to the bowl.  Mash the banana chunks with a fork, leaving a few smaller pieces here and there.  Stir in the cranberries and chopped pecans.

In a large bowl, combine the oats, coconut, oat flour, baking powder and salt.  Pour the wet mixture over the dry mixture and stir well to combine.  The mixture will be wet.

Scrape the mixture into the prepared pan and smooth the top.  Bake for 40-45 minutes until the top is dry and a tester inserted into the middle of the pan comes out clean.  Cool completely before cutting into bars.  Freeze any portion which will not be consumed within a day or two.


Tuesday, March 11, 2014

Chocolate Hazelnut Truffle Squares


Last week, my girlfriends and I got together to eat, chit-chat and do some crafty things.   Pam was bringing lunch and a craft idea, so I took the opportunity to comb through my cookbooks to find a dessert to make.  I often make the same tried-and-true cookies and cakes for my customers, so I'm excited when I get to try a new recipe and have the girls taste test it.  As soon as I saw this recipe, I knew I had to try it, and I'm glad I did!  It's my favorite combination of hazelnuts and rich dark chocolate - even better than a scoop of Nutella!  The girls loved it and that makes me happy!

The recipe is a little involved - you have to chop chocolate, and toast nuts, and make a caramel for the praline paste, and dirty more than a few dishes.  This recipe is worth it though, I promise.

Regarding the praline paste needed for this recipe: I ran into a snag while making the praline paste from the book (although you'd never know it in the final product), so below I provided a similar recipe with a different technique that I think will work better.  Just be warned that the praline paste is so delicious all by itself you may want to eat it by the spoonful.

Chocolate Hazelnut Truffle Squares
adapted from The Good Cookie by Tish Boyle
Makes 16 bars

hazelnut brownie layer:
1 1/2 ounces bittersweet chocolate, chopped
4 tablespoons unsalted butter
1 large egg
1/2 cup granulated sugar
1 tablespoon hazelnut liqueur
1/4 cup all-purpose flour (or gluten-free flour mix- I used Cup4Cup)
1/2 cup hazelnuts, toasted, skinned and coarsely chopped

hazelnut truffle layer:
6 ounces bittersweet chocolate, chopped
6 tablespoons unsalted butter
1/4 cup praline paste (store-bought or recipe follows)
1/4 cup granulated sugar
pinch of salt
1/2 cup heavy cream
1 tsp pure vanilla extract
1 large egg
2 large egg yolks

garnish:
confectioner's sugar for dusting
16 hazelnuts, toasted and skinned


Preheat the oven to 350 degrees F.  Place about 3/4 cup hazelnuts on a baking sheet (add 1 cup hazelnuts and 1 cup blanched almonds to the baking sheet if making the praline paste recipe) and bake in the oven until fragrant and toasted, about 10 minutes.  Rub the hazelnuts inside a clean towel to remove as much of the skins as possible.  Reserve 16 of the barest, nicest looking hazelnuts to use as garnish.  Divide the remaining as follows: 1/2 cup hazelnuts for brownie layer and 1 cup hazelnuts and 1 cup almonds for praline paste, if making.

Make the hazelnut brownie layer:
Reduce the oven temperature to 325 degrees F.  Spray a 9x9-inch pan with cooking spray (or coat with softened butter).  Line the pan with parchment, allowing the excess to hang over two sides, then spray or butter the parchment.  Coarsely chop the 1/2 cup reserved toasted hazelnuts.  Place the chocolate and butter in the top of a double boiler over barely simmering water and heat while stirring until melted and smooth.  Stir in 1/2 cup sugar and the hazelnut liqueur until blended.  Add the egg and stir vigorously until well blended.  Fold in the flour and hazelnuts just until the flour is incorporated.  Spread the brownie base evenly into the prepared pan.

Make the truffle layer:
Place chocolate and butter in the top of a double boiler over barely simmering water and heat while stirring until melted and smooth.  Remove the pan from the heat and stir in the praline paste.  Whisk in the sugar, salt, heavy cream, and vanilla.  Whisk in the egg and egg yolks, one at a time, blending well after each addition.  Scrape the mixture over the brownie layer and spread it evenly.

Bake the bars for 25-30 minutes until the top is puffed and set and no longer shiny.  Cool the bars completely on a wire rack, then chill for at least 2 hours.

Cut the bars into squares using a sharp chef's knife.  For clean cuts you can run the knife under hot water, then dry the knife and make your cut, cleaning off the knife between cuts.  Dust the bars with confectioner's sugar and press a toasted hazelnut into the top of each bar.  Serve with vanilla ice cream.

Praline Paste
Adapted from Joe Pastry

8 ounces (1 cup plus two tablespoons) granulated sugar
2 ounces (1/4 cup) water
4 ounces (1 cup) blanched almonds (113 grams)
4 ounces (1 cup) hazelnuts toasted and peeled


Place the nuts on a sheet of lightly greased parchment paper or a silpat. Then simply add the water to the sugar in a small saucepan and heat it over high heat, swirling until the mixture turns to caramel. Dark amber is usually the degree most pastry makers cook to, though you can go darker for a stronger flavor. Pour the caramel over the nuts and allow the mixture to cool completely. Then break the praline into pieces and grind them as finely as you can in a food processor until a paste forms. 


Monday, March 4, 2013

Lemon Poundcake Squares


When it comes to bakery fare, I'm pretty hard to please.  I mean, I'm used to nibbling on sweets just hours or minutes from my own oven.  Many times those sweets in the bakery case are dry or taste like they've been sitting just a bit too long.

But I have to say that I used to love Starbuck's Lemon Pound Cake. {They have since changed the recipe I think, because it's not as good as I remember.}   It was lemony and moist and the perfect accompaniment to a chai tea latte.   I'll always ate it from the bottom, so my last bites could all have that sweet lemony icing that's on top.  It's the best part!

Enter these super easy Lemon Poundcake Squares.  They taste exactly like that Starbuck's poundcake, but they're made in a bar form and every single bite has that lemony icing!  Every bite!  Trust me, if you're a lemon poundcake lover you must try these.  But be warned, you'll keep cutting little slices out of the pan until they are all gone.  You won't be able to stop eating these.  Thankfully, I found this recipe on Pinterest and I can have my Iced Lemon Poundcake fix anytime within an hour without leaving the house!  

Other lemony recipes you can find here:


Lemon Poundcake Squares
adapted from Baker Girl
Makes one 9x13" pan of lemon squares; recipe may be halved and baked in an 8 x 8" pan

Note:  I doubled the icing from the original recipe, so if you want a thinner layer of icing on top, cut the amount of icing in half.


1 1/2 cups all-purpose flour
1 1/2 cups granulated sugar
1/2 teaspoon salt
1 cup (2 sticks) butter, softened
4 large eggs
1 Tablespoon lemon zest
3 Tablespoons lemon juice

Lemon Glaze:
2 cups powdered sugar
3 tablespoons lemon juice (or more for desired consistency)


Preheat oven to 350°F. Spray an 9-by-13-inch baking dish with cooking spray and set aside. Zest and juice three small lemons; set aside.  (You will need a total of 6 tablespoons lemon juice and 1 tablespoon of zest for the cake and glaze.)

In the bowl of an electric mixture fitted with the paddle attachment, beat the flour, sugar, salt, and softened butter until combined.

In a separate bowl, whisk together the eggs, lemon zest, and lemon juice until combined. Pour into the flour mixture and beat at medium speed until smooth and creamy, about 2 minutes. Pour into baking dish and bake for 25 minutes, or until just starting to turn golden around the edges and a toothpick inserted into the center of the batter comes out clean. Allow to cool completely before glazing.

Make the glaze by whisking together the powdered sugar and lemon juice.  Add more powdered sugar or lemon juice to get a pourable but not-too-thin consistency.  Spread over the cooled bars with an offset spatula and let set.  Cut into squares when icing is dry.

Monday, January 28, 2013

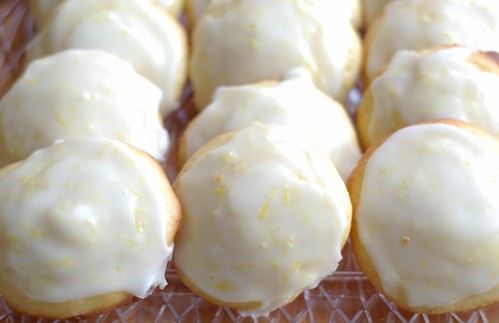
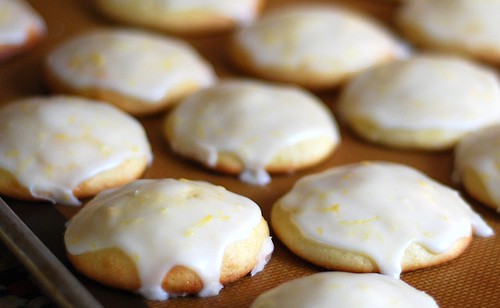
Iced Lemon Ricotta Cookies

Lemon Ricotta Cookies

I love ricotta cheese.  I prefer my lasagna without it, but I love to eat it on spaghetti squash and in these cookies.  These cookies are light and delicious; sweet, but not too sweet.  They are much like our favorite orange cookies, but a bit lighter.  And the batter is unbelievably good!  Don't ask me how I know this.

Lemon Ricotta Cookies

The recipe is from Giada DiLaurentis, so when you read the recipe, make sure to roll your "R" a little  when you say "ricotta" in your head.  You'll feel more Italian that way!  Do you have any favorite ways to use ricotta cheese?  If so, I'd love to hear about it!

{Kitchen Update:  the floors and plaster are completed!  Paint and cabinets come next...stay tuned!}

Lemon Ricotta Cookies
from Giada DiLaurentis and Food Network

Cookies:
2 1/2 cups all-purpose flour
1 teaspoon baking powder
1 teaspoon salt
1 stick unsalted butter, softened
2 cups sugar
2 eggs
1 (15-ounce) container whole milk ricotta cheese
3 tablespoons lemon juice 1 lemon, zested

Glaze:
1 1/2 cups powdered sugar
3 tablespoons lemon juice
1 lemon, zested

Directions:
Preheat the oven to 375 degrees F.

In a medium bowl combine the flour, baking powder, and salt. Set aside.

In your electric mixer bowl combine the butter and the sugar and beat until light and fluffy, about 3 minutes. Add the eggs, 1 at a time, beating until incorporated. Add the ricotta cheese, lemon juice, and lemon zest. Beat to combine. Stir in the dry ingredients.

Line 2 baking sheets with parchment paper or Silpat mats. Spoon the dough (about 2 tablespoons for each cookie) onto the baking sheets. Bake for 15 minutes, until slightly golden at the edges. Remove from the oven and let the cookies rest on the baking sheet for 20 minutes.

For the Glaze: Combine the powdered sugar, lemon juice, and lemon zest in a small bowl and stir until smooth. Spoon about 1/2-teaspoon onto each cookie and use the back of the spoon to gently spread. Let the glaze harden for about 2 hours.

Sunday, January 6, 2013

Pizzelles and Making Ice Cream Cups

DSC_0401

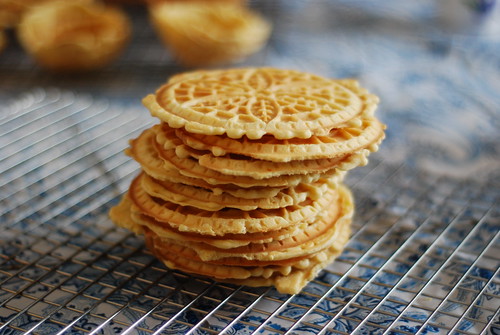
I'm getting ready to show you my temporary kitchen, but before I do that, I'd like to share with you a cookie that requires NO oven - the pizzelle!  My daughter missed having pizzelles at Christmas this year, so we spent a little time yesterday making them.

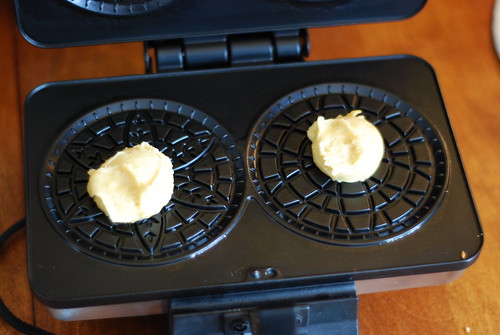
The only caveat is that you need a pizzelle iron, or ice cream cone maker.  Pizzelle irons make small 4" rounds and ice cream cone makers make 7" rounds.  Otherwise they are essentially the same thing.  For this recipe it is also useful to have a small cookie scoop for portioning the batter.

DSC_0396

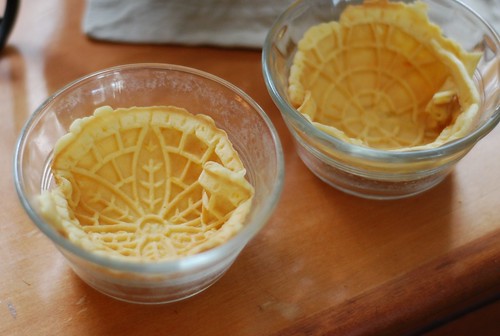
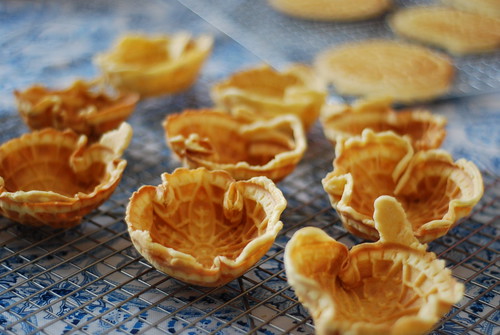
I liked the idea of having these cookies with ice cream, but the rounds were too small to make cones so we improvised a bit and made small ice cream cups.  I used small custard cups to mold them, but you could use a bigger bowl like a cereal bowl or even drape the cookie over the bottom of the upside-down bowl to make bigger, wider cups.   The trick is to immediately place the warm cookie right from the iron into the bowl.  Keep the bowls next to the iron and don't hesitate, because as soon as the cookies cool for a few seconds, they get crispy and are unable to press into the bowl without cracking.

Pizzelle Bowls

After the cups cool, they will hold their shape.  You can change the flavorings in the recipe to suit your taste and to suit the ice cream flavors and toppings you will serve it with.  For eating just plain cookies, I like to use anise and vanilla extracts with lemon and orange zests.  The anise is not at all overpowering and it will smell stronger in the batter than it will in the finished cookie.  For eating with vanilla ice cream, strawberries and chocolate sauce like we did, you might want to omit all flavorings except the vanilla so the flavors don't compete.  These little cups take your ice cream dessert to a whole new level and provides an impressive presentation with very little effort - and without turning on your oven!

DSC_0399 

Pizzelles
Makes about 20-25 cookies

3/4 cup sugar
1/2 cup unsalted butter, melted and cooled slightly
3 eggs
1 tsp anise extract
zest of 1/2 a lemon
zest of 1/2 an orange
1 T vanilla
1 1/2 cups flour
1 1/2 tsp baking powder
1/4 tsp salt

Whisk together the flour, baking powder and salt and set aside.  Cream together the sugar and melted butter.  Add the eggs, one at a time, and mix well.  Add the extracts and zests.   Add the flour mixture and stir until just incorporated.  Scoop batter onto pizzelle iron with a small cookie scoop or according to your pizzelle maker's instructions and bake until golden.  Transfer to a cooling rack.  Cookies will become crispy as they cool.

If shaping your pizzelles into bowls, immediately place the hot pizzelle into a bowl, pressing very gently, but working very quickly before the cookie has a chance to cool.  Let cool in the bowl before removing.  Store cooled pizzelles in an airtight container up to 5 days.

Wednesday, February 29, 2012

Sweet and Salty Caramel Brownies


Would you just look that these brownies! They were delicious - maybe the best ever.  Fudgy chocolatey goodness with caramel oozing out the center and drizzled on top, sprinkled with sea salt and coarse sugar.  A glass of milk with these is not optional.

I had given some away...


...but there were plenty for us too.


The ones hanging around were devoured, and then the kids, realizing that they were all gone, had that surprised, shocked, sad, disappointed look on their faces when they asked, "Who ate the last brownie?".

No one confessed.  I suppose I'll just have to make more.

Sweet & Salty Brownie
from Baked Explorations by Matt Lewis and Renato Poliafito
Makes one 9x13 pan of brownies - how many you decide to cut from that is a personal decision!

For the caramel filling:
1 cup sugar
2 tablespoons light corn syrup
1/2 cup heavy cream
1 teaspoon fleur de sel, or other mild sea salt
1/4 cup sour cream

For the Brownie:
1 1/4 cups all purpose flour
1 teaspoon salt
2 tablespoons dark unsweetened cocoa powder
11 ounces quality dark chocolate (60 to 72 %), coarsely chopped
1 cup (2 sticks) unsalted butter, cut into 1-inch cubes
1 1/2 cups sugar
1/2 cup firmly packed light brown sugar
5 large eggs, at room temperature
2 teaspoons vanilla extract

For Assembly:
1 1/2 teaspoons fleur de sel
1 teaspoon coarse sugar

Make the Caramel:
In a medium saucepan, combine the sugar and corn syrup with 1/4 cup water, stirring them together carefully so you don't splash the sides of the pan.  Cook over high heat until and instant read thermometer reads 350 degrees F, or until the mixture is dark amber in color (keep a close eye on the caramel at all times, as it goes from golden brown to black and burnt very quickly), 6 to 8 minutes.  Remove from the heat, and slowly add the cream (careful, it will bubble up ) and then the fleur de sel.  Whisk in the sour cream. Set aside to cool.

Make the Brownie:
Preheat the oven to 350 degrees F.

Butter the sides and bottom of a glass or light colored metal 9 by 13 inch pan.  Line the bottom with a sheet of parchment paper, and butter the parchment.

In a medium bowl,whisk together the flour,salt and cocoa powder.

Place the chocolate and butter in the bowl of the double boiler set over a pan of simmering water, and stir occasionally until the chocolate and butter are completely melted and combined.  Turn off the heat, but keep the bowl over the water of the double boiler, and add both sugars.   Whisk until completely combined and remove the bowl from the pan.  The mixture should be at room temperature.

Add three eggs to the chocolate mixture and whisk until just combined.  Add the remaining eggs and whisk until just combined.  Add the vanilla and stir until combined.  Do not over beat the batter at this stage, or your brownies will be cakey.

Sprinkle the flour mixture over the chocolate.  Using a spatula, fold the dry ingredients into the wet ingredients until there is just a trace amount of the flour mixture visible.

Assemble the Sweet & Salty Brownie:

Pour half of the brownie mixture into the pan and smooth the top with a spatula. Drizzle about 3/4 cup of the caramel sauce over the brownie layer in a zigzag pattern, taking care to make sure the caramel does not come in contact with the edges of the pan or it will burn.  Use your offset spatula to spread the caramel evenly across the brownie layer.  In heaping spoonfuls, scoop the rest of the brownie batter over the caramel layer.  Smooth the brownie batter gently to cover the caramel layer.

Bake the brownies for 30 minutes, rotating the pan halfway through the baking time, and check to make sure the brownies are completely done by sticking a toothpick into the center of the pan.  The brownies are done when the toothpick comes out with a few moist crumbs.

Remove the brownies from the oven, drizzle on desired amount of extra caramel and sprinkle with fleur de sel and coarse sugar.

Cool the brownies completely before cutting and serving.

The brownies can be stored, tightly wrapped at room temperature, for up to 4 days.

Sunday, October 16, 2011

Maple Iced Pumpkin Cookies


Fall is upon us, a chill is in the air, and pumpkins are everywhere! These pumpkin cookies taste like pumpkin pie but come in a handy bite-sized package. They are soft and cakey, much like the orange cookies we make at Christmastime. And they are spicy and delicious. They would be a perfect treat to take along with you on your trip to the pumpkin patch or the Christmas tree farm, along with some hot spiced apple cider or hot chocolate.


The icing is the perfect compliment, adding a bit of sweet and moist, and the chopped sugared pecans give it a little crunch. They come together in a jiffy, so you can go outside and enjoy the fall weather and pick out that perfect pumpkin! Here's my little pumpkin choosing hers!


Maple-Iced Pumpkin Cookies
Cookie recipe adapted from Allrecipes
Sugared Pecans from The Cake Book by Tish Boyle

Makes about 40 cookies

Cookies:
2 1/2 cups all-purpose flour
1 teaspoon baking powder
1 teaspoon baking soda
2 1/2 teaspoons ground cinnamon
1 teaspoon ginger
1/2 teaspoon ground cloves
1/2 teaspoon salt
1/2 cup (1 stick) butter, softened
3/4 cup white sugar
1/2 cup dark brown sugar, packed
1 1/4 cups canned pumpkin puree
1 egg
1 teaspoon vanilla extract

Maple Icing:
3 tablespoons maple syrup
4 tablespoons butter
1 teaspoon vanilla extract
1/4 teaspoon cinnamon
1 tablespoon cream
pinch of salt
2 cups confectioners' sugar

Sugared pecans:
(this recipe will make more than you need for these cookies)
1 egg white
1 1/2 cups pecans
2 tablespoons granulated sugar


Preheat oven to 350 degrees F. Combine flour, baking powder, baking soda, cinnamon, ground ginger, ground cloves, and salt; set aside.

In a medium bowl, cream together 1/2 cup of butter and both sugars until light and fluffy. Add pumpkin, egg, and 1 teaspoon vanilla to butter mixture, and beat until creamy. Mix in dry ingredients. Drop on cookie sheet using a cookie scoop (I used a 1 1/2 tablespoon sized scoop).

Bake for 15 to 20 minutes or until the cookie no longer looks wet and it springs back when pressed lightly with your finger. Allow to cool before icing.

To make icing:
Microwave or heat on the stove all of the ingredients except the sugar until melted and smooth.  Add the sifted confectioners sugar and mix until smooth.  Add more cream by the teaspoon if a thinner consistency is desired.  Drizzle or spread icing with a small spoon or spatula.

To make sugared pecans:
Preheat oven to 325 degrees F. Butter a baking sheet or line with a silicone sheet liner.

Place the egg white in a medium bowl, add the nuts, and stir to coat evenly.

Sprinkle the sugar over the mixture and stir to combine.

Spread the nuts in a single layer on the prepared baking sheet. Bake for 20-25 minutes, stirring once or twice, until the nuts are lightly browned and fragrant. When cool, place one pecan half on each cookie, or chop the nuts if desired and sprinkle on top of icing before it has dried.

Store leftover nuts in an airtight container at room temperature.

Friday, April 22, 2011

Coconut Macaroon Brownies


I'm back from Istanbul, and fighting some mean jet lag, but before I show you a peek at the sights we saw, I wanted to share with you one of the most delicious things I made before we left.

I have always been a huge fan of coconut and chocolate together and this recipe for Coconut-Macaroon Brownies caught my eye immediately as I was reading Alice Medrich's Bittersweet.

You can use any favorite brownie recipe as the base, even a boxed mixed if you are so inclined, but I would recommend the easy brownie recipe from Alice's book which I have provided below. If you can find a high quality unsweetened chocolate, such as Callebaut, I would recommend that too. {Note: I buy all types of Callebaut chocolate at either Whole Foods or our local Market District in one-pound blocks.}


A small piece will satisfy you, as the brownie base is rich and the coconut top is sweet, but the combination is heavenly!

Fortunately, these keep quite well for several days in an airtight container at room temperature and will freeze wonderfully as well.


Classic Unsweetened-Chocolate Brownies
from Bittersweet by Alice Medrich
Makes 16 brownies

Note: This is Alice's basic recipe for brownies, which calls for an 8-inch pan. If you are using this recipe for the coconut-topped brownies (recipe below), use a 9-inch pan and reduce the sugar by 2 tablespoons, and reduce the oven temperature to 350, as noted in the coconut brownie instructions.

4 ounces unsweetened chocolate, chopped
8 tablespoons (1 stick or 1/4 pound) unsalted butter
1 1/4 cups sugar
1 teaspoon pure vanilla extract
1/4 teaspoon salt
2 cold large eggs
1/2 cup all-purpose flour
2/3 cup chopped walnuts or pecans (optional - I omitted)

Preheat the oven to 400 degrees F. Line the bottom and sides of an 8-inch baking pan with parchment paper or foil, leaving an overhang on at least 2 opposite sides.

Place the chocolate and butter in a medium to large heat-proof bowl (big enough that you are able to add all of the ingredients to this bowl) over a pan of simmering water (a double boiler). Stir frequently until the chocolate and butter are melted and the mixture is hot to the touch.

Remove the bowl from the double boiler and stir in the sugar, vanilla, and salt with a wooden spoon. Add the eggs, one at a time, stirring until the first one is incorporated before adding the next. Stir in the flour and beat until the batter is smooth and glossy, about 1-2 minutes. Stir in the nuts if using. Scrape the batter into the prepared pan and smooth to even it.

Bake for 20 minutes, or until the brownies just begin to pull away from the side of the pan. The surface will look dry, but a toothpick inserted in the center will come out quite gooey. While the brownies are baking, prepare an ice bath with about 3/4 inch of water in a roasting pan large enough to fit the brownie pan inside.

When the brownies are ready, remove the pan from the oven and immediately set it in the ice bath. Let the brownies cool. Remove the pan from the ice bath and lift the brownies out of the pan using the overhang of parchment to help lift them out and place the brownies on a cutting board. Cut into squares.

Coconut Macaroon Brownies
(called Lacy Coconut-Topped Brownies in the book)
from Bittersweet by Alice Medrich

Note: This is the recipe as written in the book, however, I had only finely shredded unsweetened coconut on hand so I used that and increased the sugar by a tablespoon or two. If you use sweetened coconut, your brownies will probably look even better than the brownies in the photos above.

1 recipe brownie batter, {recipe above}, made with 2 tablespoons less sugar
1 large egg white
1 cup (3 ounces) sweetened shredded coconut
1/4 cup sugar
a pinch of salt
3/4 teaspoon pure vanilla extract

Preheat the oven to 350 degrees F. Line the bottom and sides of a 9-inch square baking pan with parchment or foil, leaving an overhang on two opposite sides.

Spread the brownie batter in the lined pan and set aside.

Combine the egg white, coconut, sugar, salt and vanilla in a medium stainless steel bowl, and set the bowl in a wide skillet of barely simmering water. (Or you may place the mixture in a heavy-bottomed saucepan over very low heat and keep an eye on it so it does not burn.) Stir the mixture, scraping the bottom to prevent burning, until it is very hot to the touch and the egg whites have thickened slightly and turned opaque, about 3-4 minutes.

Use your fingers to drop lacy clumps of coconut topping over the brownie batter. Bake until the brownies puff at the edges and the shreds of coconut look deep golden brown and crusty, about 25 minutes. Let cool completely in the pan on a rack.

Lift up the ends of the parchment or foil liner, and transfer the brownies to a cutting board. Cut into 25 squares.

Tuesday, March 29, 2011

Nanaimo Bars and a Visit to Toronto


For the past three years, my girlfriend and I have made it a tradition to take a road trip with our kids for a few days during their two-week Spring Break. This year we traveled north to Toronto, Canada and stopped at Niagara Falls along the way. Toronto is only a 5-6 hour drive from Pittsburgh. Thanks to the Spilled Milk podcasts (co-hosted by Molly Wizenberg from Orangette) I had teed up on my iPhone, I giggled most of the way there and the driving time went by in a flash.

We visited the usual Toronto tourist attractions...

The CN Tower, where you ride up to the top and on a clear day you can see for miles. A portion of the floor at the top is made of glass and you can see straight down to the ground below.


The Toronto Zoo. The polar bears were so much fun to watch.


Casa Loma, the beautiful castle built on a hill overlooking the city, was quite interesting.


The Royal Ontario Museum and The Science Center kept us busy for hours.


We saw the Stanley Cup at the Hockey Hall of Fame and Justin Bieber's shoes at the Bata Shoe Museum. Only seeing Justin Bieber himself could've topped that (according to one fanatic 14-year-old)!


Of course, along the way, we had to stop at interesting bakeries and chocolate shops.
The Soma Chocolate Shop in the Distillery District was a chocolate lover's dream. The kids chose to buy milk chocolate bars and I had two chocolates from the glass case - a gianduja (pronounced john-DOO-ya, more on that in a post to come) and a chocolate-covered morsel of marzipan, my favorite treat.


The L'Espresso Bar and Pastry shop on Bloor street just down from the Royal Ontario Museum was fantastic. They played lively jazz music and the dining room was packed on a Sunday morning. Ellen and Ben were wanting to try a Canadian sweet and chose the Butter Tart. A butter tart is kind of like a pecan pie without the pecans. They are quite sweet. This one had traditional raisins in the filling. I purchased a cranberry shortbread and an almond shortbread cookie - one to eat now and one to have with my tea later. We took our treats to go and finished them on a bench outside the shop.


Another Canadian dessert we saw along the way was the Nanaimo Bar. We didn't get the chance to try it in Canada, so I made this version of the Nanaimo Bar after we got home. The original Nanaimo bar has a vanilla custard middle layer and the recipe calls for custard powder. I didn't have any custard powder, so I made this take on a Nanaimo bar from Alice Medrich's book, Chewy, Gooey, Crispy, Crunchy Melt-In-Your-Mouth Cookies. The middle layer is cheescake in this version. The cookie crust is wonderful, made with chocolate wafers (I used Oreos), dried coconut, and chopped pecans.

Although I loved Toronto, next year I vow to go south where it might be a little warmer. Any suggestions?


No-No Nanaimo Bars
adapted from Chewy Gooey Crispy Crunchy Melt-in-Your-Mouth Cookies by Alice Medrich
Base Layer
1 1/2 cups (5 ounces) chocolate cookie crumbs (I used Oreos)
1/2 cup (1.5 ounces) unsweetened dried shredded coconut (sweetened would work as well)
1/2 cup (2 ounces) finely chopped pecans
8 tablespoons (1 stick) unsalted butter, melted
1/4 cup sugar

Middle Layer
8 ounces cream cheese, at room temperature
1/4 cup granulated sugar
2 tablespoons (0.875 ounce) packed brown sugar
1/2 teaspoon pure vanilla extract
1 large egg

Top Layer
2 T granulated sugar
1/2 cup heavy cream
7 ounces semisweet or bittersweet chocolate with 55% to 60% cacao

Equipment
A 9-inch square metal baking pan, the bottom and all 4 sides lined with foil

Preheat the oven to 350°F.

Mix the crumbs, coconut, pecans, butter, and 1/4 cup of the granulated sugar and pat it very firmly into the lined pan. Bake the crust for 10 to 12 minutes, or until it looks slightly darker at the edges and smells toasted.

While the crust is baking, mix the filling. In a large bowl, beat the softened cream cheese, brown sugar, and 1/4 cup of the remaining granulated sugar until smooth. Beat in the vanilla and then the egg. When the crust is baked, dollop the filling onto the hot crust and spread gently with the back of a spoon. Bake the bars until the edges are slightly puffed, about 10 minutes. Cool on a rack for 30 minutes. Chill for at least 2 hours.

Dissolve the remaining 2 tablespoons granulated sugar in the cream. Bring 1/2 inch water to a simmer in a medium skillet. Coarsely chop the chocolate and combine with the cream in a medium metal bowl. Place the bowl directly in the skillet of hot water and turn off the heat. Let rest for 5 minutes and whisk until smooth. Set aside until needed.

Pour the warm ganache onto the bars, spread, and chill for at least 30 minutes before serving. Lift the bars out of the pan by using the edges of the foil liner. Cut into 16 or 25 squares, wiping the knife between cuts. May be stored in an airtight container in the refrigerator for 3 to 4 days.

Makes 16 large (2 1/4—inch) bars or 25 smaller bars.

Monday, March 7, 2011

Almond Macarons with Chocolate Swiss Buttercream


Alert the press!
Strike up the band!
I'm celebrating here at Marzipan!

Why? Because I made fabulous French macarons!

I've bookmarked so many posts and tutorials about macarons that they have their own folder in my bookmarks. I tried them last year and the result was a flat, undercooked cookie that wouldn't let go of the Silpat they were sitting on. I was completely psyched out after that.

Until Irina from Pastry Pal published her free tutorial, Master the Macaron. Not only is it a drop dead gorgeous and comprehensive primer, but it works. And the first and most important thing she tells you to do is to stop being intimidated by these little confections! Those were the words I needed to hear. I am intimidated no longer. And neither should you be.  Get on over to Pastry Pal to download her e-book for the recipe for macarons.  

Chocolate Swiss Meringue Buttercream
From Martha Stewart's Cupcakes
Makes 5 cups

1 1/4 cups sugar
5 large egg whites
pinch of salt
1 pound (4 sticks) unsalted butter, cut into tablespoons, room temperature
1 teaspoon pure vanilla extract
4 ounces good-quality chocolate, melted and cooled, but still liquid

Combine sugar, egg whites and salt in mixer bowl, and set over a pan of simmering water. Whisk constantly until sugar is dissolved and mixture registers 140 degrees on an instant-read thermometer.

Transfer bowl to mixer; whisk on medium-high speed until whites are fluffy and the outside of the mixer bowl no longer feels warm to the touch, about 10 minutes.

Reduce speed to medium-low; add butter by the tablespoon, whisking well after each addition. The icing will look curdled for a bit after all the butter has been added, but just continue to beat until the icing is fluffy and smooth. Switch to the paddle attachment and add vanilla extract and melted chocolate and beat until smooth. Pipe the icing onto the macarons with a pastry bag fitted with a medium round tip.

Thursday, February 17, 2011

Chocolate Whoopie Pies


My husband subscribes to the Wall Street Journal. Occasionally he finds an article that he thinks might interest me and circles it for me to read. It could be there is a lack of big financial news, but on the front page of the WSJ the other day was this article about a big fight brewing over the Whoopie Pie. I'm not joking. Apparently there are people arguing over who was the first to invent it, and whose state should make it their "official state dessert".  Seems like a silly argument.

But the article did cause me to have Whoopie Pies on the brain. It was Valentine's Day and I thought I'd make some for the kids - and to see what all the hubbub was about.

They're delicious, quite similar to a cupcake, only perhaps a little easier to eat. They are harder than a cupcake to decorate seeing as you only have the icing peeking out between the cakes to attach any sprinkles too. I don't know if they need to be our state dessert, but the kids sure loved them!

Chocolate Whoopie Pies
from Baked Explorations by Matt Lewis and Renato Poliafito
{using a medium cookie scoop, this recipe made 28 pies}

For the cakes:

3 1/2 cups all-purpose flour
1/4 teaspoon salt
1 1/4 teaspoons baking powder
1 1/4 teaspoons baking soda
3/4 cup dark cocoa powder
1 cup very strong brewed coffee
2 cups firmly packed light brown sugar
3/4 cup canola oil
1 large egg
1 teaspoon vanilla extract
1/2 cup buttermilk, shaken
Preheat the oven to 350 degrees and line two baking sheets with parchment paper.

In a large bowl, whisk together the flour, salt, baking powder, and baking soda. Set aside.

In another large bowl, whisk together the cocoa powder and hot brewed coffee until completely combined and dissolved.

In a medium bowl, stir together the brown sugar and oil. Add this to the cocoa mixture and whisk until combined. Add the egg, vanilla, and buttermilk. Whisk until smooth.

Use a rubber spatula to gently fold the dry ingredients into the wet. Make sure to scrape down the sides and bottom of the bowl as you fold.

Use a 1 1/2 tablespoon sized cookie scoop to drop spoonfuls of dough onto the prepared baking sheets about 1 inch apart. Bake for 10 to 15 minutes, until the cookies are just starting to crack on top and a toothpick inserted in the center comes out clean. Let the cookies cool completely on the pan while you make the filling.

For the Swiss Meringue Buttercream Filling:
(This recipe makes more than you'll need for the whoopie pies.}

5 large egg whites
1 1/2 cups white sugar
2 cups (4 sticks) unsalted butter, cut into 1/2 inch cubes, cool but not cold
a pinch of table salt
2 teaspoons vanilla extract

In a medium bowl, whisk the egg whites and sugar together. Set the bowl over a pan of simmering water but do not let the water touch the bottom of the bowl. Heat the mixture until the sugar is completely dissolved and the color is a milky white, about 2 to 3 minutes, stirring often. You can test the mixture by rubbing a small amount between your fingers. It should feel completely smooth.

Transfer the egg mixture to the bowl of an electric mixture fitted with the whisk attachment and beat on medium-high speed. Beat until smooth and fluffy and completely cooled, about 5-10 minutes. Remove the whisk attachment and replace with the paddle attachment. Add the cubed butter and beat on medium-high speed until smooth and fluffy, about 5 minutes more. The buttercream will look as though it is breaking, but it will come together as you continue to beat.

Add the salt and vanilla and beat until combined.

To assemble the pies, turn half of the cookies upside down. Use a spoon or a piping bag fitted with a large round tip to apply a dollop of filling onto the flat side of the cookie. Place another cookie, flat side down, on top of the filling and lightly press the cookies together. Repeat until all cookies are filled. Spoon some sprinkles on the icing if desired.

Saturday, February 5, 2011

Nutella Pastry Pockets


Happy World Nutella Day!

Pies are all the rage these days - some are debating if the pie is the new cupcake of 2011. I've been reading that there are several pie shops trying to make a go of it around the country.


But I wonder if those pie shops have a use for their pastry scraps. An aversion to waste probably made the donut hole what it is today. And like the donut hole is just as delicious as the donut, these pastry pockets are just as good as the pie. Sure, you could roll out the scraps and brush the dough with egg, and then sprinkle with cinnamon and sugar like we used to do when I was growing up.


Or you could roll the dough like rugelach or a crescent roll with some nuts and jam or just about any filling you desire, making a darned good cookie.

Or you could cut the dough into circles, dollop a bit of Nutella and chopped hazelnuts in the center, fold it over, crimp the edges and bake. If you want, brush the tops with egg wash and sprinkle some Turbinado or coarse sugar on top before baking. I love the extra crunch that the hazelnuts and the sugar on top give to the pastry, but you could leave them out if you want.

I'd take these pastry pockets over a donut hole any day.


Other Nutella recipes from the Marzipan archives:

Nutella Pastry Pockets
A Marzipan Original :)

Note: The nutella inside the pastry does not stay soft like it is right from the jar. It will firm up a bit as it is baked, like the chocolate in a candy bar. 

Leftover (or not) pie dough or tart dough
Nutella, about a teaspoon per pocket
Hazelnuts, toasted, skinned and coarsely chopped
Egg wash for brushing
Turbinado or other sugar for sprinkling

Preheat the oven to 375 degrees F. Roll out the dough to 1/8" thickness and cut into 3" circles with a cookie or biscuit cutter. Place a teaspoon of Nutella in the center of the circle and sprinkle with a few chopped hazelnuts. Dip a pastry brush or your finger into a small bowl of water and lightly moisten the edges around half of the dough circle. This will help glue the pastry together. Fold the dough in half and lightly press the edges to seal. Crimp the edge with a fork or make it more decorative if you wish. Brush the tops with egg wash and sprinkle with sugar. Bake until the dough is golden brown, 20 minutes or so.


Sunday, January 9, 2011

Hazelnut Sandwich Cookies


It's been cold here in Pittsburgh, but we're still waiting for that big snow. It seems that we've had a constant flurry of snow coming down, but no accumulation to speak of. It's been beautiful and I should probably count my blessings that the roads are clear and we haven't had to shovel, only brush the walks. Annie's been dying to get out there and play in the snow, but there's not even enough to build a proper snowman. We can even still see the tips of grass poking through the snowy white layer on the ground. Even our friends half an hour north have had enough snow for sledding, but somehow it's missed us so far.


In my mind, it's been perfect - I can get to the store without any problems, and there's no buildup of snow on the old slate roof to cause trouble. But I do love to watch the kids after a big snow. (Admittedly I watch them through the window most of the time! What can I say, I like to be warm.) There's just that happiness, when they have the day off from school and can trod around in the deep snow, that can't be matched. Ah well, they'll just have to be patient. It will come. Meanwhile, I'll watch the light snowfall out my kitchen window and keep on baking.

These hazelnut sandwiches are amazing! The dough, made with ground toasted hazelnuts (also called filberts), is made into a few skinny logs which are then frozen, then sliced and baked. My logs weren't all the same size, but I found that the thinner logs made a more elegant cookie, just the right size to have two with an afternoon cup of chai tea. The most difficult part of making this cookie is toasting and removing the skins from the hazelnuts - it's a pain and a little messy - but so worth it.  I have since found toasted and skinned hazelnuts at Trader Joe's - well worth seeking out.


The cookie itself is the perfect consistency - not too hard when you bite into it, that all the filling oozes out, and not chewy either - they're soft with a bit of a sandy texture.

The Nutella filling, already made so you don't have to dirty more dishes (although you could make your own if you wanted to), complements the cookie wonderfully. If you don't have Nutella, substitute raspberry jam.


Hazelnut Sandwich Cookies
adapted slightly from A Passion for Desserts by Emily Luchetti
Makes about 45 cookies

1/2 cup hazelnuts, toasted and skins removed
1 1/2 cups all-purpose flour
10 tablespoons unsalted butter, softened
2 ounces cream cheese
2/3 cup sugar
1 large egg
Pinch of salt
1 teaspoon baking powder
3/4 cup Nutella or your favorite jam, or as needed

Directions
1. To toast and skin the hazelnuts: Preheat oven to 350° F. In a baking pan, toast hazelnuts in one layer in middle of oven 10 to 15 minutes, or until lightly colored and fragrant. Wrap nuts in a kitchen towel and let steam 1 minute. Rub nuts in towel to remove loose skins (don't worry about skins that don't come off) and cool completely. In a food processor, finely grind the hazelnuts with 1/2 cup of the flour.

2. Using an electric mixer on medium speed, beat together the butter, cream cheese, and sugar until light in color and smooth, 1 minute with a stand mixer or 2 minutes with a handheld mixer. Add the egg and mix until combined.

3. On low speed, add the ground hazelnuts, the remaining flour, the salt, and the baking powder and mix until smooth. Wrap the dough in plastic wrap and refrigerate for at least 1 hour.

4. Divide the dough into 4 pieces. On a lightly sugared work surface, roll the dough into 4 logs, between 1 and 1 1/4 inches in diameter. Place the logs in the freezer for at least 1 hour until firm. (Note: because the dough is kept frozen, you can bake a few as needed and keep the remaining dough in the freezer. Perfect for unexpected visitors or a short-notice gift.)

5. Preheat the oven to 350°F (175°C). Line 2 baking sheets with parchment paper.

6. Slice the dough into 1/4-inch-thick rounds. Place on the prepared baking sheets about 2 inches apart and bake until golden brown around the edges, about 8 minutes. Let cool to room temperature.

7. Sandwich 2 cookies together using about 1 teaspoon of Nutella or jam for each.

Planning ahead: The cookie dough can be made several days in advance and kept frozen. The cookies can be baked several days in advance (without the filling). Store at room temperature in an airtight container. Sandwich the cookies the day you plan to serve them.

LinkWithin

Related Posts Widget for Blogs by LinkWithin