Showing posts with label Breakfast/Muffins/Sweet Rolls. Show all posts

Saturday, September 28, 2013

Banana Walnut Bran Muffins


Here's another use for those overripe bananas on your counter or in your freezer.  I really enjoyed them.  They were stick-to-your-ribs hearty, but still very tasty.  Great for a grab-and-go breakfast on those busy school mornings!  Substitute chocolate chips for the walnuts for a more indulgent treat.

Marzipan Archives:
5 years ago Zucchini Soup

Banana Walnut Bran Muffins
Makes 12-18 muffins

2 1/8 cups (312g) all-purpose flour
2 1/4 cups (160g) wheat bran
2 tsp baking soda
1 3/4 tsp kosher salt
2 1/2 cups (500g) mashed banana
1 cup + 2 tablespoons (250g) unsalted butter at room temperature
2 large (100g) eggs
1 cup (200g) brown sugar
1 1/3 cups (150g) walnuts, toasted and coarsely chopped
1 cup (150g) sliced ripe banana (I omitted)

Preheat oven to 350 degrees F.  Grease 12-18 muffin cups or line with muffin liners depending on how full you fill the cups and how big you want your muffins to be (I filled the cups to the top and it made about 18 smaller muffins.)

In a large bowl, whisk together the flour, wheat bran, baking soda, and salt and set aside.

In another bowl with a mixer, beat the mashed banana and softened butter until mixed.  The mixture will look lumpy and curdled.  Add the eggs and brown sugar and mix until completely combined.

Fold the dry ingredients into the banana mixture and stir just until combined, then gently fold in the walnut pieces and banana slices.

Scoop the batter into the muffin cups.  Bake for 23-25 minutes or until the muffin is lightly browned and a toothpick inserted into the center comes out clean.

Cool in the pan 5 minutes, then remove from the pan and place on a wire rack to cool completely.  Serve or freeze within 8 hours.


Monday, November 7, 2011

Raspberry Buttermilk Cake


If you're looking for a quick, easy and delicious cake to have for breakfast or tea, look no further. This is a delicious cake that from start to finish took less than an hour, and only requires about 15 minutes of active time.


It's seriously one of the easiest things I've ever made. And this little cake is so versatile. Substitute any berry or fruit you desire, or add a little lemon zest if you want. Dust with powdered sugar, or leave it plain. Any way you make it, you'll love this cake!


Raspberry Buttermilk Cake
from Melissa Robert's recipe in Gourmet | June 2009

Serves 8-10

1 cup all-purpose flour
1/2 teaspoon baking powder
1/2 teaspoon baking soda
1/4 teaspoon salt
1/2 stick unsalted butter, softened
2/3 cup sugar

1/2 teaspoon pure vanilla extract
1 large egg
1/2 cup well-shaken buttermilk
1 cup fresh raspberries (about 5 ounces)
1 1/2 tablespoons coarse sugar such as turbinado or raw sugar

Preheat oven to 400°F with rack in middle. Butter and flour a 9-inch round cake pan.

Whisk together flour, baking powder, baking soda, and salt.

Beat butter and 2/3 cup sugar with an electric mixer at medium-high speed until pale and fluffy, about 2 minutes, then beat in vanilla. Add egg and beat well.

At low speed, mix in flour mixture in 3 batches, alternating with buttermilk, beginning and ending with flour, and mixing until just combined.

Spoon batter into cake pan, smoothing top. Scatter raspberries evenly over top and sprinkle with 1 1/2 tablespoons coarse sugar.

Bake until cake is golden and a wooden pick inserted into center comes out clean, 25 to 30 minutes. Cool in pan 10 minutes, then turn out onto a rack and cool to warm, 10 to 15 minutes more. Invert onto a plate. Sprinkle with powdered sugar, if desired.

Monday, October 3, 2011

Joanne Chang's Perfect Croissants


My kids are getting to the age where school is becoming more challenging and they are experiencing some failures along the way. They don't realize that these failures are teaching them valuable lessons that they just can't learn any other way. As a mom, it's hard to watch them struggle and I try to guide them as best I can. When they face obstacles, persevere, and succeed, the pride and confidence that they have in themselves is one of the most rewarding things that I have witnessed as a parent.

Failure is discouraging at any age, but you learn a little bit with each mistake and hopefully you try again until you find success. Baking is no exception. It comes with many failures and no matter how long you've been baking, there are still times when things just don't work out.


Take the croissant. Until now, the perfect croissant had evaded me. Everything I'd read about croissants (and laminated doughs in general) told me that they can be tricky. I tried a croissant recipe once before and thought all was well, until I baked them and the butter streamed out and pooled on the baking sheet in a buttery mess. No one could tell when I served them (they were still pretty tasty), but I knew something had gone terribly wrong. I needed to try again, but I lacked the confidence until I came upon this recipe.

When I picked up Flour from my library, I expected that I would try to make Joanne Chang's Sticky Sticky Buns, made famous when they kicked Bobby Flay's buns on The Food Network Throwdown. Instead, I decided to try the croissants - and I had to do it before the book needed to be returned. There was no time for procrastinating.

I tried not to be dissuaded by the 4 pages of instructions - it was daunting at first glance. But after reading through the recipe, I realized that 4 pages of instructions were a good thing. The directions were clear and precise and spelled out every turn and every measurement of the dough every step of the way. I could do this (and you can too)! It could have been labeled "Making Croissants for Dummies", and it's exactly what I needed!


Laminated dough is essentially dough which is wrapped around a block of butter. This dough is repeatedly folded and rolled out to form many, many thin layers of butter and dough. When the dough is baked, the moisture from the butter layers is released and the steam creates a light and flaky, delicious pastry. Other laminated doughs include puff pastry and danish dough.

Croissants can be paired equally well with savory and sweet accompaniments. Of course, there's pain au chocolat, my first choice when I go to a great bakery, or a croissant with homemade strawberry jam, but Nutella on a fresh warm croissant is a match made in heaven.

As for the savory - the simplest chicken salad is transcended by sandwiching it between two halves of a croissant. I may or may not have eaten all of these variations on a croissant all in one day. And I may or may not have been compelled to go on a diet the very next day. I have no regrets - it was worth every bite. In fact, I may be more proud of these little pastries than anything else that's ever come out of my kitchen.

Is there anything that you just don't have the confidence to bake? Maybe something you tried before that was not successful? Leave a comment and let me know!


Croissants
from Flour by Joanne Chang

This tip from Joanne Chang could be a game changer in your croissant success so please read the following carefully and perhaps you can learn from my mistake: Each time the recipe tells you to roll out the dough, first press up and down all across the dough in both directions with your rolling pin to flatten it, and then begin to roll it out to the size indicated. This preserves the layers of butter within the dough and prevents the butter from oozing out the sides of the dough when you roll it out, which in turn will prevent the butter from pooling onto your cookie sheet when you bake them. Believe me when I tell you that I read a LOT of recipes and none ever told me to do that. Thank you Joanne.

1 cup plus 2 tablespoons milk (260 grams), at room temperature
1 package (2 1/2 teaspoons) active dry yeast
2 1/4 cups (315 grams) unbleached all-purpose flour
2/3 cup (100 grams) bread flour
2 teaspoons kosher salt
1/4 cup (50 grams) sugar
2 tablespoons (1/4 stick) unsalted butter, very soft, plus 1 cup (2 sticks) cold unsalted butter
1 egg

Using a stand mixer fitted with the dough hook (or a hand mixer), mix together the milk and yeast on low speed for 5 to 10 seconds to dissolve the yeast. Add the all-purpose flour, bread flour, salt, sugar, and the 2 tablespoons soft butter and continue to mix on low speed for 3 to 4 minutes, or until the butter is fully incorporated and the dough is smooth. Remove the dough from the mixer bowl, place it on a tray, and cover it loosely with plastic wrap. This dough block is called the détrempe. Place the tray in the refrigerator for at least 6 hours or for up to 12 hours. The dough will firm up and the yeast will take some action and proof a bit.

At least 6 hours later, put the détrempe on a well-floured work surface, and then press down firmly to create about an 8-inch square. Rotate the square so that, as you face it, it looks like a baseball diamond. Use the sides of your palm to mark a 7-inch square in the middle of the diamond, creating triangular flaps at the 4 corners.

As best you can, roll out each of the triangular flaps into a squarish shape (about 3-inch squares). You will have to tug a bit at the edges to pull the flap into a square as you roll. When you are done, the entire piece of dough will be about 12 inches wide and tall, with a 6-inch-square lump in the middle and one squarish flap off of each side of that lump. The 6-inch-square lump will be about 1 inch thick, and the 4 squarish flaps will be about 1/4 inch thick.

Place the 1 cup cold butter in the stand mixer fitted with the paddle attachment, and beat on medium speed for 15 to 20 seconds to break up the butter, yet still keep it quite cold. (Alternatively, pound the cold butter with a rolling pin to soften it and shape it into a 6-inch square.) Scrape the butter out of the bowl directly onto the 6-inch-square lump in the center of the dough, and pat it with your fingers into a square that covers the 6-inch-square lump. The butter should be about the same consistency as the dough.

Fold one of the flaps up and stretch it over the butter square to cover it entirely. (The dough is quite stretchy, so you can stretch it to cover the butter completely.) Fold and stretch a second flap over the first flap, then repeat with the third and then the fourth flap. Tug at the flaps to keep them in a square that covers the butter. You will now have a butter square that is entirely encased in dough above and below. Using the palms of both hands, firmly press down on this dough package to create about an 8-inch square.

When the dough package is relatively flat, switch to a rolling pin and continue to flatten the dough by pressing up and down on the package with the pin. Roll out the dough into a rectangle about 16 by 10 inches. As you work, flour the dough and the work surface as needed to prevent the rolling pin from sticking to the dough.

Position the rectangle so a long side is facing you. Using a bench scraper or a knife, score the rectangle in half vertically, to create two 10-by-8-inch rectangles. Brush any loose flour off the dough. Lift the right side of the dough and fold it in, so the right edge meets the scored line in the center. Then lift the left side of the dough and fold it in, so the left edge also meets the scored line in the center and meets the right edge, as well. Square off the folds as much as possible so the edges meet neatly, then fold the right half of the dough on top of the left half. This is called a book fold. Your dough will now be 4 inches wide, 10 inches from top to bottom, and about 2 inches thick. Rotate the dough pile clockwise 90 degrees; it will now be 10 inches wide and 4 inches from top to bottom. The process of folding and rotating is called “turning the dough.”

Now, roll out the dough into a rectangle about 18 inches wide and 8 inches from top to bottom. The dough might be a little sticky, so, again, be sure to flour the dough and the work surface as needed to prevent the pin from sticking. Using the bench scraper or knife, this time lightly score the rectangle vertically into thirds. Each third will be 6 inches wide and 8 inches from top to bottom. Brush any loose flour off the dough. Take the right third of the dough and flip it over onto the middle third. Then take the left third of the dough and flip that third on top of the middle and right thirds. (This is like folding a business letter.) Your dough should now be about 6 inches wide, 8 inches from top to bottom, and about 2 inches thick. Rotate the dough pile clockwise 90 degrees; it will now be 8 inches wide and 6 inches from top to bottom.

Place the dough on a baking sheet and cover it completely with plastic wrap, tucking the plastic under the dough as if you are tucking it into bed. Refrigerate for at least 1 1/2 hours and no more than 3 hours.

Remove the dough from the refrigerator and place it on a well-floured work surface, with a long side of the rectangle facing you. This time roll out the dough into a rectangle about 18 inches wide and 12 inches from top to bottom. If the dough resists rolling, let it sit and relax for up to 15 minutes and roll again. Once again score it vertically into thirds, and then give it another letter fold (fold the right third onto the middle third, and fold the left third on top of that). Return the dough to the baking sheet and again cover it completely with plastic wrap. This time let it rest in the refrigerator for at least 4 hours or up to 16 hours.

Line a baking sheet with parchment paper.

Remove the dough from the refrigerator, and place it once again on a well-floured work surface, with a long side of the rectangle facing you. Roll it out into a long, narrow rectangle about 30 inches wide and 6 to 7 inches from top to bottom.

Starting at the bottom left corner of the rectangle, make a mark along the bottom edge of the rectangle every 5 inches until you reach the bottom right corner. Then, starting at the top left corner of the rectangle, mark along the top edge exactly midway between the notches on the bottom edge. Your first notch will be 2 1/2 inches from the left corner and then continue to notch every 5 inches. Use a chef’s knife to cut the dough rectangle into triangles by cutting on the diagonal from notch to notch. You will end up with 10 triangles and a few edge pieces of scrap.

Starting at the edge, cut a 1-inch vertical slit at the center of the base of each triangle. Turn all of the triangles so the base is at the top, farthest from you, and the point is directed toward you. Pick up a triangle and hold it by its base with one hand and gently stretch it and stroke it lengthwise with your other hand to elongate it to 10 to 12 inches in length.

Place the lengthened triangle on the work surface. Fan open the base at the 1-inch slit into a Y, and then roll the dough down to the point. Place the rolled triangle, point-side down, on the parchment-lined baking sheet, so the point is touching the parchment. Repeat with the remaining dough triangles, spacing the pastries 2 to 3 inches apart on the baking sheet.

Cover the croissants lightly with plastic wrap and leave them in a warm place for 2 to 2 1/2 hours, or until they are somewhat poufy and airy.

In a small bowl, whisk the egg until blended. Gently brush the croissants lightly with the egg.

If you are baking the croissants the same day, cover them again with plastic wrap and let them finish proofing for another 1 hour to 1 hour and 30 minutes. They will get even more poufy and jiggly when you nudge them.

Position a rack in the center of the oven, and heat the oven to 400°F.

When the croissants are done proofing, brush them again with the beaten egg. Bake at 400°F for the first 5 minutes, then turn down the oven to 350°F and bake for another 25 to 35 minutes (for a total baking time of 30 to 40 minutes), or until they are golden brown all over. Let cool on the pan on a wire rack for 30 to 40 minutes. Serve warm.

If you are baking the croissants the next day, after the first 2- to 2 ½-hour proof, brush them lightly with the beaten egg as directed, wrap them in plastic wrap and place in the refrigerator. The next morning, remove them from the refrigerator and let them sit at room temperature for 30 to 40 minutes. Then heat the oven, brush them again with the beaten egg, and bake as directed.

The croissants taste best the day they are baked. They can be stored in an airtight container at room temperature overnight, and then refreshed in a 300°F oven for 5 to 8 minutes before serving.

Saturday, August 20, 2011

Have you tried...Wheat Chex with Peaches?


I love, love, love peaches. But I'm picky. They have to be perfectly ripe and juicy, not mealy (of course), in season, and grown locally. I buy my peaches from Soergel's and let them sit on the counter until they are perfectly ripe (the fruit yields to gentle pressure and it is no longer green at the stem end). If you're not ready to eat them when they become perfectly ripe, they can be placed in the fridge for a few days longer.

I don't generally like my peaches cooked, like in a pie or a muffin. I think that some of the flavor is lost in the cooking as well as the texture that I love.

My favorite way to eat a peach is for breakfast with Wheat Chex and whole milk and maybe just a sprinkling of sugar, but often the sugar is not needed. There must be enough peaches in the bowl so that there is peach in every bite. It's a bonus if the peaches are cold from the fridge.  So delicious.

Saturday, June 18, 2011

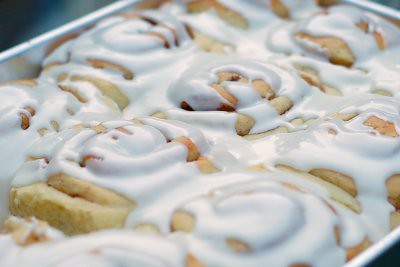
Cream Cheese Cinnamon Rolls


I saw this recipe on the Saveur website, and in about 10 minutes, I found myself making cinnamon rolls...again. I can't resist them.

And I can't seem to make the same recipe each time I make them either. But they're all so good, and this one is no exception.


Cinnamon rolls fall into the "enriched dough" category of bread doughs. That means that in addition to flour, water, salt and yeast, there may also be things like butter, milk, eggs and sugar in the dough. This dough takes it a step further and incorporates cream cheese into the final dough, much as you would incorporate a butter block into a croissant or puff pastry dough, by folding the dough around the cream cheese creating many layers of cream cheese within the dough itself.

The result is a rich, flavorful, and tender cinnamon roll with easy and delicious icing. This recipe ranks up there with the very best. I bet Dad would love these for Father's Day!


Cream Cheese Cinnamon Rolls
from Saveur

Makes 8 Large Rolls

For the dough:
1 1⁄4-oz. package active dry yeast
1⁄2 tsp. plus 1⁄4 cup sugar
1⁄2 cup milk, at room temperature
2 tbsp. light brown sugar
1⁄2 tsp. vanilla extract
1 egg
1 egg yolk
2 3⁄4 cups flour, sifted, plus
more for kneading
3⁄4 tsp. fine salt
8 tbsp. unsalted butter, at room
temperature, plus more for the pan

For the filling:
1⁄2 cup sugar
1⁄4 cup dark brown sugar
1⁄4 cup finely chopped pecans
1⁄4 cup finely chopped walnuts
1⁄4 cup raisins
1 tbsp. ground cinnamon
1⁄2 tsp. fine salt
1⁄8 tsp. ground cloves
2 tbsp. maple syrup
4 oz. cream cheese, at room temperature
8 tbsp. unsalted butter, melted

For the icing:
2 cups confectioners' sugar
1⁄4 cup buttermilk

1. Make the dough: In the bowl of a standing mixer fitted with a hook, combine yeast, 1⁄2 tsp. of the sugar, and 1⁄4 cup water heated to 115°. Stir to combine and let sit until foamy, about 10 minutes. Add remaining sugar, milk, light brown sugar, vanilla, egg, and egg yolk. Beat on low speed until thoroughly combined, 1 minute. Turn mixer off and add the flour and salt. Mix on medium speed until the dough just comes together. Turn mixer speed to high and knead dough for 4 minutes. Add the butter and continue kneading until dough is smooth and pulls away from the side of the bowl, about 6 minutes. Remove bowl from the mixer, cover with plastic wrap, and set aside in a warm place. Let the dough rise for 1 1⁄2–2 hours, until it has doubled in size.

2. Meanwhile, make the filling: Combine the sugar, dark brown sugar, pecans, walnuts, raisins, cinnamon, salt, and cloves in a large bowl; stir to combine. Stir in the maple syrup. Set filling aside.

3. Punch the dough down and turn it out onto a heavily floured surface. Gently knead the dough until it's no longer sticky, adding more flour as necessary, about 1 minute. Using a floured rolling pin, roll the dough into a 10" x 10" square. In a small bowl, beat the cream cheese with a rubber spatula until it's smooth and spreadable. Spread the cream cheese evenly over the dough square; then fold square into thirds as you would fold a letter to fit it into an envelope. Take the open ends of the resulting rectangle and fold into thirds again, to make a smaller dough square. Invert the dough so that the seam is face down and, using the rolling pin, gently roll into a 10" x 20" rectangle.

4. Turn the dough so that the short sides are parallel to you. Brush the top of the dough with half of the melted butter. Drizzle the reserved filling over the dough, leaving a 1" border at the edge farthest away from you. Lightly press the filling into the dough. Using your hands, lift up the bottom edge of the dough and roll it forward into a tight cylinder. Place dough cylinder, seam side down, on a cutting board and, using a thin, sharp knife, trim off the ends; cut cylinder crosswise into 8 equal-size slices. Nestle the slices, cut sides up and evenly spaced from one another, into a buttered 9" x 13" light-colored metal baking pan. Cover pan with plastic wrap and set aside in a warm place to let rise for 2 hours. (Alternatively, the rolls may be refrigerated overnight.)

5. Heat oven to 375°. Uncover the rolls. (If refrigerated, let them sit at room temperature for 15 minutes.) Bake until golden brown and a toothpick inserted in the center of the rolls comes out clean, about 30 minutes.

6. Make the icing: While the rolls are baking, whisk together the sugar and buttermilk in a small bowl until smooth.

7. Transfer the pan of cinnamon rolls to a cooling rack; brush with remaining melted butter. Let cool for 5 minutes. Dip the tines of a fork into the icing and drizzle all over the rolls. Serve immediately.

Saturday, May 28, 2011

Currant Cream Scones and Homemade Clotted Cream


Tea and scones are a quintessential combination. Add some clotted cream and jam, and you could swear you were in England. The compliments I received when I made these scones tell me that I'm not the only one who loved these. The texture is perfect and the currants give them a little extra sweetness.


The clotted cream was a new adventure for me. I was asked to make scones and provide clotted cream for 80 for an annual Spring Tea. I went searching for clotted cream and found out that it is quite expensive to buy already prepared. I had to find a way to make it myself.

Most clotted cream recipes I found told me that I had to find heavy cream which was not ultra-pasteurized - this can be difficult to find easily.  Whole Foods and other natural food stores are your best bet.

I read that someone tried adding a little buttermilk to the ultra-pasteurized cream and it worked wonderfully. Then I remembered that you make homemade creme fraiche by adding buttermilk to cream and then it thickens the cream after sitting out at room temperature for a day or two. It made sense, so I tried the buttermilk method and it worked for me too. Just remember to plan ahead, as the cream needs to cook for 12 hours and then chill for another 4-8 hours. The good thing is, there's not much more to it than that.


Currant Cream Scones
from The Art and Soul of Baking by Cindy Mushet
Note: These scones are made with cream as opposed to my other favorite scone recipe made with buttermilk. In fact, the recipes are almost identical, which I only realized when I tripled the cream recipe and doubled the buttermilk recipe. Both recipes make excellent scones, so try both and decide which one you like better!

Another note: if using currants, look them over and try to remove any itty bitty stems that you see.

Another note: these lend themselves well to making ahead. You can freeze or refrigerate the unbaked scones (directions below), but try to bake the scones within 4 hours of serving for best results.

2 cups (10 oz) all-purpose flour
1/4 cup (1 3/4 oz) granulated sugar
2 1/2 teaspoons baking powder
1/4 teaspoon salt
1 stick butter (4 oz) (cold, cut into pieces)
1 cup (8 oz) heavy whipping cream (cold)
1/2 cup (7 ounces) dried currants (if not soft and pliable, soak in boiling water for 5 minutes, drain and pat dry)

For the Topping:
1 egg, lightly beaten with a teaspoon of water (egg wash)
Turbinado sugar or other coarse sugar for sprinkling

1. Preheat oven to 425 degrees F.

2. Whisk together the flour, sugar, baking powder and salt in a large bowl.

3. Using your fingertips, work the butter into the flour until it resembles coarse cornmeal. A few larger pieces are fine and will actually add to the flakiness of the scones.

4. Stir in the currants, then add the cream. Blend together quickly using a spatula until it just comes together. Do not over-mix. Transfer the dough to a lightly floured surface and knead only enough for the dough to hold together - about 5 to 10 times.

5. Divide the dough in half and shape each into a flattened circle about an inch thick. Cut each circle into 6 wedges. I use a metal pastry scraper to cut the dough. Alternatively, you can shape the dough into one larger square, again about an inch thick and cut that into smaller squares of any size you like. At this point, you could wrap the circle of scones in plastic and freeze until you need them, up to a month. You do not need to thaw the scones before baking them.

6. Transfer the fresh or frozen scones to a parchment or Silpat-lined baking sheet. If making these the night before, cover the baking sheet with plastic wrap and place the entire sheet in the refrigerator overnight. When ready to bake, brush each scone with egg wash using a pastry brush and sprinkle with coarse sugar.

8. Bake for 14-16 minutes until golden brown and firm when pressed lightly on top.


Homemade Clotted Cream
makes about 2 cups

4 cups heavy cream
1/4 cup buttermilk
a pinch of salt (optional)

Place the heavy cream and buttermilk in an enameled cast-iron pot or other heavy-duty pot with a lid. The cream and buttermilk mixture should ideally be 2 to 3 inches deep, so adjust your cream amount or your pot size accordingly.

Place the pot, covered, into the oven set at 180 degrees F and cook for 10-12 hours, or until the cream on top looks a dark yellow color (see #1 above).
Note: some ovens will turn themselves off after a period of time, so check it every once in a while to make sure it is still on.

After 10-12 hours, remove the pot from the oven and allow to cool. Refrigerate overnight, or until well chilled.

Using a spatula, remove the thick clotted cream from the surface and place into a bowl. Use a large slotted spoon to remove any remaining thickened cream from the pot. The cream which is left in the pot may be refrigerated and used in any recipe calling for heavy cream.

Add a pinch of salt, and vigorously stir the clotted cream in the bowl, adding more of the leftover liquid cream to reach the desired consistency, until the mixture is fairly smooth and uniform in texture.

Serve with scones and jam.

Tuesday, January 4, 2011

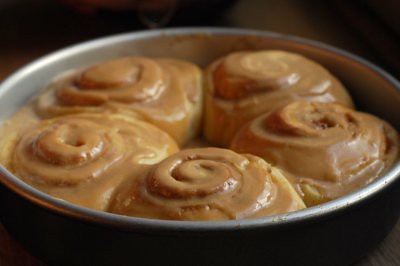
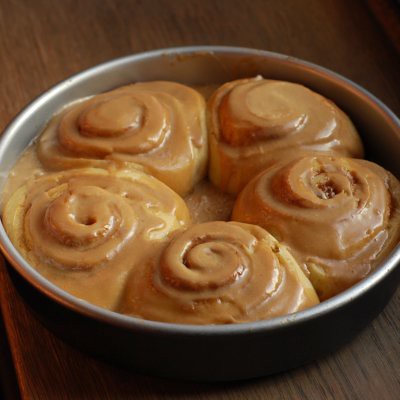
Pioneer Woman's Cinnamon Rolls

Ree's Cinnamon Rolls

I have no less than 18 cinnamon roll recipes bookmarked on my computer. Eventually I'll try them all...


Then there's Pioneer Woman's Cinnamon Rolls. You know I had to try them. Anyone who unequivocally claims that they're cinnamon roll is the best - well, how could I resist?

Ree's Cinnamon Rolls

I made them once as written, and then tried them with butter replacing the oil. It was a slight difference, but I think the recipe made with butter tastes just a bit better.

These are some of the easiest I've made, with no unusual ingredients, except maybe the maple flavoring used in the icing. The addition of leavenings (baking soda and baking powder) was a new concept for me. The dough is easy to work with and delicious. Seeing all the blog posts on these cinnamon rolls tells me that this recipe works - they all look identical!

As Ree says, don't skimp in the icing - let it pour all over. It's a good thing!

Are they the best?

Hmmm...I've never met a cinnamon roll I didn't like, but I'll have to try the other 18 recipes to know for sure... do you have a favorite cinnamon roll recipe? Please share! There's always room for one more cinnamon roll recipe!

Ree's Cinnamon Rolls

Pioneer Woman's Cinnamon Rolls
Makes about 24 rolls

Ingredients:
1 quart whole milk
1 cup vegetable oil or butter
1 cup sugar
2 packages active dry yeast (5 teaspoons)
8 cups (plus 1 cup extra, separated) all-purpose flour
1 teaspoon (heaping) baking powder
1 teaspoon (scant) baking soda
1 Tablespoon (heaping) salt
1 cup butter, melted or warm room temperature
2 cups Sugar
Generous Sprinkling Of Cinnamon
_____
MAPLE FROSTING:
1 pound Powdered Sugar
2 teaspoons Maple Flavoring
½ cups Milk
¼ cups Melted Butter
¼ cups Brewed Coffee
⅛ teaspoons Salt

For the dough:
Mix the milk, vegetable oil (or butter) and sugar in a pan. Scald the mixture (heat until just before the boiling point). Turn off heat, transfer the mixture to a bowl of a heavy duty mixer, and leave to cool 45 minutes to 1 hour. When the mixture is lukewarm to warm, but NOT hot, sprinkle in both packages of Active Dry Yeast. Let this sit for a minute. Then add 8 cups of all-purpose flour. Stir mixture together using paddle attachment. Cover and let rise for at least an hour.

After rising for at least an hour, add 1 more cup of flour, the baking powder, baking soda and salt. Stir mixture together. (At this point, you could cover the dough and put it in the fridge until you need it – overnight or even a day or two, if necessary. Just keep your eye on it and if it starts to overflow out of the pan, just punch it down).

When ready to prepare rolls: Sprinkle rolling surface generously with flour. Take half the dough and form a rough rectangle. Then roll the dough thin, maintaining a general rectangular shape. Drizzle 1/2 cup melted butter over the dough, or if using room temperature butter, you can spread it all over the dough with your fingertips or the butter wrapper. Sprinkle 1 cup of sugar over the butter followed by a generous sprinkling of cinnamon.

Now, starting at the opposite end, begin rolling the dough in a neat line toward you. Keep the roll relatively tight as you go. Next, pinch the seam of the roll to seal it.

Spread 1 tablespoon of melted butter in each of 4 round foil cake or 9" pie pans, or two 9x13 pans. Then begin cutting the rolls approximately ¾ to 1 inch thick and laying them in the buttered pans - you should get about 12 rolls from each half of dough.

Repeat this process with the other half of the dough. Let the rolls rise for 20 to 30 minutes, then bake at 375 degrees until light golden brown, about 15 to 18 minutes.

For the frosting:
Mix together all ingredients listed and stir well until smooth. It should be thick but pourable. Taste and adjust as needed. Generously drizzle over the warm rolls.

Monday, October 11, 2010

Blueberry Crumb Cake

Blueberry Crumb Cake

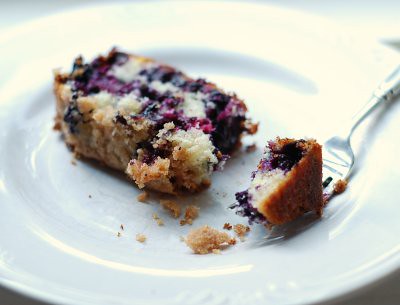
You've got to put this recipe into your "to try" file. You have one of those, right? This cake is absolutely delicious! It is perfection on a plate. And it's easy to make. I'm going to try it again today with raspberries. I hope it lasts longer than the blueberry, but I doubt it.

Blueberry Crumb Cake
from Maida Heatter's Cakes

2 cups fresh or frozen blueberries

Topping:
1/3 cup sifted flour
1/2 cup sugar
1 tsp cinnamon
2 ounces butter

Cake:
2 cups sifted flour
2 tsp baking powder
1/2 tsp salt
2 ounces butter
1 tsp vanilla
1/4 cup sugar
1 egg
1/2 cup milk
zest of one lemon
1/2 cup walnuts, chopped (optional)

Preheat oven to 375. Butter or spray a 9-inch square baking pan. Coat it well with fine dry bread crumbs.
For the topping:
In a small bowl, mix the flour, sugar, and cinnamon. Cut in the butter with a pastry blender or your fingertips until the mixture resembles coarse crumbs. Set aside.
For the cake:
Whisk together the flour, baking powder, and salt in a bowl. Place the blueberries in a large bowl. Sprinkle the blueberries with about 1 1/2 T of the flour mixture. Set aside the flour mixture and the blueberries.
In the bowl of an electric mixer, cream the butter. Beat in the vanilla and sugar and beat for one minute. Add the egg and beat until incorporated. Add the dry ingredients and the milk alternately in two or three additions, scraping the bowl when necessary.
Stir in the lemon zest and pour the mixture over the floured blueberries and gently fold the blueberries into the batter.
Fill the prepared pan with the batter and even out the top. Sprinkle walnuts over the top, then the reserved topping.
Bake 50 minutes or until top is well browned. Cool in the pan for 30 minutes before serving.

Sunday, August 29, 2010

Maida Heatter's Cinnamon Rolls

Cinnamon Rolls

Just like brownies, I've never met a cinnamon roll I didn't like. I keep trying new recipes and I can't decide which one I like the best. This recipe comes from Maida Heatter's Great American Desserts Cookbook. The dough is easy, doesn't contain an exorbitant amount of butter (like brioche dough seems to). This recipe call for 2 sticks of butter for 12 rolls, and the one today has only 1/2 stick. And this recipe has mashed potatoes in it which keeps the dough moist for days.

I made these rolls exactly as written, except I used a 9x13 pan instead of a 10 1/2 X 15 jelly roll pan and I omitted the raisins (forgot them actually). I thought the almond extract in the icing was unusual and I'm glad I tried it, although I'd most likely stick with plain vanilla next time, or maybe substitute orange or maple flavoring. I will definitely make these again, but next time I will add more cinnamon filling, omit the nutmeg, and use a thinned cream cheese icing like the one I used here.


Cinnamon Buns
from Book of Great American Desserts by Maida Heatter

Note: Maida goes into great detail when writing out her recipes with helpful tips and hints. I have shortened the instructions to include just the basics...

1 cup mashed potatoes, instant or real, from about 3/4 lb potatoes
1 cup milk
1/2 cup plus 1 tablespoon sugar
1/2 teaspoon salt
2 ounces (1/2 stick) unsalted butter, cut up
1/4 cup warm water or potato cooking water, 105-115 degrees F
2 1/4 teaspoons active dry yeast
1 large egg
1 teaspoon vanilla extract
about 4 1/2 cups all-purpose flour

Heat the mashed potatoes and milk in a small saucepan. Stir in the 1/2 cup sugar, the salt, and the butter. Heat and stir until the mixture is 105-115 degrees F. The butter does not need to melt completely.
In a 1-cup glass liquid measuring cup, stir the warm water with the remaining 1 T sugar, sprinkle on the yeast and stir briefly with a knife. Set aside for about 10 minutes or until the mixture rises to the 3/4 cup line.
In a small bowl, beat the egg and vanilla.
Transfer the potato mixture to the bowl of an electric mixer fitted with the paddle attachment. Add the yeast mixture and the egg. On low speed, gradually add 3 cups of flour. Beat on low speed for a minute or two. Remove the paddle attachment and replace with the dough hook. Add and additional 1 1/4 cups flour. Continue to knead on low speed for about 5 minutes, adding up to 3/4 cup additional flour to make a dough that is not too dry and not too sticky. The dough should stick to the bottom of the bowl, but not to the sides of the bowl while kneading.
Place the dough in a bowl sprayed with Pam and then lightly spray the top of the dough as well. Cover with plastic wrap and place it in a warm place to rise for 1 to 1 1/2 hours until the dough has doubled in volume.
Punch the dough down and transfer to a floured board. Cover it loosely with plastic wrap and let rest for 10 minutes. Meanwhile, spray a 9x13 pan with cooking spray.
Roll the dough to an 18-inch square with floured rolling pin. Spread the dough with butter and sprinkle on the cinnamon sugar and the raisins, if using. Roll the dough like a jelly roll and pinch the seam to close. Shape the log with your hands to obtain an evenly thick log. With a sharp knife (floured if sticking), cut the dough into 12 even pieces. Place the rounds into the 9x13 pan with 3 rows of 4 buns. Cover loosely and allow to rise for one hour. Meanwhile, preheat the oven to 375 degrees F. Bake the buns for 20 minutes until the buns are nicely but lightly browned. Let stand for 5 minutes. Drizzle with glaze.

Filling
note: this is the original recipe, and next time I will double the cinnamon and sugar and omit the nutmeg.

2 tablespoons granulated sugar
1 1/2 teaspoons cinnamon
1/4 teaspoon nutmeg
1 ounce butter, melted
5 ounces dark raisins, steamed

Melt the butter in a bowl. In another bowl, combine the cinnamon, sugar, and nutmeg.

Glaze
1 tablespoon unsalted butter at room temperature
1 cup confectioners sugar
pinch of salt
1/2 teaspoon vanilla extract
a few drops almond extract
about 2 tablespoons cream

Beat or whisk all ingredients together until smooth. Add more cream or confectioners sugar to adjust the consistency. It should be thick but pourable.


Friday, February 12, 2010

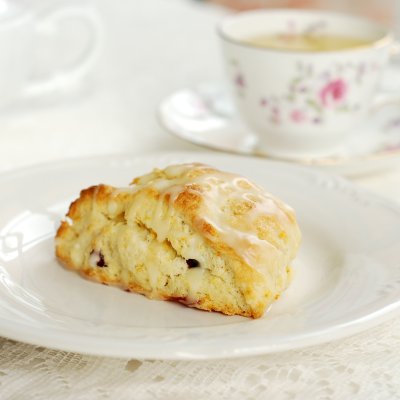
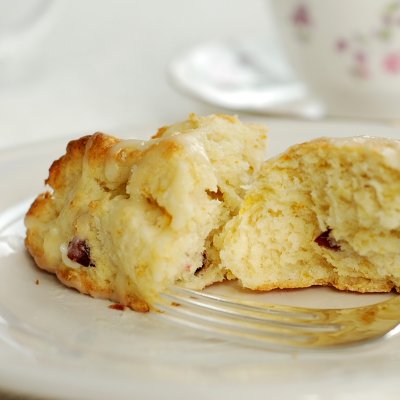
Cranberry-Orange Scones

Cranberry-Orange Scones

Oh yes, Cranberry Orange Scones. These are flaky, moist, and slightly addictive.  The recipe comes from Baking with Julia and they are so simple to make. The orange zest in the dough and in the glaze makes these ultra delicious! Serve these to your sweetie for breakfast on Valentine's Day and it will be a special day indeed!

Cranberry-Orange Scones


Buttermilk Scones
adapted from a Marion Cunningham recipe from Baking with Julia
Makes 12 scones

3 cups all-purpose flour
1/3 cup sugar
2 1/2 teaspoons baking powder
1/2 teaspoon baking soda
3/4 teaspoon salt
1 1/2 sticks (6 ounces) cold unsalted butter, cut into small pieces
1 cup buttermilk
1 tablespoon orange zest
1/2 cup dried cranberries

Preheat the oven to 425 degrees F.

In a medium bowl, whisk to combine the flour, sugar, baking powder, baking soda, and salt. Add the cold butter pieces and using your fingertips, work the butter into the flour mixture until the mixture resembles coarse cornmeal with a few larger pieces. Add 1 cup buttermilk, cranberries, and orange zest and mix with a fork until ingredients are just moistened. If the dough looks dry, add another tablespoon of buttermilk. Gather the dough into a ball, pressing it gently so that it holds together, and turn it out onto a lightly floured surface. Knead it briefly, about 10 times or so, and then cut the dough in half.

On a lightly floured surface, roll one piece of dough into a 1/2-inch thick circle that is about 7 inches across. If you are going to bake the scones right away, brush the dough with heavy cream and sprinkle with coarse or regular sugar (or omit the sugar and glaze the scones after they are baked - glaze recipe below), and cut the circle into 6 wedges. Place the scones on an ungreased cookie sheet (I use a Silpat mat). Repeat with the other half of the dough. Bake the scones for 10-12 minutes until the tops and bottoms are golden brown. Transfer the scones to a rack to cool slightly before serving.

To make ahead the night before:
Cut the dough circle into 6 wedges but do not brush with butter or cream and do not sprinkle with sugar. Transfer the triangles to a cookie sheet and cover with plastic wrap and refrigerate overnight. In the morning, brush each triangle with melted butter or cream and sprinkle with sugar (or glaze after baking). Bake 10-12 minutes as above.

To make days ahead: Freeze the dough circles, wrapped in a double layer of plastic wrap for up to two weeks. Thaw the circles overnight in the refrigerator, cut into wedges as above, brush with cream, sprinkle with sugar, (alternatively, glaze the scones after baking) and bake for 10-12 minutes until golden.

Orange Glaze

1 cups sifted confectioners' sugar
2 tablespoons or so of orange juice
fine zest of one orange

Place the sugar in a bowl. Add the orange zest and enough orange juice to make the icing thin enough to drizzle. Add more sugar if too thin and add more juice if too thick. Using a spoon, drizzle the icing over the scones.

Tuesday, January 12, 2010

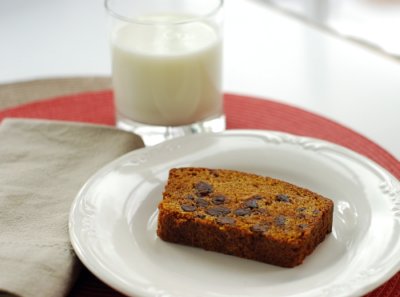
Pumpkin Chocolate Chip Loaf

Pumpkin Chocolate Chip Loaf

I found some pumpkin puree in my freezer and decided to make this Pumpkin Chocolate Chip Loaf from the Baked cookbook. The texture was moist but not oily - perfect really.  Next time I'd probably leave out the chocolate chips and add walnuts or pecans instead because I prefer that flavor combination, but this was delicious too.

One Year Ago: Chocolate Cupcakes with Vanilla Cream Cheese Icing


Pumpkin Chocolate Chip Bread
adapted from Baked: New Frontiers in Baking

3 1/4 cups all purpose flour
2 tsp baking soda
2 tsp cinnamon
1/2 tsp nutmeg
1/2 tsp clove
1/2 tsp ginger
2 tsp salt
1 cup vegetable oil
1 3/4 cups pumpkin puree (15oz can)
3 cups granulated sugar
4 large eggs
1 tsp vanilla extract
2/3 cup water, room temperature
1 cup (12 oz) chocolate chips or chopped semisweet chocolate

Preheat the oven to 350F and position a rack in the middle. Grease and flour two 9x5 inch loaf pans and line the bottoms with parchment paper. Spray the parchment with cooking spray.

In a large bowl, whisk together the flour, baking soda, spices, and salt. Set aside.

In another large bowl, whisk together the oil and pumpkin puree. Add the granulated sugar and whisk to combine. Add the eggs, one at a time, followed by the vanilla extract and water. Mix in the chocolate with a rubber spatula.

Fold the dry ingredients into the wet ingredients until just combined. Do not overmix (and don't worry if you see a few small streaks of flour). Divide into the two pans and bake for 1 hour and 15 minutes, or until a toothpick inserted in the center comes out clean. Transfer pans to a wire rack to cool for 10 minutes, then unmold leave to cool completely.

Wednesday, October 21, 2009

Apple Cranberry Muffins


The reason for the get-together: to plan the next get-together, of course. Do you need a better reason than that to invite the girls over? School is well underway and we're overloaded with housework, and homework, and after-school chauffeuring. But our girl-time is sacred. Time with the girls is the best stress-relief known to "mom". We discussed school activities and the swine flu (none of our families have had it - yet). We talked about movies and wine and books we've read. The more tech-savvy shared ideas for photo editing. And oh, the delicious goodies we had for breakfast - a delicious pumpkin tiramisu and these freshly baked Apple Cranberry Muffins. It was perfect! The next get-together will be a weekend get-away - a whole weekend of food, fun, shopping and crafts with the girls. I can hardly wait!


Apple Cranberry Muffins
adapted from King Arthur Flour

1 cup (4 ounces) King Arthur 100% White Whole Wheat Flour
1 cup (4 1/4 ounces) King Arthur Unbleached All-Purpose Flour
1 teaspoon baking powder
1 teaspoon baking soda
1/4 teaspoon salt
1 tablespoon cinnamon
1/2 cup (1 stick, 4 ounces) unsalted butter, at room temperature
1/2 cup (3 1/2 ounces) granulated sugar
1/2 cup dark brown sugar, divided
1 large egg, lightly beaten
1 cup (8 ounces) buttermilk
2 large apples, peeled, cored, and coarsely chopped
1/2 cup dried cranberries

Preheat the oven to 425°F (see note above). Grease and flour a 12 cup muffin tin and set aside.
Mix together the flours, baking powder, baking soda, salt, and cinnamon, and set aside.
In a separate bowl, cream the butter and add the granulated sugar and 1/4 cup of the brown sugar. Beat until fluffy.
Add the egg and mix well; stop once to scrape the sides and bottom of the bowl. Mix in the buttermilk gently. (If you over-mix, the buttermilk will cause the mixture to curdle.) Stir in the dry ingredients and fold in the apple chunks and cranberries.
Divide the batter evenly among the prepared muffin cups, sprinkling the remaining 1/4 cup brown sugar on top. Bake for 10 minutes, turn the heat down to 375°F, and bake for an additional 15 to 20 minutes, or until a toothpick inserted into the center of a muffin comes out clean. Cool the muffins for 5 minutes in the tin, then turn them out onto a wire rack to cool completely. Yield: 12 muffins.

Saturday, August 22, 2009

Cooking with Kids Episode 4 - Strawberry Banana Smoothie


Here's our family's favorite smoothie. The kids love them and they're good for their growing bodies. I usually make more than I think I'll need so I can make smoothie popsicles. I don't even mind if they eat one of the popsicles for breakfast! This recipe is great for the kids to make because the amounts do not need to be precise. In fact, I never measure the ingredients. I just eyball it and throw the ingredients in the blender. I've guessed at the amounts for the purpose of writing this recipe, but feel free to add a little more of this or a little less of that. Substitute any berry or fruit for the strawberries if it sounds good to you. Here's a tip: if you ever have overripe bananas sitting on your counter, peel them and break them into chunks and freeze them in a ziploc freezer bag. Then you'll have them whenever you're in the mood for a smoothie (or use them for banana espresso chocolate chip muffins).

Strawberry Banana Smoothies
Serves about 4

3/4 cup vanilla or plain yogurt
1 cup milk
3/4 cup orange juice
1 or 2 frozen bananas, broken into chunks
3 handfuls of frozen strawberries

Throw all the ingredients in a blender and blend until smooth. Add more milk or orange juice to reach desired thickness.

Friday, July 31, 2009

Blueberry Cinnamon Rolls

Blueberry Cinnamon Rolls

Have you ever thought about a recipe and couldn't rest until you tried it for yourself? I've been dreaming (I mean literally having dreams in my sleep!) about these Blueberry Cinnamon Rolls ever since Susan from Food Blogga posted about them last month. If you've been following my blog for a while, you know how much I love a good cinnamon sticky bun, but I never thought of putting fresh blueberries in a cinnamon roll. As Ina would say, "Butter, cinnamon, and blueberries baked in sweet dough, and topped with icing - how bad could that be??"
The dough is easy to make, especially if you have a food processor or heavy duty mixer - just put all the ingredients in and give them a whirr.

Blueberry Cinnamon Rolls
For the icing, I used some leftover cream cheese frosting which I had frozen from a batch of carrot cupcakes I made. I heated a little icing in the microwave just until it was "drizzle-able" and spread it on top of the warm roll (you must eat these warm!) They were heavenly with cream cheese icing and got all thumbs ups from the judging panel (the kids and I). Annie asked if we could make these AND sticky buns for Christmas morning next year. I suppose I will - and a new tradition is born! Thanks to Susan and her mom for sharing the recipe!

Blueberry Cinnamon Rolls
Adapted from recipe for Mom's Blueberry Sweet Rolls from Susan at Food Blogga
Makes 12 rolls

Dough:
2 packets of yeast
1/2 cup warm water
3/4 cup warm milk
1 cup melted butter
2 large eggs
1 cup granulated sugar
1 teaspoon salt
1 teaspoon pure vanilla extract
4 1/2 cups all-purpose flour plus enough to form a workable dough
3 tablespoons melted butter for brushing over dough

Blueberry Filling:
1 pint fresh blueberries
1/2 cup granulated sugar
1 tablespoon all-purpose flour
2 teaspoons ground cinnamon

Vanilla Cream Cheese Icing:
2 tablespoons unsalted butter, room temperature
2 cups confectioners' sugar, sifted
1/4 teaspoon pure vanilla extract
3 ounces cream cheese, room temperature

1. Mix all of the dough ingredients in a large bowl, and knead lightly by hand until the dough comes together. (I mixed the dough in a food processor with 4 1/2 cups flour and then worked more flour in by hand until a ball formed. I'm sure you could also use a heavy-duty mixer fitted with a dough hook.) Roll into a ball, wrap in plastic wrap, and refrigerate overnight.
2. The next day, remove the dough from the refrigerator and let it rest on the counter until it's just cool or at room temperature.
3. Butter a 9x13 pan or coat with cooking spray.
4. On a floured surface, roll out the dough into a large rectangle, about 12 x 18 inches. Brush with 3 tablespoons melted butter.
5. In a medium bowl, mix the blueberries, granulated sugar, flour, and cinnamon, until well coated, and spread evenly over the dough. Lightly press the berries with your hand so they stick into the dough. Starting with the long side closest to you, begin rolling the dough as tightly as you can, tucking in any stray blueberries as you go. Place the end seam side down, and tuck the ends of the roll under so the berries don't escape. Using a sharp serrated knife, cut the roll into 12 equal pieces.
6. Place the rolls, cut side up, in the prepared pan. Cover with a clean dish towel, and allow to rest on the counter top for 45-60 minutes, until risen and puffy.
6. Preheat the oven to 350 degrees F about 15 minutes before ready to bake. Bake for 40-45 minutes, or until the tops are golden and a toothpick inserted into the center of the dough comes out clean. Place pan on a rack and cool slightly.
6. Place all icing ingredients in a bowl and beat until well combined. Add milk one teaspoon at a time until desired consistency is achieved. Drizzle icing over rolls and serve warm.
7. Be prepared to receive the "Best Mom of the Year" Award.

Friday, July 17, 2009

Friday Favorite Summertime Breakfast


The recipe:
Autumn Wheat cereal by Kashi
mixed backyard berries picked by Hubby
fresh local milk
a sprinkling of sugar

Place all ingredients in a bowl in the order given and eat. No cooking, very little clean-up, and healthy to boot!

Mmmmmm!

Monday, June 29, 2009

Rhubarb Streusel Muffins


Yesterday, we invited the family over for brunch. With extra rhubarb in the garden, I decided to bake some muffins to serve alongside pancakes, scrambled eggs, sausage, and fresh fruit. The batter is moist and delicious. If you're not a rhubarb fan, you could certainly substitute your favorite fruit - blueberries or raspberries would be delicious. You can substitute whole milk for the buttermilk if you prefer. I would give the credit for this recipe to epicurious.com, but the credit should really go to one of the commenters of the recipe who suggested changes that made the recipe so much better. Almost all of the subsequent commenters used his suggestions, and I'm glad I did too! These are just as moist and delicious the next day, although the streusel will soften a bit.


Rhubarb Streusel Muffins
adapted from epicurious.com
For topping:
3/4 cup oatmeal
1/3 cup all-purpose flour
1/3 cup packed brown sugar
1/2 teaspoon cinnamon
1/8 teaspoon salt
4 tablespoons unsalted butter, softened

For cake batter:
1 1/4 cups all-purpose flour
1 teaspoon baking powder
1 teaspoon salt
3/4 tsp cinnamon
1 stick (1/2 cup) unsalted butter, softened
1/2 cup brown sugar
1/4 cup granulated sugar
2 large eggs
1/2 teaspoon vanilla
1/2 cup buttermilk
3 cups fresh rhubarb stalks, cut into 1/4-inch dice
3 tablespoons confectioners sugar

Preheat oven to 375°F. Use cooking spray to coat muffin cups and top of pan.
Make streusel for topping:
Whisk together oatmeal, flour, brown sugar, cinnamon, and salt in a bowl. Blend in butter with your fingertips until mixture forms small clumps.
Make batter:
Whisk together flour, baking powder, cinnamon and salt in a bowl and set aside. Beat together butter and sugars in a large bowl with an electric mixer at medium speed until blended, about 2 minutes. Add eggs and vanilla and beat until fluffy, about 1 minute. Reduce speed to low and add flour mixture and buttermilk alternately in 2 batches, beginning and ending with flour mixture and mixing until just combined. Add confectioners' sugar to the rhubarb and toss to coat. Immediately add rhubarb to the batter and gently fold it in.
Divide batter evenly among 18 muffin cups (cups will be almost full). Crumble streusel evenly on top. Bake in middle of oven until tops are golden and a tester inserted in center of a cake comes out clean, about 25 minutes. Cool cakes in pan on a rack 3 minutes, then loosen edges of cakes with a small sharp knife or small metal spatula. Remove cakes from pan and allow to cool on a cooling rack.

Monday, February 23, 2009

Banana Espresso Chocolate Chip Muffins


My son's 4th grade class recently invited the parents to a "Poetry Coffee House" in their classroom. We received written invitations and upon arrival, the kids took our order for drinks and refreshments and we were treated to a string quartet and later a flute and clarinet mini-concert.


The kids have been learning to write different forms of poetry and had their works published into a hard-bound book to keep at home. The poets recited one poem from their repetoire in front of the audience, while we enjoyed tea, fruit and muffins. I sent in a miniature version of these banana muffins. The poetry was enlightening and the muffins were delicious!

What to do in Pittsburgh, PA
by Ben, age 9

Going to Pittsburgh is like eating an enormous piece of pie
Scream! Shout! Go to a Pitt Penguin game and watch them score
Visit the zoo and watch the lions sprint
Walk to "The Point" where the three rivers meet to peer at the fountain
Learn about electricity at the Carnegie Science Museum
Enjoy all the screaming and shouting at a Steelers Game
Catch a home run ball and go to a Pirates game
Float up to Mt. Washington on the incline
Go to the Byham Theater to see a show
Sleep in at a hotel and dream of what to do tomorrow


Banana Espresso Chocolate Chip Muffins
From Baked: New Frontiers in Baking by Matt Lewis and Renato Poliafito

1 1/2 cups mashed, very ripe bananas (about 4)
1/2 cup sugar
1/4 cup firmly packed light brown sugar
1/2 cup unsalted butter, melted
1/4 cup whole milk
1 large egg
1 1/2 cups all-purpose flour
1 tsp instant espresso powder
1 1/2 tsp baking soda
1 tsp salt
1 cup (6 ounces) semisweet chocolate chips

Preheat the oven to 350 degrees F. Spray a 12-cup muffin pan with non-stick cooking spray.
In a medium bowl, stir together the bananas, sugars, butter, milk, and egg.
In another medium bowl, whisk together the flour, instant espresso powder,baking soda and salt. Make a well in the middle of the dry ingredients. Pour the wet ingredients into the well and stir just until combined. Fold in the chocolate chips.
Fill each cup about 3/4 full. Bake in the center of the oven for 20-25 minutes, until a toothpick inserted in the center of the muffin comes out clean.
Let the muffins cool on a cooling rack for 15 minutes. Then remove the muffins from the pan and allow them to finish cooling on the cooling rack. Store up to 2 days in an airtight container.

Wednesday, January 21, 2009

Hot Chocolate and Chocolate Waffles

Forget the mixes and frozen foods! With some basic ingredients on hand and a handful of recipes, you can make it yourself. I have found that it only takes a little bit of extra time - not a lot - and you're saving money and packaging waste. We hosted a sleepover last weekend and I got a request for chocolate waffles the next morning. In no time, I found the recipe online, whipped them up and the girls devoured them! I know they're not the healthiest breakfast item, but at least I know what's in them (and I control the quality of the ingredients) and what's not (no preservatives, high fructose corn syrup, or trans fats!) Read the ingredients list on a box of cake mix, or frozen waffles, or Swiss Miss hot cocoa. There are just things in there that should not be, and I just can't bring myself to buy them anymore. You may have a few extra dishes to wash, but isn't it worth it to give your family good food with wholesome ingredients? Make this breakfast for your chocoholic sweetie on Valentine's Day - and you can boast that you made it from scratch! What says "I Love You" better than that?


Chocolate Waffles
from Alton Brown/The Food Network

7 ounces all-purpose flour or whole wheat pastry flour, approximately 1 1/2 cups

1 3/4 ounces sugar, approximately 3 tablespoons
1.5 ounces cocoa powder, approximately 1/2 cup
1 teaspoon baking powder
1 teaspoon salt
1/2 teaspoon baking soda
3 whole eggs, beaten
2 ounces unsalted butter, melted and slightly cooled
1 teaspoon pure vanilla extract
16 ounces buttermilk, room temperature
4 ounces chocolate chips, approximately 3/4 cup
Vegetable spray, for waffle iron

Preheat waffle iron according to manufacturer's directions.
In a medium bowl whisk together the flour, sugar, cocoa powder, baking powder, salt, and baking soda. In another bowl beat together the eggs and melted butter and vanilla, and then add the buttermilk. Add the wet ingredients to the dry and stir in the chocolate chips just until combined. Allow to rest for 5 minutes.
Ladle the recommended amount of waffle batter onto the center of the iron. Close the iron top and cook until the waffle is crispy on both sides and is easily removed from iron. Serve immediately or keep warm, uncovered in a 200 degree F oven until ready to serve.


Hot Cocoa
from Hershey's

1/2 cup sugar
1/4 cup HERSHEY'S Cocoa
Dash salt
1/3 cup hot water
4 cups (1 qt.) milk
3/4 teaspoon vanilla extract
Miniature marshmallows or sweetened whipped cream(optional)


Directions:1. Stir together sugar, cocoa and salt in medium saucepan; stir in water. Cook over medium heat, stirring constantly, until mixture comes to a boil. Boil and stir 2 minutes. Add milk; stirring constantly, heat to serving temperature. Do Not Boil. 2 Remove from heat; add vanilla. Beat with rotary beater or whisk until foamy. Serve topped with marshmallows or whipped cream, if desired. Five 8-oz. servings. Variation: Add a few drops of peppermint extract or some espresso powder.

MICROWAVE SINGLE SERVING: Combine 1 heaping teaspoon HERSHEY'S Cocoa, 2 heaping teaspoons sugar and dash salt in microwave-safe cup or mug. Add 2 teaspoons cold milk; stir until smooth. Fill cup with milk. Microwave at HIGH (100%) 1 to 1-1/2 minutes or until hot. Stir to blend; serve.

Saturday, January 3, 2009

The Successful Pecan Sticky Bun


These sticky buns can be made weeks ahead and frozen, unbaked. We hauled these frozen buns (along with our own!) all the way to North Carolina and baked them up on New Year's Day.


Straight out of the oven they were gorgeous and browned and cinnamony.


Turn them over to find a delicious sticky goo!


Make the extra gooey pecan topping and you've got one sinfully delicious sticky bun!

Sticky Buns with Pecans for Freezing
Makes twelve 3 1/2-inch buns. Published May 1, 2007 in Cook's Illustrated

Dough:
3 large eggs at room temperature
3/4 cup
buttermilk at room temperature
¼ cup granulated sugar
1 ¼ teaspoons
table salt
2 ¼ teaspoons instant yeast
4 ¼ cups
unbleached all-purpose flour (21 1/4 ounces), plus additional for dusting work surface
6 tablespoons unsalted butter , melted and cooled until warm

Caramel Glaze:
6 tablespoons unsalted butter
¾ cup
packed light brown sugar (5 1/4 ounces)
3 tablespoons corn syrup , light or dark
2 tablespoons heavy cream
Pinch
table salt

Cinnamon-Sugar Filling:
¾ cup
packed light brown sugar (5 1/4 ounces)
2 teaspoons
ground cinnamon
¼ teaspoon ground cloves (I will omit this next time)
Pinch
table salt
1 tablespoon unsalted butter , melted

Pecan Topping:
3 tablespoons unsalted butter
¼ cup
packed light brown sugar (1 3/4 ounces)
3 tablespoons corn syrup , light or dark
Pinch
table salt
1 teaspoon
vanilla extract
¾ cup pecans (3 ounces), toasted in a skillet over medium heat until fragrant and browned, about 5 minutes, then cooled and coarsely chopped

For the dough: In bowl of standing mixer, whisk eggs to combine; add buttermilk and whisk to combine. Whisk in sugar, salt, and yeast. Add about 2 cups flour and butter; stir with wooden spoon or rubber spatula until evenly moistened
and combined. Add all but about 1/4 cup remaining flour and knead with dough hook at low speed 5 minutes. Check consistency of dough (dough should feel soft and moist but should not be wet and sticky; add more flour, if necessary); knead at low speed 5 minutes longer (dough should clear sides of bowl but stick to bottom). Turn dough out onto lightly floured work surface; knead by hand about 1 minute to ensure that dough is uniform (dough should not stick to work surface during hand kneading; if it does stick, knead in additional flour 1 tablespoon at a time).


Lightly spray large bowl or plastic container with nonstick cooking spray. Transfer dough to bowl, spray dough lightly with cooking spray, then cover bowl tightly with plastic wrap and set in warm, draftfree spot until doubled in volume, 2 to 2 1/2 hours.

For the glaze: Meanwhile, combine all ingredients for glaze in small saucepan; cook over medium heat, whisking occasionally, until butter is melted and mixture is thoroughly combined. Pour mixture into nonstick metal 13- by 9-inch baking dish; using rubber spatula, spread mixture to cover surface of baking dish. Set baking dish aside.

To assemble, store, and reheat buns: For filling, combine brown sugar, cinnamon, cloves, and salt in small bowl and mix until thoroughly combined, using fingers to break up sugar lumps; set aside. Turn dough out onto lightly floured work surface. Gently shape dough into rough rectangle with long side nearest you. Lightly flour dough and roll to 16 by 12-inch rectangle. Brush dough with 1 tablespoon melted butter, leaving 1/2-inch border along top edge; with butter remaining on brush, brush sides of baking dish. Sprinkle filling mixture over dough, leaving 3/4-inch border along top edge; smooth filling in even layer with hand, then gently press mixture into dough to adhere. Beginning with long edge nearest you, roll dough into taut cylinder. Firmly pinch seam to seal and roll cylinder seam side down. Very gently stretch to cylinder of even diameter and 18-inch length; push ends in to create even thickness. Using serrated knife and gentle sawing motion, slice cylinder in half, then slice each half in half again to create evenly sized quarters. Slice each quarter evenly into thirds, yielding 12 buns (end pieces may be slightly smaller).

Arrange buns cut side down in prepared baking dish; cover tightly with plastic wrap and set in warm, draft-free spot until puffy and pressed against one another, about 1 1/2 hours. Place baking dish in freezer; store for up to 1 month.

To bake, adjust oven rack to middle position and heat oven to 350 degrees. Remove buns from freezer, remove plastic wrap, wrap dish tightly with foil, and set on baking sheet. Bake buns for 30 minutes, then remove foil and continue to bake until golden brown and center of dough registers about 180 degrees on instant-read thermometer, about 20 minutes longer. Cool on wire rack 10 minutes; invert onto rimmed baking sheet, large rectangular platter, or cutting board. With rubber spatula, scrape any glaze remaining in baking dish onto buns; let cool while making pecan topping. For the topping: Combine butter, brown sugar, corn syrup, and salt in small saucepan and bring to simmer over medium heat, whisking occasionally to thoroughly combine. Off heat, stir in vanilla and pecans until pecans are evenly coated. Using soupspoon, spoon heaping tablespoon nuts and topping over center of each sticky bun. Continue to cool until sticky buns are warm, 15 to 20 minutes. Pull apart or use serrated knife to cut apart sticky buns; serve.

LinkWithin

Related Posts Widget for Blogs by LinkWithin