Showing posts with label Pies and Tarts. Show all posts

Sunday, July 26, 2020

Zucchini Pie with Quinoa Crust


After 20 years of gardening I finally have a zucchini crop to write home about.  I grew these from seed and I'm so proud of how they have grown.  The weeds also look pretty healthy. {sigh}


But now I have refrigerator full of zucchini and I'm trying to get creative with ways to use it all.  For sure I'll be making my all time favorite Zucchini Soup and I found a great recipe for zucchini bread using coconut flour with a cinnamon walnut and a double chocolate variation which I'll be sharing soon.  And I have several other great zucchini recipes I've written about over the years.  Search "zucchini" in the search bar to find them.


But this zucchini pie is definitely a great way to use a couple of them, along with corn and tomatoes which are coming into full swing as well.  You can make the quinoa crust or use a store-bought pastry crust, or even omit the crust altogether and bake in a casserole dish.  So delicious!

Zucchini Pie with Quinoa Crust
Serves 4

Quinoa crust:
2 cups cooked quinoa (from about 1/2 cup uncooked)
1 egg
Salt/pepper

Filling:
4 cups zucchini, thinly sliced 
1/2 cup corn cut from about 3 ears of fresh corn on the cob
1 cup sweet onion, diced 
1 tablespoon olive oil
1 ⁄ 4 cup flat leaf parsley, chopped 
2 garlic cloves, chopped 
1 teaspoon dried herbes de provence or 1-2T fresh herbs (oregano, thyme, savory, rosemary)
1 teaspoon kosher salt
1/2 teaspoon black pepper, freshly ground
pinch cayenne pepper (optional)
1 tablespoon Dijon mustard 
2 eggs 
5 ounces mozzarella, shredded 
1 ounce parmesan cheese, grated
2 ounces ricotta cheese
Two medium tomatoes, thinly sliced


Preheat oven to 375 degrees. Combine cooked quinoa, egg, salt and pepper in a bowl.  Spread onto the bottom and sides of a 10" pie pan.  Cook for 20 minutes, remove from oven, and let cool.  Saute zucchini, corn, onions and garlic in olive oil until soft. Stir in parsley, herbes de provence, salt and pepper. Remove from heat and transfer to a large bowl to cool slightly. Beat the eggs and then add the cheeses to the beaten eggs. Pour into the veggies and combine. Spread dijon mustard on bottom of pie crust. Add zucchini mixture to crust. Arrange tomato slices on top and drizzle with additional olive oil and salt and pepper.  Bake for 35-40 minutes.

Sunday, December 14, 2014

Pumpkin Pie with Oat Crust {gluten free}


We traveled to New Bern, NC this past Thanksgiving to visit my parents and to see my brothers and their families.   The family is expanding with marriages and a baby on the way and it's rare these days that we are all together, but everyone was there and that made it really special!


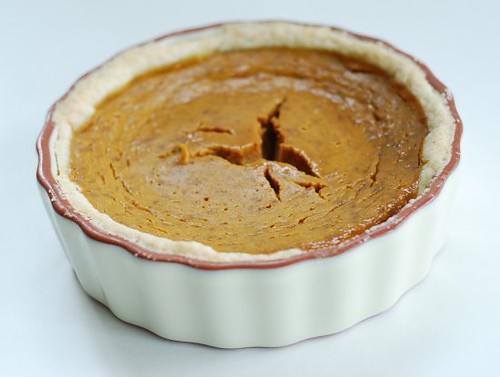
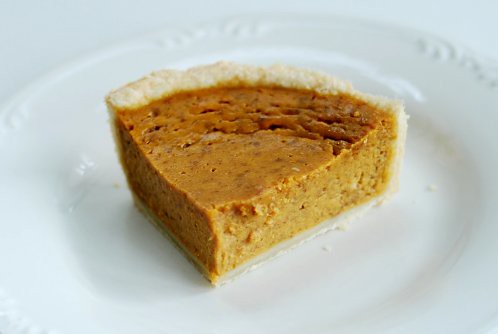
I made this pumpkin pie to serve alongside my brother's famous rhubarb custard pies so that the guests could have a gluten-free option.  I had no idea how it would taste until we cut into it and tried a piece.  It was so good that Mark dubbed it "best pumpkin pie ever", gluten-free or not!  Coming from a pie connoisseur, that's saying something!  The crust held together nicely and the pumpkin custard sliced up beautifully.  If you're looking for a gluten-free dessert to make for Christmas, try this recipe!  Happy Holiday Baking!

Pumpkin Pie
Adapted from ancestral-nutrition.com
Makes one pie

2 cups pumpkin puree (I used homemade roasted pumpkin puree)
1 cup canned unsweetened coconut milk
1/2 cup honey (I might try a little less next time)
2 eggs, slightly beaten
1 teaspoon cinnamon
1 teaspoon pumpkin pie spice (or add 1/2 tsp ginger, 1/4 tsp cinnamon, 1/4 tsp cloves)
Oatmeal pie crust (recipe below) or crust of your choice

Prepare the crust and chill.  Preheat oven to 350 degrees F.  In a large bowl, whisk together the pumpkin puree, canned coconut milk, and 1/2 cup honey until smooth.  Whisk in the eggs, cinnamon, and pie spice.  Pour into the chilled pie crust just below the crimped edges.  Carefully transfer to the preheated oven and bake for about 50 minutes or until the filling is no longer jiggly in the middle.  If you have filling leftover, pour it into ramekins and bake until done (no jiggles).  Cool completely and chill before serving.


Oatmeal crust
Adapted from Good Without Gluten by Jules, Lepoutre, and Yanase
Makes a single pie crust

80g (2/3 cup) oat flour
45 g (1/3 cup) tapioca starch
40g (1/3 cup) almond flour
50g (1/3 cup plus 1 tablespoon) confectioners sugar
1/4 teaspoon xanthan gum
80g cold butter (6 tablespoons), cut into pieces
1 egg

Place all dry ingredients into a food processor and pulse to combine.  Add the butter pieces and pulse until butter pieces are pea sized or smaller.  Add the egg and pulse until mixture holds together.  Press the dough into the pie plate using wet hands, or parchment to keep your hands from sticking (a little tricky but try different things and see what works for you).  Try not to make it too thick at the corners of the pie pan like I did (i.e. try to make it the same thickness all the way around.)  Crimp the edges and chill until firm, about one hour.  

Monday, October 24, 2011

{Pinterest} Pies and Tarts


Y'all know about Pinterest, right? If not, you really need to check it out at pinterest.com. It's a virtual pin board where you can post pictures of your favorite ideas that you find all over the web into one place. You can create different boards to organize them. You can follow, like, and comment on people's pins, and repin them onto your boards if you like. It's very addicting, so don't say I didn't warn you.

I've been bookmarking a ton of recipes and inspirational food photos and I recently posted all the pies and tarts I had bookmarked onto Pinterest. So click here if you need some pie inspiration for the holidays!

Happy Pinning!

Thursday, August 18, 2011

Provençal Tomato Tart with a Crunchy Savory Tart Crust


This is a wonderful way to use the abundance of tomatoes from your garden or farm market. I wouldn't exactly call it a quiche, although it does have a little egg custard to bind the filling together. The main stars are the tomatoes, and the Gruyere cheese, and the herbs. There's also a little Dijon mustard in there, but it's not noticeable - it just adds a little extra flavor.

And the crust! I loved the slight crunch from the addition of semolina flour. It is the perfect complement to the savory filling.

The tart calls for a bit of herbes de Provence, but since my bottle of herbes de Provence is getting old, I thought I'd chop up a combination of herbs from my garden - thyme, oregano, rosemary, sage, and summer savory (new to my garden this year). It's delicious, fresh, seasonal, and pretty too.

Provençal Tart with Gruyere and Herbes de Provence
from Once Upon a Tart by Frank Mentesana and Jerome Audureau
one par-baked 9-inch Crunchy Savory Tart Crust (recipe below)
12-15 plum tomatoes cut into 1/4-inch thick rounds
2 tablespoons Dijon mustard
1 cup grated Gruyere cheese
1 teaspoon herbes de Provence (I used a tablespoon of chopped fresh herbs - rosemary, thyme, sage, summer savory, and oregano)
2 large eggs
1/4 cup light cream
1 teaspoon salt
freshly ground black pepper
Preheat oven to 375 degrees F.
Place the tomato slices in a colander and place it in the sink. Let the tomatoes drain their excess water for 15 minutes.
Spread the mustard evenly over the tart shell, then sprinkle the cheese and half of the herbs. Lay the tomato slices in overlapping concentric circles until the crust is entirely covered.
Whisk the eggs in a bowl with the cream, salt, and pepper. Pour the mixture evenly over the tomatoes until it comes to about 1/4 inch from the top edge of the crust. Pour a little cream on top if there is not enough to fill the tart.
Bake for 1 hour to 1 hour and 20 minutes, or until the custard is set. Remove the tart from the oven and allow it to cool slightly. Serve warm or at room temperature.

Crunchy Savory Tart Crust
from Once Upon a Tart by Frank Mentesana and Jerome Audureau
2 1/2 cups unbleached all-purpose flour
3 tablespoons semolina flour
1 teaspoon salt
12 tablespoons (1 1/2 sticks or 6 ounces) cold unsalted butter, cut into 1/4-inch cubes
3 tablespoons cold solid vegetable shortening
a glass of ice water

Put flours and salt in the bowl of a food processor fitted with a metal blade and pulse to combine.

Add the butter and shortening and pulse several time until the mixture resembles coarse crumbs with some butter chunks still visible.

Remove the blade from the food processor and dump the dough into a large bowl. Sprinkle 4 tablespoons of ice water evenly over the dough, then use your hands or a wooden spoon to bring the dough together to form a ball. The dough should be just past crumbly, but holding together. Add more water as needed, a tablespoon at a time, if necessary to get the dough to come together.

Cut the dough in half, shape each half into a disk, and wrap each disk in plastic wrap. Refrigerate at least 30 minutes before rolling out.

Preheat the oven to 400 degrees F. Roll out dough to 1/4 inch thickness, fit it into your tart pan, and trim the edges. Chill 30 minutes. Prick the bottom of the tart with the tines of a fork, line the tart with parchment or foil and fill with pie weights or dried beans.
Place the tart shell on the center rack of the oven and bake for 10 minutes. Remove the paper and weights from the pan and return the tart crust to the oven. Bake another 5-10 minutes for a par-baked shell (crust is golden brown and no doughy areas remain), or bake for 10-20 minutes for fully-baked tart shell (golden brown all over). Cool on a wire rack.
Monday, June 20, 2011

Rhubarb-Lovers' Strawberry Rhubarb Pie


I've kind of gotten off of pie baking recently. My neighbors who order from me mostly want cakes and brownie pops and cookies. Occasionally a tart, but hardly ever and good ole pie.

This lack of pie-baking has raised the eyebrows of a certain husband of mine. You see, he loves pie. He can take or leave just about anything else I bake. Clearly missing the pies, he "places his order" for a pie and hopes I'll have time to fulfill it.

In timely fashion, Martha Stewart wrote about this Strawberry Rhubarb Pie recipe in a recent issue of her magazine.

I call this pie Rhubarb-Lover's Strawberry Rhubarb Pie because the ratio of rhubarb to strawberries is 6:1 - the perfect ratio in my opinion. It tastes like rhubarb with a hint of strawberry, not like those other recipes out there that have a 1:1 ratio, where the filling is like strawberry jam (too sweet) and the rhubarb taste is all but lost.

If you like rhubarb, I urge you to try this recipe. In fact, make it a day ahead and let the pie sit in the fridge overnight after it cools. You might just find your husband repeating these words each time he eats a slice: This pie is delicious!

Other rhubarb recipes you might like:

Strawberry Rhubarb Pie
adapted from Martha Stewart

For The Filling
1 3/4 pounds rhubarb, cut into 3/4-inch-thick pieces (6 cups)
6 ounces strawberries, coarsely chopped (1 cup)
1 1/2 cups granulated sugar
1/4 cup cornstarch
1/4 teaspoon finely grated orange zest, plus 1 tablespoon orange juice
Coarse salt

For The Crust
2 disks Pate Brisee
All-purpose flour, for surface
2 tablespoons unsalted butter, cut into pieces
1 large egg, lightly beaten, for egg wash
Sanding sugar, for sprinkling (optional)

Preheat oven to 375 degrees F. To make the filling, mix together rhubarb and strawberries in a large bowl. In a separate medium bowl, combine the granulated sugar, cornstarch, zest and juice, and 1/4 teaspoon salt. Sprinkle the sugar mixture over the rhubarb mixture and gently fold over the berries until well coated with the sugar mixture.

Make the crust: Roll out 1 disk pate brisee to a 1/8-inch thickness on a lightly floured surface. Fit dough into a 9-inch pie plate. Pour in filling; dot top with butter. Refrigerate while making top crust.

Roll remaining disk pate brisee to a 1/8-inch thickness on a lightly floured surface.

Trim bottom and top crusts to a 1-inch overhang using kitchen shears, and press together to seal around edges. Fold edges under, and crimp as desired. Refrigerate for 30 minutes.

Brush crust with egg wash, and sprinkle generously with turbinado sugar. Bake pie on middle rack, with a foil-lined baking sheet on bottom rack to catch juices, until vigorously bubbling in center and bottom crust is golden, about 1 1/2 hours. (Loosely tent with foil after 1 hour if crust is browning too quickly.) Transfer pie to a wire rack, and let cool for at least 2 hours (preferably longer) before serving. We like to eat ours chilled. Pie keeps for a week in the refrigerator.

Saturday, February 5, 2011

Nutella Pastry Pockets


Happy World Nutella Day!

Pies are all the rage these days - some are debating if the pie is the new cupcake of 2011. I've been reading that there are several pie shops trying to make a go of it around the country.


But I wonder if those pie shops have a use for their pastry scraps. An aversion to waste probably made the donut hole what it is today. And like the donut hole is just as delicious as the donut, these pastry pockets are just as good as the pie. Sure, you could roll out the scraps and brush the dough with egg, and then sprinkle with cinnamon and sugar like we used to do when I was growing up.


Or you could roll the dough like rugelach or a crescent roll with some nuts and jam or just about any filling you desire, making a darned good cookie.

Or you could cut the dough into circles, dollop a bit of Nutella and chopped hazelnuts in the center, fold it over, crimp the edges and bake. If you want, brush the tops with egg wash and sprinkle some Turbinado or coarse sugar on top before baking. I love the extra crunch that the hazelnuts and the sugar on top give to the pastry, but you could leave them out if you want.

I'd take these pastry pockets over a donut hole any day.


Other Nutella recipes from the Marzipan archives:

Nutella Pastry Pockets
A Marzipan Original :)

Note: The nutella inside the pastry does not stay soft like it is right from the jar. It will firm up a bit as it is baked, like the chocolate in a candy bar. 

Leftover (or not) pie dough or tart dough
Nutella, about a teaspoon per pocket
Hazelnuts, toasted, skinned and coarsely chopped
Egg wash for brushing
Turbinado or other sugar for sprinkling

Preheat the oven to 375 degrees F. Roll out the dough to 1/8" thickness and cut into 3" circles with a cookie or biscuit cutter. Place a teaspoon of Nutella in the center of the circle and sprinkle with a few chopped hazelnuts. Dip a pastry brush or your finger into a small bowl of water and lightly moisten the edges around half of the dough circle. This will help glue the pastry together. Fold the dough in half and lightly press the edges to seal. Crimp the edge with a fork or make it more decorative if you wish. Brush the tops with egg wash and sprinkle with sugar. Bake until the dough is golden brown, 20 minutes or so.


Thursday, November 11, 2010

Chocolate Caramel Mini Tartlets with Sea Salt

Chocolate Caramel Tartlets

Sweet and salty is all the rage right now and these bite-sized Chocolate Caramel Tartlets with Sea Salt are an impressive addition to your chocolate sampler tray next to your Chocolate Raspberry Truffles and Chocolate-Dipped Coconut Macaroons.

If you've tried your hand at ganache, caramel, and pastry then these will be a snap to make. If you haven't mastered these yet, then these tartlets are a good reason to try these techniques again. Use a 9" tart pan if you're not into making dozens of tiny tart shells.

I've had these little mini tartlet molds ever since I took a cooking class in a little local kitchen shop about 15 years ago. I'm embarassed to say that this is the first time I've used them. But then again, I got a little busy in those 15 years...(my kids are 14, 11, and 8!)

The tartlet shells are a sweet pate sucree dough. I pricked to bottoms with a fork to eliminate the possibility of air pockets. No need for pie weights with a shell this small but if you are making a larger tart, bake the shell for half the total baking time lined with parchment and pie weights, then remove the paper and weights and continue baking until golden brown.

I thought the tart shells looked just like sunflowers...

Chocolate Caramel Tartlets

Spoon in the caramel filling...

Chocolate Caramel Tartlets

And then top with chocolate ganache and a sprinkling of gourmet sea salt. I picked up this pink Himalayan Sea Salt at Marshall's. If you look closely, you can see a hint of pink.

Chocolate Caramel Tartlets

Place your chocolate goodies on a pretty platter. Now who could resist these?

Chocolate Caramel Tart with Sea Salt
Makes one 9-inch tart or about 24 mini tartlets
Note: to make the mini tart shells, I cut circles out of the rolled-out dough and worked the dough into the tartlet molds. Prick the bottoms with a fork and bake until golden, about 8-10 minutes.


1 9-inch pre-baked pate sucree tart shell or 24 mini tart shells

for the chocolate ganache:
8 ounces bittersweet chocolate, finely chopped
1 cup heavy cream

Sea Salt for garnish


Place the chocolate into a medium heat-proof bowl. Heat the heavy cream in a small saucepan until just boiling. Pour the heavy cream over the chocolate and let it sit for one minute. Stir with a rubber spatula or whisk in a small, quick circular motion, starting in the center of the bowl and working your way out until the ganache is shiny and all the chocolate has melted.

Assemble the tart:
Pour enough caramel into the tart shell to come up about 1/3 of the way up the sides of the tart shell. Refrigerate the tart for 30 minutes to harden the caramel. Pour the chocolate ganache over the caramel to fill about 2/3 of the tart shell. Sprinkle with sea salt and allow to set for 30 minutes in the refrigerator or 2 hours at room temperature.


Wednesday, September 22, 2010

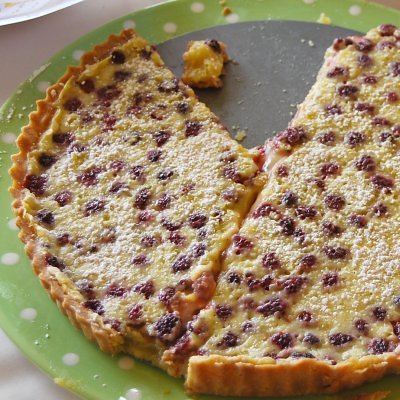
2010 Pie Festival and a Prize-Winning Raspberry Custard Tart

Raspberry Custard Tart

Last weekend marked the 3rd Annual Pie Festival and Contest organized by my mother-in-law and a few of her neighbors. You may have heard me talk about it in 2009 and 2008.

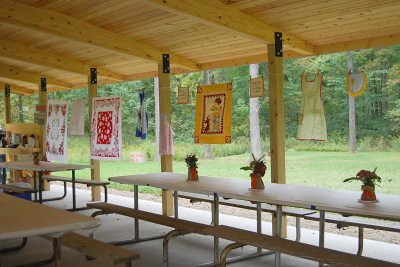
2010 Pie Festival

The shelter was rented and decorated with hanging aprons and vintage tablecloths. The table centerpieces were made with garden-picked flowers in quart canning jars set inside a brown paper bag and tied with ribbon. There was coffee and water and iced tea for drinking. And of course pies for eating. Everything was perfect.

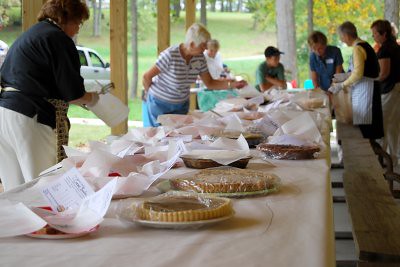
2010 Pie Festival

Each pie was registered and three pieces were cut from each pie. The pieces were placed on a plate with a ballot attached. All of the attendees chose the pieces they wanted to taste and rated them for appearance, taste, crust, and originality.
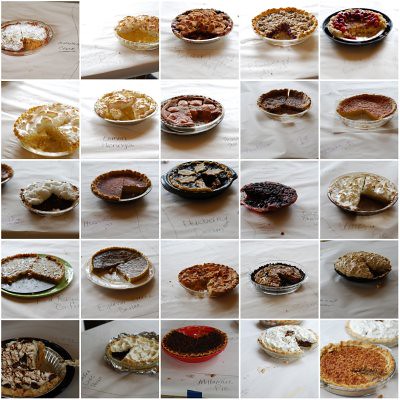
There were more than 25 pies entered in the contest. It was the year of custards and creams. All of the pies were delicious!

2010 Pie Festival Pies

Row 1: Momofuku's Crack Pie, Aunt Ginny's Coconut Cream, Blackberry Apple, Blueberry Streusel, Fruit Glazed Creme Brulee
Row 2: Pineapple Custard, Lemon Meringue, Peach Polka Dot, Shaker Sugar, Lemon Buttermilk
Row 3: Chocolate Cream, Hoosier Sugar, Blueberry Dream, Deep Dish Blueberry, Vinegar pie
Row 4: Raspberry Custard, Coffee Creme Brulee, Peach Custard, Oreo Chiffon, Peanut Butter Cream
Row 5: Caramel Sweet Potato, Baked Chocolate Pecan, Millionaire Pie, Santigo Chocolate, Maple Walnut Oatmeal Pie

And the winners are...
Baked Chocolate Pecan won the Nut category and Best of Show
My daughter, Ellen (in the pink sweater), tied in the custard category for her Coffee Creme Brulee Pie
The other winner in the custard category was the Blueberry Streusel Pie
Peanut Butter Cream won in the Cream category
My mother-in-law (in the orange vest) won in the Heirloom category for her Aunt Ginny's Coconut Cream Pie
And my Raspberry Custard Pie won the Fruit category

2010 Pie Festival Winners

It was a great day! Thanks to all who helped organize this year's festival!

If you love red raspberries and cream, you'll love this dessert!

Red Raspberry Custard Tart
adapted from Classic Stars Desserts by Emily Luchetti
Makes one 9-inch tart

1 cup of fresh red raspberries
1 pre-baked tart crust in a 9-inch tart pan (recipe follows)
1 cup granulated sugar
2 large egg yolks
1 teaspoon pure vanilla extract
3/4 cup heavy whipping cream
2 tablespoons flour
pinch of kosher salt
1/4 cup sliced almonds (optional- I omitted)

Preheat oven temperature to 325 degrees F. (Or reduce the temperature if the oven is already on from baking the tart crust.) Arrange the raspberries on the bottom of the baked tart crust and set aside. In a bowl, whisk together the sugar, egg yolk, vanilla and cream until blended. Stir in the flour and salt. Carefully pour the cream mixture over the berries. Sprinkle the almonds evenly over the top. Bake at 325 for 35 minutes until almost completely set. Let the tart cool and transfer to a platter. Sprinkle with sifted confectioners sugar if desired.

Tart Crust
makes one crust for a 9-inch tart
from The Book of Great American Desserts by Maida Heatter

1 cup flour
2 tablespoons sugar
1/4 teaspoon salt
4 ounces (one stick) cold butter, cubed
1 large egg

Preheat oven to 350. Place flour, sugar and salt in the bowl of a food processor and pulse to mix. Add the butter and pulse until the mixture resembles coarse crumbs. Add the egg and pulse just until the mixture comes together. Turn the mixture out onto a board and knead a few times, using a bench scraper if the dough sticks to the surface. Form the ball into a small disk and wrap in plastic. Refrigerate for at least one hour. Roll the dough out onto a floured surface and place carefully into a 9-inch tart pan with a removable bottom. Cut the edges of the pastry off, prick the bottom of the pastry with a fork and chill the pastry in the freezer for 30 minutes. Line the dough with foil and place pie weights or dried rice in the tart shell. Bake for 15 minutes, remove the foil and the weights and bake for 10-15 minutes more or until the crust is lightly browned.

Saturday, June 26, 2010

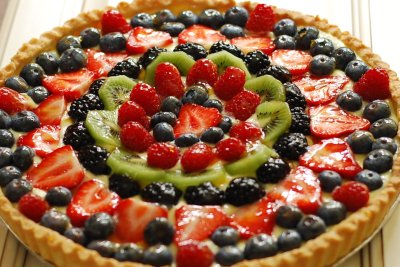
Fresh Fruit Tart

Fresh Fruit Tart with Lemon Curd

This may be one of the most beautiful desserts I've ever made. I can't take the credit though. The berries get it all. It's the time of year when fresh, beautiful fruit is in abundance and this dessert showcases it like no other.

I used a pate sucree for the tart crust in a 12-inch tart pan, and a lemon curd filling, although you could also use a vanilla pastry cream or a cream cheese filling instead. The fruit is arranged on top and brushed with an apricot jam glaze for a glossy shine.

Almost too beautiful to eat!

Pate Sucree
adapted from The Secrets of Baking by Sherry Yard
enough for two 9- or 10- inch tarts, or 16 mini tarts

1/2 pound butter, softened but still cool
1/2 cup sugar
1/2 teaspoon salt
2 large egg yolks, at room temperature
3 cups pastry flour, sifted
2 tablespoons heavy cream

1. Place the butter in the bowl of a standing mixer fitted with the paddle attachment. Beat on low speed for 2-3 minutes, or until lightly creamed. Stop the mixer and scrape down the sides of the bowl. Add the sugar and mix for 30 seconds.
2. Add the salt and egg yolks, one at a time, scraping down the sides of the bowl after each addition.
3. Add the flour and mix until the dough just about comes together, about 30 seconds. Add the cream, then pulse the mixer on low speed for 15-30 seconds, or until the dough is smooth.
4. Remove the dough from the bowl, divide it in half, and wrap each piece in plastic wrap. Chill for at least 4 hours. At this point, the dough will keep in the refrigerator for up to 3 days or may be rolled out and frozen for up to 1 month.
5. When you remove the dough from the refrigerator, it will be very hard. To make it pliable enough to roll out, you must soften it without warming it up too much. I cut the dough into several pieces and gently kneaded each piece, then gathered the pieces back together into a ball.
6. After rolling the dough out and lining the tart pan, place the tart shell in the freezer until ready to bake, at least 30 minutes (not necessary to wrap), or up to one month, well wrapped in plastic.
7. Place a parchment liner over the dough and fill with dried beans or uncooked rice and bake at 350 degrees F for 15 minutes. Remove the liner and the dried rice/beans, prick the bottom of the tart shell with a fork, and bake for another 10 minutes, or until golden brown. The tart shell may be baked a day ahead.

Lemon Curd
adapted from The Secrets of Baking by Sherry Yard
makes about 2 cups

2/3 cup sugar
2 tablespoons finely chopped or grated lemon zest
3 large eggs
4 large egg yolks
3/4 cups lemon juice, or 1/2 cup lemon juice and 1/4 cup lime juice
8 tablespoons unsalted butter, cut into 1/2-inch cubes

Fill a medium saucepan with about 2 inches of water and bring to a simmer. Combine the sugar and lemon zest in a food processor and pulse for about one minute. Combine the lemon sugar, eggs, and egg yolks in a medium heatproof bowl such as a stainless steel mixing bowl and whisk together for 30 seconds. Place the bowl over the simmering water and immediately begin whisking and stir until the sugar is dissolved. Add the lemon juice and continue to cook and stir with a rubber spatula to scrape the bottom of the bowl, until the curd has thickened and reached a temperature of 160 degrees F.

Rinse and dry the bowl of your food processor. Using a mesh strainer, strain the curd into the food processor bowl. Pulse the food processor while you add the butter a piece at a time, until the texture is homogenous. Transfer the curd to a container with a lid and place a piece of plastic wrap directly on the surface of the lemon curd. Allow the curd to cool completely and then place the lid on your container and place it in the refrigerator to chill for at least 2 hours or up to one week.

Apricot Glaze
1/2 cup apricot jam
1 tablespoon of water

Heat the jam and the water gently in a saucepan until smooth. Strain through a mesh strainer into a bowl. Add more water if needed to adjust the consistency.

To assemble the fruit tart:
Place the tart shell on a serving platter. Fill with tart shell with lemon curd, leaving a little space for the fruit. Arrange your choice of fruit on top of the lemon curd and using a pastry brush, brush the apricot glaze over the fruit. Refrigerate until ready to serve. (This tart is best eaten the same day as it is assembled.)

Monday, April 12, 2010

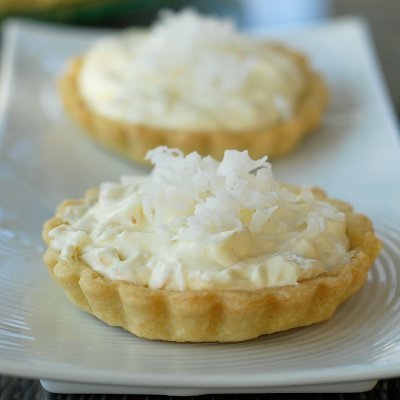
Coconut Cream Tart with Pecan Crust

Coconut Cream Tart

This past Easter is the last one we'll spend in this house, the house we built 10 years ago. What memories were made in this house - basically our kids grew up here. Annie, our youngest, is almost 8.

Usually on Easter, the Easter bunny will leave a note for the kids - a rhyming limerick with clues indicating where the baskets are hidden. My husband always comes up with clever plays on words which I've saved through the years.

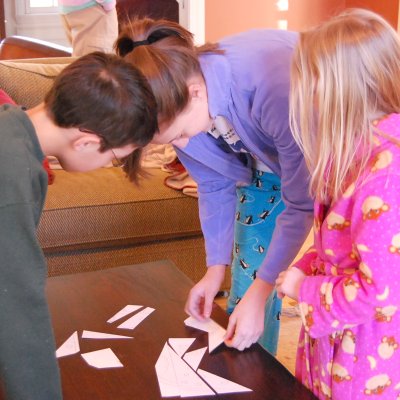
Easter 2010

This year, the Easter bunny (you can see his shirt in the background - the traditional Easter rugby pulled out every year just for the occasion) thought of another idea. He commissioned his cartographer to draw a map of our yard with the house on it. The map was made into a puzzle and the pieces were hidden all over the house. The kids were to find the pieces, put the map together, and find out where their baskets were according to where their name was located on the map. I've never seen such teamwork! Not to mention the added bonus of sharpening their map-reading skills!

Easter 2010

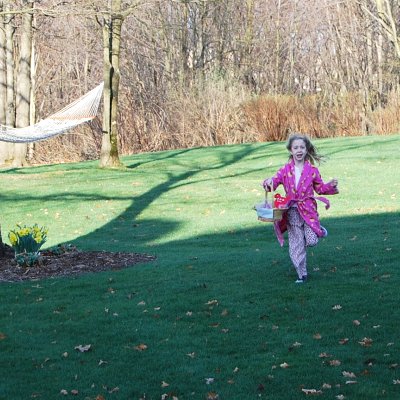
It was the warmest Easter in recent memory, so he hid the baskets outside - Annie's by the hammock, Ben's by the basketball hoop, and Ellen's by her favorite flowering dogwood tree in the front of the house.
And voila! more memories are made - oh happiness!

Easter 2010

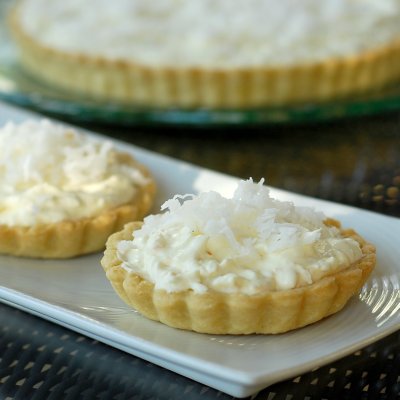
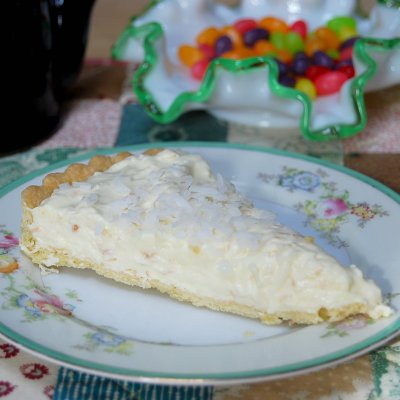
This coconut cream tart was unbelievably good. The filling was light and creamy, perfect for a Spring holiday dessert. The filling is made in two steps. First make a vanilla pastry cream and refrigerate overnight. Next add the chilled pastry cream to some heavy cream and sugar, essentially making a whipped cream filling with a bit more substance to it. Add the toasted coconut and fill the pre-baked tart shell.

Coconut Cream Tart

The original recipe is adapted from the recipe for Coconut Cream Pie with Pecan Crust in the cookbook Luscious Creamy Desserts by Lori Longbotham. I chose to use a plain tart dough only because I had the dough already made in the freezer, but I imagine the pecan crust would be fantastic.

A tart holds less filling than a pie therefore you get a higher crust to filling ratio - the perfect balance in my opinion. Only I had lots of extra filling leftover. I managed to get two tartlet shells out of the leftover dough and filled them, but still had extra filling.  To make a 9-inch tart, you might want to cut the filling recipe in half.

Coconut Cream Tart

Coconut Cream Tart with Pecan Crust
Serves 8 with extra filling left over
Adapted from Luscious Creamy Desserts by Lori Longbotham

For the filling:
1 1/4 cups finely shredded unsweetened coconut
3/4 cup sugar, divided
2 tablespoons cornstarch
2 3/4 cups whipping cream, divided
2 large egg yolks
1/2 teaspoon vanilla extract

Preheat the oven to 350 degrees F. Toast the coconut for 5-7 minutes on a baking sheet, stirring once or twice during that time.

Stir together 1/2 cup sugar and the cornstarch in a small bowl. Whisk 1/2 cup of the cream and and egg yolk in a medium bowl. Whisk in the sugar/cornstarch mixture.

Heat 1 1/4 cups cream in a medium heavy saucepan over medium heat until hot. Slowly pour the cream into the yolk mixture, whisking constantly. Return the mixture to the saucepan, reduce the heat to medium low and cook, whisking constantly for 5-7 minutes, or until thickened. Pour the pastry cream through a coarse strainer set over a bowl. Whisk in the vanilla, and place a piece of plastic wrap directly on the surface of the pastry cream to keep a skin from forming. Let cool to room temperature, then refrigerate the pastry cream for at least 2 hours, or up to one day.

Once the pastry cream is thoroughly chilled, place the pastry cream in a large bowl with remaining 1 cup of heavy cream and 1/4 sugar. Beat with an electric mixer until the mixture forms soft peaks when the beaters are lifted. Fold in the toasted coconut and spoon the mixture into the pie crust. Sprinkle with a small handful of sweetened shredded coconut. Chill the tart for at least 2 hours or up to 6 hours before serving.

For the crust:
Note: I used a basic pate brisee tart crust for this recipe 'cause I had it in the freezer. Use your favorite tart dough recipe or use the one below.  

1 cup pecans
1/2 cup flour
1/4 cup (1/2 stick) unsalted butter, at room temperature
1/4 cup sugar
1/4 teaspoon salt
1 egg yolk

Pulse the pecans and flour in a food processor just until the pecans are finely ground. With an electric mixer, beat the butter, sugar, and the salt until light and fluffy. Add the egg yolk and beat until well combined. Add the pecan mixture and stir with a rubber spatula until combined. Shape the dough into a disk, wrap in wax paper, and refrigerate for at least one hour or up to one day.

Roll out the dough between two sheets of wax paper to a 12-inch circle. remove the top shhet of paper and invert the crust into a 9-inch tart pan. Gently ease the dough into the pan, and remove the remaining wax paper. Trim the excess dough.

Press a piece of aluminum foil snugly into the bottom and up the sides of the pastry shell and fill with uncooked rice or dried beans. Bake for 15 minutes, remove the foil and beans, and bake for another 15 minutes until golden brown. Prick the dough with a fork if you see the dough starting to bubble. Let cool on a wire rack.


Monday, November 23, 2009

Pumpkin Eggnog Pie

Pumpkin Eggnog Pie

It's almost Thanksgiving and I am headed over the river and through the woods to Grammy's house for Thanksgiving dinner. One of the things I'll be bringing is this Pumpkin Eggnog Pie. I've tried a few other pumpkin pie recipes but I always went back to the recipe on the Libby's Pumpkin label - until my friend Megan told me about this recipe. It's so smooth and creamy and delicious - yet still traditional for those traditionalists out there. It really begs for a dollop of whipped cream but this was only the dress rehearsal after all. For the big show there will certainly be plenty of whipped cream. Happy Thanksgiving!

Pumpkin Eggnog Pie


Pumpkin Eggnog Pie
adapted from Good Housekeeping

1/2 recipe Pate Brisee
1 15-oz can pumpkin (not pie filling)
1 1/4 cup eggnog (from a carton such as Land o' Lakes)
2/3 cup sugar
3 eggs
1/4 teaspoon salt
3/4 teaspoon cinnamon
1/2 teaspoon ginger
1/4 teaspoon cloves
1/4 tsp nutmeg
(or use 1 1/2 teaspoons pumpkin pie spice in place of the cinnamon, ginger, cloves and nutmeg)

Prepare pie crust and place it into a 9- or 10-inch pie pan and crimp the edges as desired.

Preheat oven to 375 degrees F. In large bowl, with wire whisk, mix pumpkin, eggnog, sugar, spice, salt, and eggs until well blended. Pour pumpkin mixture into the pie crust. The mixture will come up to almost the top of the piecrust. (Any extra custard can be baked in a custard cup. It is done when the center no longer jiggles.)

Bake pie 60 to 65 minutes or until filling puffs up around edges and center is just set but not puffed. Cool pie completely on wire rack. Refrigerate until ready to serve or up to 1 day. Garnish each serving with whipped cream sprinkled with pumpkin-pie spice.

Monday, November 2, 2009

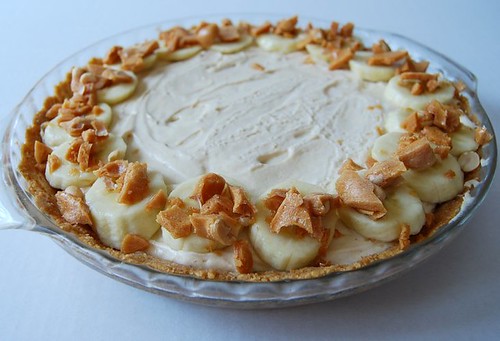
Prize-Winning Peanut Butter Banana Cream Pie

Peanut Butter Banana Cream Pie

Last month, I attended the Second Annual Pie Contest in Slippery Rock, PA, organized by my amazing mother-in-law (Happy Birthday by the way!) and a few of her neighbors. There were at least 25 pies entered in 5 pie categories - Cream, Fruit (except apple), Apple, Nut, and Custard.

Ellen and I both entered a pie. I baked a new recipe for pumpkin pie and topped it with whipped cream. It was pretty good but maybe a little too sweet.

Ellen found a recipe on Epicurious for this phenomenal Peanut Butter Banana Cream Pie. I wish I had taken a picture of an individual slice. Imagine from bottom to top - vanilla wafer crust, a layer of vanilla custard, sliced bananas, a layer of peanut butter mousse, and garnished with bananas and peanut brittle for a little crunchy contrast in texture. After a while, the peanut brittle started to dissolve a little and looked like drizzled caramel on top of the bananas. It was unbelievably good! Her pie won the cream pie category! Congratulations Ellen! You rock!

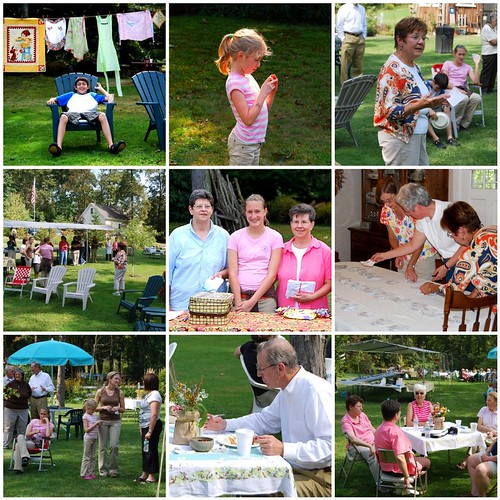
Here are some photos from the day - notice the aprons hanging on the clothesline for decoration. It was a great time to socialize while eating lots of pie. We were all judges and rated the pies we chose to try by assigning a number from 1 to 5 in five categories including appearance, taste, originality, and crust. The organizers tallied all the ballots and the pies with the highest score won for each category. After the five winners were announced, there were several overall judges who again tasted each of the winners' pies and rated them again. The winner of this won Best of Show. The Apple Raisin Streusel Pie won the Best of Show this year. Each participant was given a handmade knitted dishcloth and each winner was given a handmade apron. It was a terrific day.

Pie Contest Mosaic

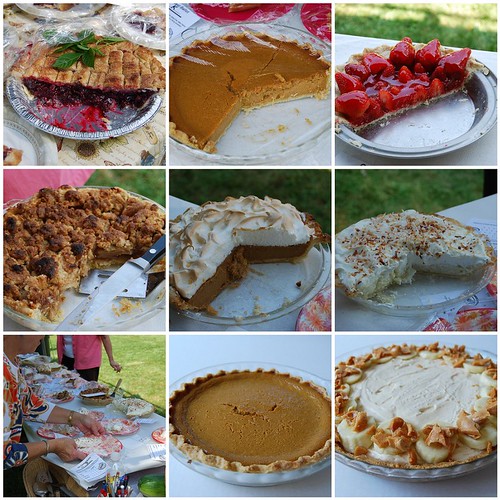
Now for some of the pies...Mixed Berry, Pumpkin, Strawberry, Apple Streusel, Pumpkin Meringue, and Coconut Cream and many more!

My creation

Peanut Butter Banana Cream Pie
From Bon Apetit, May 2009
recipe courtesy of Matt Lewis and Renato Poliafito

Vanilla wafer crust:
6 ounces vanilla wafer cookies
6 tablespoons (3/4 stick) chilled unsalted butter, cut into 1/2-inch cubes
2 tablespoons sugar

Vanilla pudding filling:
1/3 cup sugar
1 1/2 tablespoons cornstarch
1/8 teaspoon salt
1 cup heavy whipping cream
1/2 cup whole milk
2 large egg yolks
1 vanilla bean, split lengthwise
1 tablespoon unsalted butter
4 firm but ripe bananas, peeled, divided
3 tablespoons orange juice, divided

Peanut butter layer:
3 ounces cream cheese, room temperature
1/2 cup powdered sugar
1 teaspoon vanilla extract
1/3 cup creamy peanut butter (do not use old-fashioned or freshly ground)
2/3 cup chilled heavy whipping cream
Purchased peanut brittle, coarsely chopped (optional)

For vanilla wafer crust:
Preheat oven to 350°F. Combine all ingredients in processor; blend until mixture resembles moist crumbs, about 1 minute. Transfer to 9-inch-diameter glass pie dish and press mixture onto bottom and up sides (not rim) of dish. Bake crust until golden brown, about 12 minutes. Remove from oven; press crust with back of spoon if puffed. Cool crust completely.

For vanilla pudding filling:
Whisk sugar, cornstarch, and salt in heavy medium saucepan until no lumps remain. Gradually whisk in cream, then milk. Add yolks and scrape in seeds from vanilla bean; whisk to blend. Cook over medium heat, whisking constantly, until pudding thickens and boils, about 5 minutes. Add butter and stir until melted. Spread warm pudding in cooled crust. Chill until filling is cool, about 1 hour. Thinly slice 3 bananas on diagonal. Combine banana slices and 2 tablespoons orange juice in medium bowl; toss to coat. Transfer banana slices to paper towels and pat dry. Arrange enough banana slices in single layer over vanilla custard filling to cover completely.

For peanut butter layer:
Using electric mixer, beat cream cheese and powdered sugar in medium bowl until smooth. Beat in vanilla, then peanut butter. Beat cream in another medium bowl until firm peaks form. Fold large spoonful of whipped cream into peanut mixture to loosen, then fold in remaining cream in 2 additions. Spread peanut butter layer evenly over bananas. Chill at least 3 hours.

DO AHEAD: Can be made 8 hours ahead. Keep chilled. Thinly slice remaining banana on diagonal. Toss with remaining 1 tablespoon orange juice, then pat dry with paper towels. Arrange banana slices around top edge of pie. Sprinkle peanut brittle over bananas, if desired, and serve.

Tuesday, June 23, 2009

Rhubarb Custard Pie


I grew up eating this pie. My mom would make one or two every year when rhubarb was in season - it's definitely a family favorite. I think the recipe came from the old, falling apart, three-ring, Betty Crocker Cookbook which I'm sure my mom still uses - a lot!  Our rhubarb patch is thriving this year, thanks to a good dose of manure earlier this Spring and maybe because of the cool weather we've had so far this summer.


My father-in-law had a birthday last week. He and my husband prefer pie to the more traditional cake, so we often make pies for their birthdays. Mark's mom made a delicious Strawberry Pie and I brought a Rhubarb Custard Pie. They actually tasted quite good together if you, like me, were to have a little slice of each on your plate. Add vanilla ice cream, and you've got the perfect birthday treat. Happy Birthday!


Mom's Rhubarb Custard Pie

3 eggs
3 tablespoon milk
2 cups sugar
1/4 cup flour
3/4 teaspoon nutmeg
4 cups rhubarb, cut into 1-inch pieces
1 tablespoon butter
one recipe Pate Brisee

Preheat the oven to 400 degrees F. In a large bowl, beat eggs slightly and add milk. In a medium bowl, mix together the sugar, flour, and nutmeg. Add the sugar mixture to the egg mixture and whisk to combine. Add the rhubarb and stir to combine. Pour the mixture into the pastry-lined pan. Dot with 1 T butter and cover with top crust and crimp edges. If desired, brush the top crust with egg wash and sprinkle with Turbinado sugar. With a knife, cut 4 holes in the top of the crust to allow steam to escape. Bake for 50-60 minutes. Allow to cool to room temperature and then refrigerate until ready to eat.

Thursday, March 19, 2009

Lemon Tart


I found this recipe in a book I got from the library called Classic Home Desserts by Richard Sax.
The lemon curd was well balanced and not too tart as some lemon curds can be. The tart dough, blind baked with pie weights, kept its shape nicely. The tart shell is then filled with the curd and baked again. After it's cooled, brush with strained apricot jam and garnish with a thin lemon slice.  Richard Sax calls this "The World's Best Lemon Tart" and maybe it is!

The World’s Best Lemon Tart
from Classic Home Desserts by Richard Sax
Makes one 9- or 10-inch tart; serves about 8
Rich Tart Dough:
1 ½ cups All Purpose flour
2 Tbsp sugar
Pinch salt
½ cup cold unsalted butter, cut into pieces
3 Tbsp ice water or cold orange juice (I needed to use about 5 Tbsp)

Combine the dry ingredients and butter in a food processor and pulse briefly until crumbly; do not over mix. Add the liquid gradually and process just until the dough begins to clump together. Shape into a disk and refrigerate at least one hour.

Roll out the dough on a lightly floured surface into a large circle; the crust for this tart should be very thin. Gently fold the dough in half, and fit it, without stretching, into a lightly buttered fluted tart or quiche pan with removable bottom. Trim off the excess dough, leaving a ¾-inch overhang. Tuck in the overhang, pressing the edges of the dough against the sides of the tart pan to form a high, smooth border. Chill the tart shell while you preheat the oven to 400 degrees F, with a rack in the center.
Line the tart shell with a sheet of lightly buttered foil, buttered side down. Weigh down with dried beans, rice, or pie weights; place the shell on a heavy baking sheet. Bake until the edges are set, 8 to 10 minutes. Very carefully lift out the weights and foil; prick the dough lightly with a fork. Continue to bake until the pastry is very pale gold, about 8 minutes longer. Cool slightly on a wire rack; leave the oven on.

Lemon Curd Filling:
Juice of two lemons
6 large eggs
1 scant cup sugar
10 T cold unsalted butter, cut into pieces
Finely grated zest of 3 lemons
3 T apricot preserves
1 paper-thin lemon slice

In the top of a double boiler or a heatproof bowl, whisk together the lemon juice, eggs and sugar until blended. Add the butter, and set over simmering water. Whisk the mixture constantly until thick and smooth, about 8 minutes. Do not let the mixture boil; be sure to scrape the bottom as you whisk. Remove from the heat. Strain the mixture into a clean bowl; whisk in the lemon zest. If you are not going to use the custard immediately, lay a sheet of wax paper or plastic wrap directly on the surface and refrigerate.
Pour the custard into the tart shell. Bake until the filling is set and lightly golden, about 30 minutes. Cool the tart to room temp on a wire rack, 1-2 hours.
Strain a thin layer of the preserves directly over the surface of the tart (it may need to be warmed if stiff). Gently brush it over the surface of the tart, glazing evenly. Lay the thin slice of lemon in the center of the tart; glaze the lemon slice with the preserves. Remove the tart from the rim of the pan and serve at room temp.
Variation:
Fresh Orange Tart: for the lemon zest and juice, substitute the zest of one orange and 1 lemon, ¼ cup fresh orange juice and the juice of ½ lemon.

Monday, August 18, 2008

Fresh Plum Frangipane Tart


This is an incredible dessert made with delicious plums and complemented by an almond custard filling.  Almost any fruit can be substituted.


Plum Frangipane Tart
Bon Appétit June 1997
Makes 8 Servings.

almond crust:

Makes One 9-inch Crust

1 1/4 cups all purpose flour
1/2 cup slivered blanched almonds (about 2 ounces)
1/4 cup sugar
1/4 teaspoon salt
1/2 cup (1 stick) chilled unsalted butter, cut into pieces
3/4 teaspoon almond extract (I used less)
2 tablespoons (about) ice water

Blend flour, almonds, sugar and salt in a food processor until nuts are finely ground. Add butter and pulse food processor until the mixture resembles coarse meal. Mix in almond extract and enough water to form moist clumps. Knead dough briefly to combine, flatten into a disk and wrap in plastic. Refrigerate 2 hours or up to one day.

Filling:
1 cup slivered blanched almonds
1/3 cup sugar
5 tablespoons unsalted butter, room temperature
1 large egg
1 teaspoon vanilla extract
1 teaspoon almond extract
1 teaspoon dark rum (I omitted)
1 teaspoon grated lemon peel
5 large plums, halved and pitted, then sliced

Blend all ingredients except plums in a food processor until almonds are finely ground.

Glaze:
2 tablespoons apricot jam (I used plum syrup)
2 teaspoons brandy (I omitted)

Preheat oven to 375°F. Roll out crust dough on lightly floured surface to 13-inch round. Transfer dough to 9-inch-diameter tart pan with removable bottom. Gently press dough into tart pan; trim excess. Freeze crust 15 minutes.

Place tart pan on baking sheet. Bake crust 10 minutes; pierce with toothpick if crust bubbles. Continue to bake until crust is pale golden, about 12 minutes. Cool crust on baking sheet 15 minutes. Maintain oven temperature.

Spread frangipane filling in prepared crust. Place plum slices on top of frangipane, pressing gently to anchor.

Bake tart on baking sheet until frangipane is puffed and golden and plums are tender, about 30 minutes.

For glaze, bring jam and brandy to a boil in a small saucepan. Brush glaze over warm tart. Remove sides of tart pan and cut into wedges to serve.

Tuesday, July 22, 2008

Rhubarb Raspberry Pie and Pate Brisee


Saturday's harvest from the backyard gave me the ingredients for my all-time favorite rhubarb treat - Rhubarb Raspberry Pie. I'm still harvesting rhubarb and now the red raspberries we transplanted 5 years ago are starting to ripen, plus we have wild blackberry and black raspberry bushes surrounding our yard at the edge of the woods. The crust (Pate Brisee) recipe comes from The Martha Stewart Cookbook. Martha taught me many things, but I'm most grateful for the food processor method for making pie crust.


I found a large silicone pastry mat in King Arthur Flour catalog that makes rolling out the dough a breeze and has measurements to ensure you're rolling the dough into a circle that's just the right size.


and now I'll tell you my secret to a scrumtious, crunchy crust...brush the top with heavy cream or egg wash (whisked mixture of an egg and one teaspoon of water) and sprinkle the top with turbinado sugar.  Add a picnic with fabulous friends and you've got perfection!


Pate Brisee
Adapted from the Martha Stewart Cookbook

2 1/2 cups all purpose flour
1 tsp sugar
1 tsp salt
1 cup unsalted butter, chilled
1/2 cup ice water

Place flour, sugar and salt in the food processor and pulse to combine. Slice the cold butter into the processor and pulse about 10 pulses until mixture has only small lumps of butter. Add ice water slowly while pulsing until the mixture just comes together in the food processor and doesn't fall apart when you squeeze some into your hand. Turn the dough out onto plastic wrap, divide in half, and shape each half into a flat circle. Wrap each circle in plastic and refrigerate 30 minutes or up to a day.

Raspberry Rhubarb Pie
Adapted from the Junior League Centennial Cookbook

1 cup sugar
3 T cornstarch
1/2 tsp grated orange or lemon zest
2 cups, fresh rhubarb, cut into 1/2 inch pieces
2 cups fresh or unthawed frozen raspberries
2 T butter

Preheat the oven to 425. Line a pie plate with pastry. Combine the sugar, cornstarch, and citrus zest in a small bowl. In a large bowl, combine the raspberries and rhubarb. Add sugar mixture to the fruit mixture and stir gently to combine. Place the mixture into the pie plate and dot with butter. Cover with top crust and seal and flute the edges. Brush top with heavy cream or beaten egg and sprinkle with turbinado sugar. Bake 45 minutes or until crust is browned and the filling is bubbly. Cover pie with foil during baking if the crust is getting too browned.

LinkWithin

Related Posts Widget for Blogs by LinkWithin