Showing posts with label Desserts. Show all posts

Wednesday, November 18, 2015

Kate Spade Inspired Bridal Shower


My neighbor held a bridal shower and asked me to provide the desserts.  The theme was inspired by the pink, black and white designs by Kate Spade.  The cake is two-tiered with vanilla cake on top and chocolate cake with chocolate ganache filling on the bottom.  It is covered with white fondant and decorated with black fondant stripes.  At the host's house, we swapped this artificial flower with a beautiful hot pink rose (see below).


Table ready for guests.  My neighbor, Kristen, has real talent!  So beautiful!


The dessert table included light pink rosette-frosted cupcakes, raspberry parfaits made with whipped cream and raspberry sauce, the chocolate and vanilla cake, cotton candy in martini glasses, and candies to match the color scheme.  (I made all the desserts except the candies.)  What a special and elegant event!

Tuesday, March 11, 2014

Chocolate Hazelnut Truffle Squares


Last week, my girlfriends and I got together to eat, chit-chat and do some crafty things.   Pam was bringing lunch and a craft idea, so I took the opportunity to comb through my cookbooks to find a dessert to make.  I often make the same tried-and-true cookies and cakes for my customers, so I'm excited when I get to try a new recipe and have the girls taste test it.  As soon as I saw this recipe, I knew I had to try it, and I'm glad I did!  It's my favorite combination of hazelnuts and rich dark chocolate - even better than a scoop of Nutella!  The girls loved it and that makes me happy!

The recipe is a little involved - you have to chop chocolate, and toast nuts, and make a caramel for the praline paste, and dirty more than a few dishes.  This recipe is worth it though, I promise.

Regarding the praline paste needed for this recipe: I ran into a snag while making the praline paste from the book (although you'd never know it in the final product), so below I provided a similar recipe with a different technique that I think will work better.  Just be warned that the praline paste is so delicious all by itself you may want to eat it by the spoonful.

Chocolate Hazelnut Truffle Squares
adapted from The Good Cookie by Tish Boyle
Makes 16 bars

hazelnut brownie layer:
1 1/2 ounces bittersweet chocolate, chopped
4 tablespoons unsalted butter
1 large egg
1/2 cup granulated sugar
1 tablespoon hazelnut liqueur
1/4 cup all-purpose flour (or gluten-free flour mix- I used Cup4Cup)
1/2 cup hazelnuts, toasted, skinned and coarsely chopped

hazelnut truffle layer:
6 ounces bittersweet chocolate, chopped
6 tablespoons unsalted butter
1/4 cup praline paste (store-bought or recipe follows)
1/4 cup granulated sugar
pinch of salt
1/2 cup heavy cream
1 tsp pure vanilla extract
1 large egg
2 large egg yolks

garnish:
confectioner's sugar for dusting
16 hazelnuts, toasted and skinned


Preheat the oven to 350 degrees F.  Place about 3/4 cup hazelnuts on a baking sheet (add 1 cup hazelnuts and 1 cup blanched almonds to the baking sheet if making the praline paste recipe) and bake in the oven until fragrant and toasted, about 10 minutes.  Rub the hazelnuts inside a clean towel to remove as much of the skins as possible.  Reserve 16 of the barest, nicest looking hazelnuts to use as garnish.  Divide the remaining as follows: 1/2 cup hazelnuts for brownie layer and 1 cup hazelnuts and 1 cup almonds for praline paste, if making.

Make the hazelnut brownie layer:
Reduce the oven temperature to 325 degrees F.  Spray a 9x9-inch pan with cooking spray (or coat with softened butter).  Line the pan with parchment, allowing the excess to hang over two sides, then spray or butter the parchment.  Coarsely chop the 1/2 cup reserved toasted hazelnuts.  Place the chocolate and butter in the top of a double boiler over barely simmering water and heat while stirring until melted and smooth.  Stir in 1/2 cup sugar and the hazelnut liqueur until blended.  Add the egg and stir vigorously until well blended.  Fold in the flour and hazelnuts just until the flour is incorporated.  Spread the brownie base evenly into the prepared pan.

Make the truffle layer:
Place chocolate and butter in the top of a double boiler over barely simmering water and heat while stirring until melted and smooth.  Remove the pan from the heat and stir in the praline paste.  Whisk in the sugar, salt, heavy cream, and vanilla.  Whisk in the egg and egg yolks, one at a time, blending well after each addition.  Scrape the mixture over the brownie layer and spread it evenly.

Bake the bars for 25-30 minutes until the top is puffed and set and no longer shiny.  Cool the bars completely on a wire rack, then chill for at least 2 hours.

Cut the bars into squares using a sharp chef's knife.  For clean cuts you can run the knife under hot water, then dry the knife and make your cut, cleaning off the knife between cuts.  Dust the bars with confectioner's sugar and press a toasted hazelnut into the top of each bar.  Serve with vanilla ice cream.

Praline Paste
Adapted from Joe Pastry

8 ounces (1 cup plus two tablespoons) granulated sugar
2 ounces (1/4 cup) water
4 ounces (1 cup) blanched almonds (113 grams)
4 ounces (1 cup) hazelnuts toasted and peeled


Place the nuts on a sheet of lightly greased parchment paper or a silpat. Then simply add the water to the sugar in a small saucepan and heat it over high heat, swirling until the mixture turns to caramel. Dark amber is usually the degree most pastry makers cook to, though you can go darker for a stronger flavor. Pour the caramel over the nuts and allow the mixture to cool completely. Then break the praline into pieces and grind them as finely as you can in a food processor until a paste forms. 


Thursday, November 11, 2010

Chocolate Caramel Mini Tartlets with Sea Salt

Chocolate Caramel Tartlets

Sweet and salty is all the rage right now and these bite-sized Chocolate Caramel Tartlets with Sea Salt are an impressive addition to your chocolate sampler tray next to your Chocolate Raspberry Truffles and Chocolate-Dipped Coconut Macaroons.

If you've tried your hand at ganache, caramel, and pastry then these will be a snap to make. If you haven't mastered these yet, then these tartlets are a good reason to try these techniques again. Use a 9" tart pan if you're not into making dozens of tiny tart shells.

I've had these little mini tartlet molds ever since I took a cooking class in a little local kitchen shop about 15 years ago. I'm embarassed to say that this is the first time I've used them. But then again, I got a little busy in those 15 years...(my kids are 14, 11, and 8!)

The tartlet shells are a sweet pate sucree dough. I pricked to bottoms with a fork to eliminate the possibility of air pockets. No need for pie weights with a shell this small but if you are making a larger tart, bake the shell for half the total baking time lined with parchment and pie weights, then remove the paper and weights and continue baking until golden brown.

I thought the tart shells looked just like sunflowers...

Chocolate Caramel Tartlets

Spoon in the caramel filling...

Chocolate Caramel Tartlets

And then top with chocolate ganache and a sprinkling of gourmet sea salt. I picked up this pink Himalayan Sea Salt at Marshall's. If you look closely, you can see a hint of pink.

Chocolate Caramel Tartlets

Place your chocolate goodies on a pretty platter. Now who could resist these?

Chocolate Caramel Tart with Sea Salt
Makes one 9-inch tart or about 24 mini tartlets
Note: to make the mini tart shells, I cut circles out of the rolled-out dough and worked the dough into the tartlet molds. Prick the bottoms with a fork and bake until golden, about 8-10 minutes.


1 9-inch pre-baked pate sucree tart shell or 24 mini tart shells

for the chocolate ganache:
8 ounces bittersweet chocolate, finely chopped
1 cup heavy cream

Sea Salt for garnish


Place the chocolate into a medium heat-proof bowl. Heat the heavy cream in a small saucepan until just boiling. Pour the heavy cream over the chocolate and let it sit for one minute. Stir with a rubber spatula or whisk in a small, quick circular motion, starting in the center of the bowl and working your way out until the ganache is shiny and all the chocolate has melted.

Assemble the tart:
Pour enough caramel into the tart shell to come up about 1/3 of the way up the sides of the tart shell. Refrigerate the tart for 30 minutes to harden the caramel. Pour the chocolate ganache over the caramel to fill about 2/3 of the tart shell. Sprinkle with sea salt and allow to set for 30 minutes in the refrigerator or 2 hours at room temperature.


Thursday, June 3, 2010

Daring Bakers Croquembouche

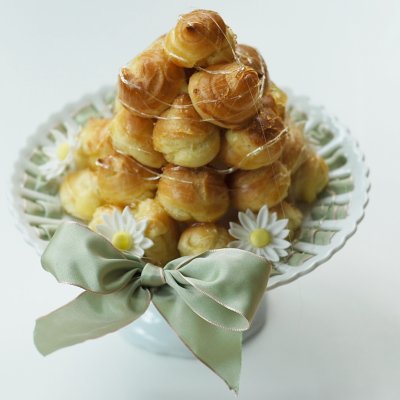
Croquembouche

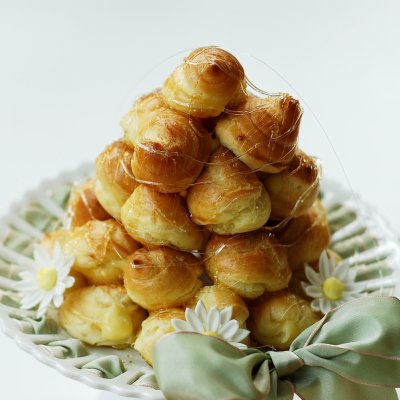
The May 2010 Daring Bakers’ challenge was hosted by Cat of Little Miss Cupcake. Cat challenged everyone to make a piece montée, or croquembouche, based on recipes from Peter Kump’s Baking School in Manhattan and Nick Malgieri.

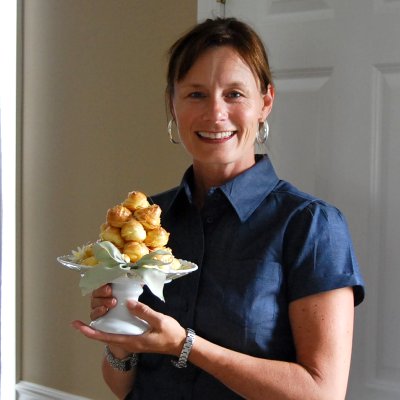
Croquembouche is a tower of cream puffs held together by a thin coating of crunchy caramel and adorned with spun sugar. The word "croquembouche" literally means "crunch in the mouth". It is the traditional wedding cake in France and is used in many communions and baptisms as well. I gave mine to my good friend, thetreatgirl, for her birthday. She loves special treats! Happy Birthday!

Pam and the birthday croquembouche

The components used in this dessert are:
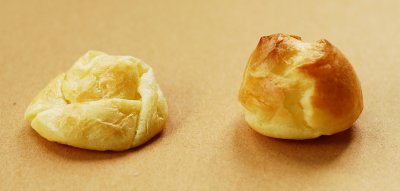
1. Pate a choux made into small, round puffs. I used a pastry bag to pipe 1-inch rounds onto a cookie sheet lined with a Silpat. I brushed the cream puffs with egg wash before baking to attain a shiny browned color. As Sherry Yard suggests in her book The Secrets of Baking, I placed a pan on the oven floor and poured about a cup of hot water into the pan just before closing the oven door. Be sure to bake the puffs until they are nice and brown. Undercooked puffs will deflate and look like a pancake, like the puff on the left in the photo below. The puffs will stay puffed if cooked long enough, like the one on the right.

Pate a choux

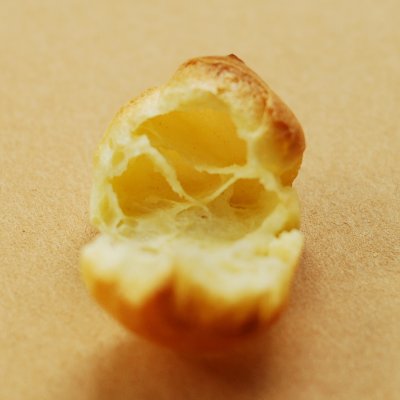
The puff will be hollow inside, like in the next picture. It can then be filled with a vanilla or other flavored pastry cream.

Pate a choux

2. Pastry Cream - I chose to make a vanilla pastry cream, but I'm sure the chocolate or coffee-flavored pastry cream would be delicious too. I used a pastry bag fitted with a plain tip to fill the puffs. After filling, cover the cream puffs and place them in the refrigerator until ready to assemble.

3. Caramel - cooked to hard crack stage or 325 degrees F on a candy thermometer. Have all the filled cream puffs ready to go before starting the caramel. Work carefully but quickly so that all the cream puffs can be assembled before the caramel starts to thicken. If the caramel cools too much, it can be reheated over low heat until useable again. After the croquembouche was assembled, I drizzled the extra caramel on top.


Croquembouche

Vanilla Crème Patissiere
1 cup (225 ml.) whole milk
2 Tbsp. cornstarch
6 Tbsp. (100 g.) sugar
1 large egg
2 large egg yolks
2 Tbsp. (30 g.) unsalted butter
1 Tsp. Vanilla

Dissolve cornstarch in ¼ cup of milk. Combine the remaining milk with the sugar in a saucepan; bring to boil; remove from heat.

Beat the whole egg, then the yolks into the cornstarch mixture. Pour 1/3 of boiling milk into the egg mixture, whisking constantly so that the eggs do not begin to cook.

Return the remaining milk to boil. Pour in the hot egg mixture in a stream, continuing whisking.

Continue whisking (this is important – you do not want the eggs to solidify/cook) until the cream thickens and comes to a boil. Remove from heat and beat in the butter and vanilla.

Pour cream into a stainless steel/ceramic bowl. Press plastic wrap firmly against the surface. Chill immediately and until ready to use.

Chocolate Pastry Cream
Bring ¼ cup (about 50 cl.) milk to a boil in a small pan; remove from heat and add in 3 ounces (about 80 g.) semisweet chocolate, finely chopped, and mix until smooth. Whisk into pastry cream when you add the butter and vanilla.

Coffee Pastry Cream
Dissolve 1 ½ teaspoons instant espresso powder in 1 ½ teaspoons boiling water. Whisk into pastry cream with butter and vanilla.

Pate a Choux
(Yield: About 28)

¾ cup (175 ml.) water
6 Tbsp. (85 g.) unsalted butter
¼ Tsp. salt
1 Tbsp. sugar
1 cup (125 g.) all-purpose flour
4 large eggs

Egg Wash:
1 egg and pinch of salt

Pre-heat oven to 425◦F/220◦C degrees. Line two baking sheets with parchment paper.

Preparing batter:
Combine water, butter, salt and sugar in a saucepan over medium heat. Bring to a boil and stir occasionally. At boil, remove from heat and sift in the flour, stirring to combine completely.

Return to heat and cook, stirring constantly until the batter dries slightly and begins to pull away from the sides of the pan.

Transfer to a bowl and stir with a wooden spoon 1 minute to cool slightly.

Add 1 egg. The batter will appear loose and shiny. As you stir, the batter will become dry-looking like lightly buttered mashed potatoes. It is at this point that you will add in the next egg. Repeat until you have incorporated all the eggs.

Piping:
Transfer batter to a pastry bag fitted with a large open tip (I piped directly from the bag opening without a tip). Pipe choux about 1 inch-part in the baking sheets. Choux should be about 1 inch high and about 1 inch wide.

Using a clean finger dipped in hot water, gently press down on any tips that have formed on the top of choux when piping. You want them to retain their ball shape, but be smoothly curved on top. Brush tops with egg wash.

Baking:
Bake the choux at 425◦F/220◦C degrees until well-puffed and turning lightly golden in color, about 10 minutes.

Lower the temperature to 350◦F/180◦C degrees and continue baking until well-colored and dry, about 20 minutes more. Remove to a rack and cool.
Can be stored in a airtight box overnight.

Filling:
When you are ready to assemble your piece montée, using a plain pastry tip, pierce the bottom of each choux. Fill the choux with pastry cream using either the same tip or a star tip, and place on a paper-lined sheet. Choux can be refrigerated briefly at this point while you make your glaze.

Use one of these to top your choux and assemble your piece montée.

Chocolate Glaze:
8 ounces/200 g. finely chopped chocolate (use the finest quality you can afford as the taste will be quite pronounced; I recommend semi-sweet)

Melt chocolate in microwave or double boiler. Stir at regular intervals to avoid burning. Use the best quality chocolate you can afford. Use immediately.

Hard Caramel Glaze:
1 cup (225 g.) sugar
½ teaspoon lemon juice

Combine sugar and lemon juice in a saucepan with a metal kitchen spoon stirring until the sugar resembles wet sand. Place on medium heat; heat without stirring until sugar starts to melt around the sides of the pan and the center begins to smoke. Begin to stir sugar. Continue heating, stirring occasionally until the sugar is a clear, amber color. Remove from heat and use immediately.

Assembly of your Piece Montée:
You may want to lay out your unfilled, unglazed choux in a practice design to get a feel for how to assemble the final dessert. For example, if making a conical shape, trace a circle (no bigger than 8 inches) on a piece of parchment to use as a pattern. Then take some of the larger choux and assemble them in the circle for the bottom layer. Practice seeing which pieces fit together best.

Once you are ready to assemble your piece montée, dip the top of each choux in your glaze (careful it may be still hot!), and start assembling on your cake board/plate/sheet. Continue dipping and adding choux in levels using the glaze to hold them together as you build up. (You may want to use toothpicks to hold them in place).

When you have finished the design of your piece montée, you may drizzle with remaining glaze or use ribbons, sugar cookie cut-outs, almonds, flowers, etc. to decorate. Bon appétit!

Monday, April 12, 2010

Coconut Cream Tart with Pecan Crust

Coconut Cream Tart

This past Easter is the last one we'll spend in this house, the house we built 10 years ago. What memories were made in this house - basically our kids grew up here. Annie, our youngest, is almost 8.

Usually on Easter, the Easter bunny will leave a note for the kids - a rhyming limerick with clues indicating where the baskets are hidden. My husband always comes up with clever plays on words which I've saved through the years.

Easter 2010

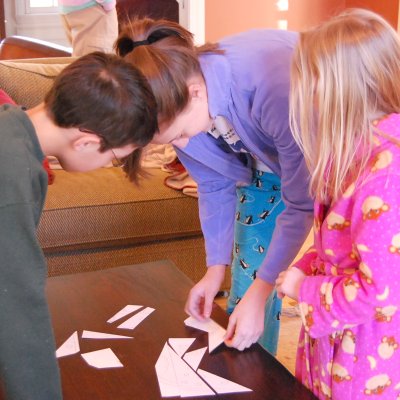
This year, the Easter bunny (you can see his shirt in the background - the traditional Easter rugby pulled out every year just for the occasion) thought of another idea. He commissioned his cartographer to draw a map of our yard with the house on it. The map was made into a puzzle and the pieces were hidden all over the house. The kids were to find the pieces, put the map together, and find out where their baskets were according to where their name was located on the map. I've never seen such teamwork! Not to mention the added bonus of sharpening their map-reading skills!

Easter 2010

It was the warmest Easter in recent memory, so he hid the baskets outside - Annie's by the hammock, Ben's by the basketball hoop, and Ellen's by her favorite flowering dogwood tree in the front of the house.
And voila! more memories are made - oh happiness!

Easter 2010

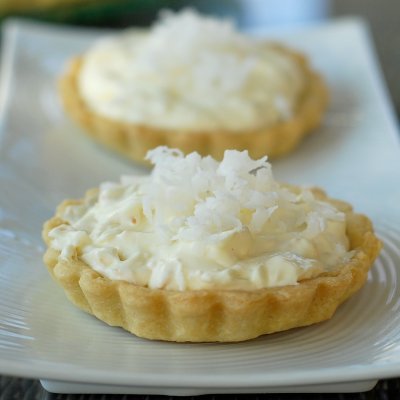
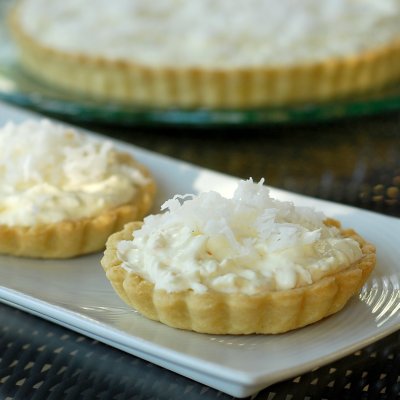
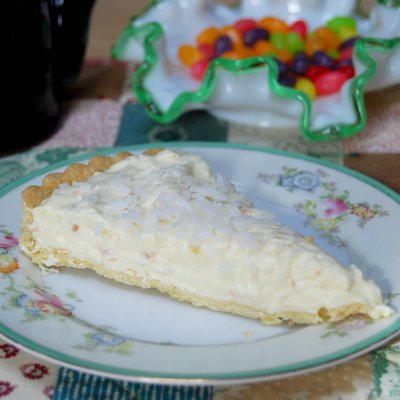
This coconut cream tart was unbelievably good. The filling was light and creamy, perfect for a Spring holiday dessert. The filling is made in two steps. First make a vanilla pastry cream and refrigerate overnight. Next add the chilled pastry cream to some heavy cream and sugar, essentially making a whipped cream filling with a bit more substance to it. Add the toasted coconut and fill the pre-baked tart shell.

Coconut Cream Tart

The original recipe is adapted from the recipe for Coconut Cream Pie with Pecan Crust in the cookbook Luscious Creamy Desserts by Lori Longbotham. I chose to use a plain tart dough only because I had the dough already made in the freezer, but I imagine the pecan crust would be fantastic.

A tart holds less filling than a pie therefore you get a higher crust to filling ratio - the perfect balance in my opinion. Only I had lots of extra filling leftover. I managed to get two tartlet shells out of the leftover dough and filled them, but still had extra filling.  To make a 9-inch tart, you might want to cut the filling recipe in half.

Coconut Cream Tart

Coconut Cream Tart with Pecan Crust
Serves 8 with extra filling left over
Adapted from Luscious Creamy Desserts by Lori Longbotham

For the filling:
1 1/4 cups finely shredded unsweetened coconut
3/4 cup sugar, divided
2 tablespoons cornstarch
2 3/4 cups whipping cream, divided
2 large egg yolks
1/2 teaspoon vanilla extract

Preheat the oven to 350 degrees F. Toast the coconut for 5-7 minutes on a baking sheet, stirring once or twice during that time.

Stir together 1/2 cup sugar and the cornstarch in a small bowl. Whisk 1/2 cup of the cream and and egg yolk in a medium bowl. Whisk in the sugar/cornstarch mixture.

Heat 1 1/4 cups cream in a medium heavy saucepan over medium heat until hot. Slowly pour the cream into the yolk mixture, whisking constantly. Return the mixture to the saucepan, reduce the heat to medium low and cook, whisking constantly for 5-7 minutes, or until thickened. Pour the pastry cream through a coarse strainer set over a bowl. Whisk in the vanilla, and place a piece of plastic wrap directly on the surface of the pastry cream to keep a skin from forming. Let cool to room temperature, then refrigerate the pastry cream for at least 2 hours, or up to one day.

Once the pastry cream is thoroughly chilled, place the pastry cream in a large bowl with remaining 1 cup of heavy cream and 1/4 sugar. Beat with an electric mixer until the mixture forms soft peaks when the beaters are lifted. Fold in the toasted coconut and spoon the mixture into the pie crust. Sprinkle with a small handful of sweetened shredded coconut. Chill the tart for at least 2 hours or up to 6 hours before serving.

For the crust:
Note: I used a basic pate brisee tart crust for this recipe 'cause I had it in the freezer. Use your favorite tart dough recipe or use the one below.  

1 cup pecans
1/2 cup flour
1/4 cup (1/2 stick) unsalted butter, at room temperature
1/4 cup sugar
1/4 teaspoon salt
1 egg yolk

Pulse the pecans and flour in a food processor just until the pecans are finely ground. With an electric mixer, beat the butter, sugar, and the salt until light and fluffy. Add the egg yolk and beat until well combined. Add the pecan mixture and stir with a rubber spatula until combined. Shape the dough into a disk, wrap in wax paper, and refrigerate for at least one hour or up to one day.

Roll out the dough between two sheets of wax paper to a 12-inch circle. remove the top shhet of paper and invert the crust into a 9-inch tart pan. Gently ease the dough into the pan, and remove the remaining wax paper. Trim the excess dough.

Press a piece of aluminum foil snugly into the bottom and up the sides of the pastry shell and fill with uncooked rice or dried beans. Bake for 15 minutes, remove the foil and beans, and bake for another 15 minutes until golden brown. Prick the dough with a fork if you see the dough starting to bubble. Let cool on a wire rack.


Monday, March 29, 2010

Orange Tian with The Daring Bakers

Orange Tian

{The 2010 March Daring Baker's challenge was hosted by Jennifer of Chocolate Shavings. She chose Orange Tian as the challenge for this month, a dessert based on a recipe from Alain Ducasse's Cooking School in Paris.}

If I were to come across this recipe in a cookbook, I might not have chosen it as one of the first to try. Just the length of the recipe would probably discourage me from trying it! But I'm so glad that Jennifer picked it for all of the Daring Bakers to make this month. This is just one of the reasons I like the Daring Bakers. It takes me beyond the chocolate desserts and the lemony sweets I am drawn to and is expanding my horizons with every challenge.

Orange Tian

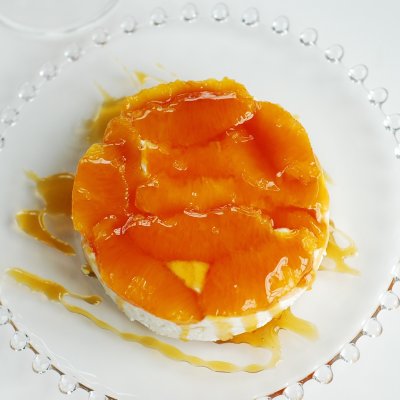
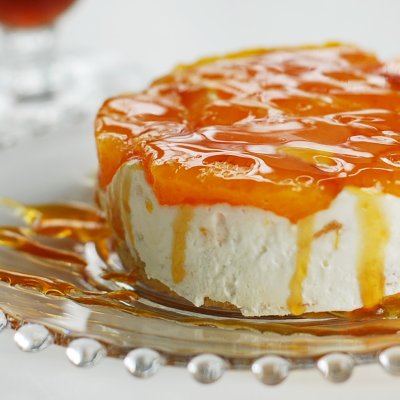
This tian is a molded layered dessert comprised of 5 components (this seems to be a recurring theme as last month's tiramisu had multiple components as well.) None of the components were particularly hard to make, except I did have my typical fear of caramel. This recipe uses the dry method of melting the sugar creating a bit of sugar anxiety for me, but even so, the caramel was successful. The greatest challenge was probably keeping track of all the recipes and directions and organizing the game plan - and for me, finishing the challenge on time!

Here are the components listed in order from bottom layer to top layer, as well as the make-ahead suggestions:

Pate sucree - a sweet pastry dough, much like a cookie - make the dough the day before, refrigerate overnight, roll out and bake the day of serving
Homemade Orange Marmalade - can be prepared several days ahead
Whipped Cream stabilized with Gelatine and flavored with Orange Marmalade - make just before assembling
Caramel-soaked Orange Slices - prepared the day before and refrigerated overnight; I ran out of orange slices on the sixth mold, so I'd make a few more next time
Orange Caramel Sauce - prepared the day before. Half is used to soak the oranges, the other half is reduced to a thick clear caramel sauce.

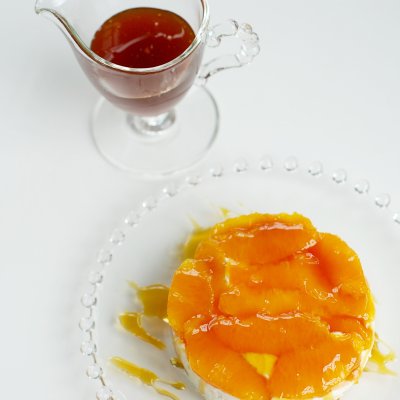
The result is a light dessert with bright flavors. It was delicious! I used 6 mini (4-inch diameter) springform pans with the bottoms removed to make this dessert, but they were a bit large for a single serving but perfect for two to share. A 3-inch mold would be better for a single serving. If I make this again (perhaps for Easter) I think I'll try using the same components and make tartlets or a larger tart to cut into slices. This tian would also be delicious if you used peaches or raspberries with a corresponding jam in place of the oranges and marmalade. Yum!

Orange Tian

Orange Tian

For the Pate Sablee:

2 medium-sized egg yolks at room temperature

granulated sugar 6 tablespoons + 1 teaspoon; 2.8 oz; 80 grams

vanilla extract ½ teaspoon

Unsalted butter ¼ cup + 3 tablespoons; 3.5 oz; 100 grams ice cold, cubed

Salt 1/3 teaspoon; 2 grams

All-purpose flour 1.5 cup + 2 tablespoons; 7 oz; 200 grams

baking powder 1 teaspoon ; 4 grams


Put the flour, baking powder, ice cold cubed butter and salt in a food processor fitted with a steel blade.
In a separate bowl, add the eggs yolks, vanilla extract and sugar and beat with a whisk until the mixture is pale. Pour the egg mixture in the food processor.
Process until the dough just comes together. If you find that the dough is still a little too crumbly to come together, add a couple drops of water and process again to form a homogenous ball of dough. Form into a disc, cover with plastic wrap and leave to rest in the fridge for 30 minutes.

Preheat your oven to 350 degree Fahrenheit.
Roll out the dough onto a lightly floured surface until you obtain a ¼ inch thick circle.
Using your cookie cutter, cut out circles of dough and place on a parchment (or silicone) lined baking sheet. Bake for 15-20 minutes or until the circles of dough are just golden.

For the Marmalade:

Freshly pressed orange juice ¼ cup + 3 tablespoons; 3.5 oz; 100 grams

1 large orange used to make orange slices

cold water to cook the orange slices

pectin 5 grams

granulated sugar: use the same weight as the weight of orange slices once they are cooked

Finely slice the orange. Place the orange slices in a medium-sized pot filled with cold water. Simmer for about 10 minutes, discard the water, re-fill with cold water and blanch the oranges for another 10 minutes.
Blanch the orange slices 3 times. This process removes the bitterness from the orange peel, so it is essential to use a new batch of cold water every time when you blanch the slices.
Once blanched 3 times, drain the slices and let them cool.

Once they are cool enough to handle, finely mince them (I suggest a food processor).
Weigh the slices and use the same amount of granulated sugar . If you don’t have a scale, you can place the slices in a cup measurer and use the same amount of sugar.
In a pot over medium heat, add the minced orange slices, the sugar you just weighed, the orange juice and the pectin. Cook until the mixture reaches a jam consistency (10-15 minutes). (It will thicken as it cools.)
Transfer to a bowl, cover with plastic wrap and put in the fridge.

For the Orange Segments:
For this step you will need 8 oranges.
Cut the oranges into segments over a shallow bowl. Do not drain the juice off.

For the Caramel:

granulated sugar 1 cup; 7 oz; 200 grams

orange juice 1.5 cups + 2 tablespoons; 14 oz; 400 grams

Place the sugar in a pan on medium heat and begin heating it.
Once the sugar starts to bubble and foam, slowly add the orange juice. As soon as the mixture starts boiling, remove from the heat and pour half of the mixture over the orange segments.
Reserve the other half of the caramel mixture in a small bowl — you will use this later to spoon over the finished dessert. When the dessert is assembled and setting in the freezer, heat the kept caramel sauce in a small saucepan over low heat until it thickens and just coats the back of a spoon (about 10 minutes). (I did this the night before just after dividing the caramel in half.)

[Tip: Be very careful when making the caramel — if you have never made caramel before, I would suggest making this step while you don’t have to worry about anything else. Bubbling sugar is extremely, extremely hot, so make sure you have a bowl of ice cold water in the kitchen in case anyone gets burned!]

For the Whipped Cream:

heavy whipping cream 1 cup; 7 oz; 200 grams

3 tablespoons of hot water

1 tsp Gelatine

1 tablespoon of confectioner's sugar

orange marmalade (see recipe above) 1 tablespoon

In a small bowl, add the gelatine and hot water, stirring well until the gelatine dissolves. Let the gelatine cool to room temperature while you make the whipped cream. Combine the cream in a chilled mixing bowl. Whip the cream using a hand mixer on low speed until the cream starts to thicken for about one minute. Add the confectioner sugar. Increase the speed to medium-high. Whip the cream until the beaters leave visible (but not lasting) trails in the cream, then add the cooled gelatine slowly while beating continuously. Continue whipping until the cream is light and fluffy and forms soft peaks. Transfer the whipped cream to a bowl and fold in the orange marmalade.
[Tip: Use an ice cold bowl to make the whipped cream in. You can do this by putting your mixing bowl, cream and beater in the fridge for 20 minutes prior to whipping the cream.]

Assembling the Dessert:
Make sure you have some room in your freezer. Ideally, you should be able to fit a small baking sheet or tray of desserts to set in the freezer.
Line a small tray or baking sheet with parchment paper or a silicone sheet. Lay out 6 cookie cutters onto the parchment paper/silicone.
Drain the orange segments on a kitchen towel.
Have the marmalade, whipped cream and baked circles of dough ready to use.
Arrange the orange segments at the bottom of each cookie cutter. Make sure the segments all touch either and that there are no gaps. Make sure they fit snuggly and look pretty as they will end up being the top of the dessert. Arrange them as you would sliced apples when making an apple tart.
Once you have neatly arranged one layer of orange segments at the bottom of each cookie cutter, add a couple spoonfuls of whipped cream and gently spread it so that it fills the cookie cutter in an even layer. Leave about 1/4 inch at the top so there is room for dough circle.
Using a butter knife or small spoon, spread a small even layer of orange marmalade on each circle of dough.
Carefully place a circle of dough over each ring (the side of dough covered in marmalade should be the side touching the whipping cream). Gently press on the circle of dough to make sure the dessert is compact.
Place the desserts to set in the freezer to set for 10 minutes. ( I suggest 20 to 30 minutes.)
Using a small knife, gently go around the edges of the cookie cutter to make sure the dessert will be easy to unmold. Gently place your serving plate on top of a dessert (on top of the circle of dough) and turn the plate over. Gently remove the cookie cutter, add a spoonful of caramel sauce and serve immediately.

Saturday, March 6, 2010

Tiramisu

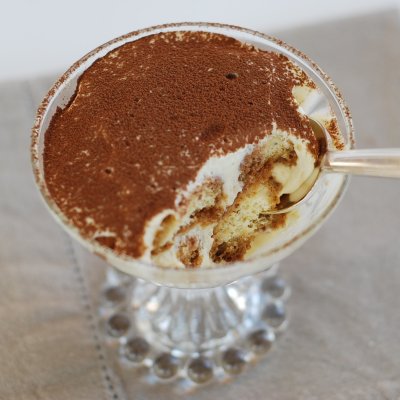
Tiramisu

This is my very first Daring Bakers Challenge. All the components were made from scratch - the ladyfingers, the zabaglione, the vanilla pastry cream, the whipped cream, and the mascarpone cheese. Here's my take on each component...

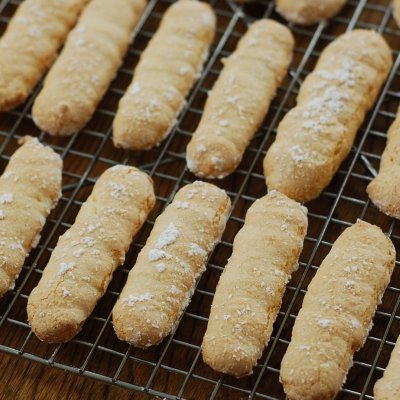
The ladyfingers...easy and delicious...perfect for tiramisu...didn't get quite enough of them for three layers in an 8x8 pan.

Savoiardi Biscuits

The zabaglione...not at all difficult, I think I would try adding coffee instead of the Marsala next time.
The vanilla pastry cream...very good.
The whipped cream... delicious.
The mascarpone...caused me the most worry...couldn't find cream that wasn't ultra-pasteurized but it seemed to work...firmed up nicely in the fridge, but when I stirred it again to make it smooth, it became almost liquid again...did this happen to anyone else? The resulting mixture was fine in the end...still, I worried it would be runny.  I think I'll just buy it next time.

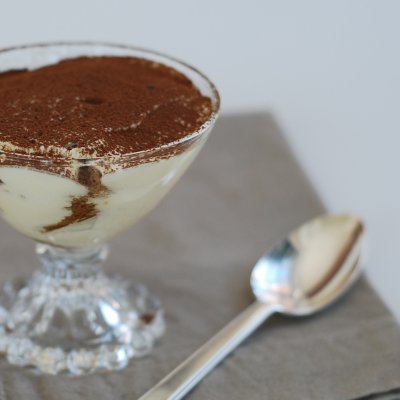
Tiramisu

The final result...so delicious. I just wish I'd counted the number of dishes and utensils this project required me to wash...let's just say it was ALOT! There's got to be an easier way, but I can't deny this dessert is fantastic! And I learned quite a bit just making this - and that's the whole reason I joined the Daring Bakers! I'm looking forward to the next challenge!

{The February 2010 Daring Bakers’ challenge was hosted by Aparna of My Diverse Kitchen and Deeba of Passionate About Baking. They chose Tiramisu as the challenge for the month. Their challenge recipe is based on recipes from The Washington Post, Cordon Bleu at Home and Baking Obsession.}

TIRAMISU

(Recipe source: Carminantonio's Tiramisu from The Washington Post, July 11 2007 )
This recipe makes 6 servings (at least)

Ingredients:
For the zabaglione:
2 large egg yolks
3 tablespoons sugar/50gms
1/4 cup/60ml Marsala wine (or port or coffee)
1/4 teaspoon/ 1.25ml vanilla extract
1/2 teaspoon finely grated lemon zest

For the vanilla pastry cream:
1/4 cup/55gms sugar
1 tablespoon/8gms all purpose flour
1/2 teaspoon finely grated lemon zest
1/2 teaspoon/ 2.5ml vanilla extract
1 large egg yolk
3/4 cup/175ml whole milk

For the whipped cream:
1 cup/235ml chilled heavy cream (we used 25%)
1/4 cup/55gms sugar
1/2 teaspoon/ 2.5ml vanilla extract

To assemble the tiramisu:
2 cups/470ml brewed espresso, warmed
1 teaspoon/5ml rum extract (optional)
1/2 cup/110gms sugar
1/3 cup/75gms mascarpone cheese
36 savoiardi/ ladyfinger biscuits (you may use less)
2 tablespoons/30gms unsweetened cocoa powder

Method:
For the zabaglione:
Heat water in a double boiler. If you don’t have a double boiler, place a pot with about an inch of water in it on the stove. Place a heat-proof bowl in the pot making sure the bottom does not touch the water.
In a large mixing bowl (or stainless steel mixing bowl), mix together the egg yolks, sugar, the Marsala (or espresso/ coffee), vanilla extract and lemon zest. Whisk together until the yolks are fully blended and the mixture looks smooth.
Transfer the mixture to the top of a double boiler or place your bowl over the pan/ pot with simmering water. Cook the egg mixture over low heat, stirring constantly, for about 8 minutes or until it resembles thick custard. It may bubble a bit as it reaches that consistency.
Let cool to room temperature and transfer the zabaglione to a bowl. Cover and refrigerate at least 4 hours or overnight, until thoroughly chilled.

For the pastry cream:
Mix together the sugar, flour, lemon zest and vanilla extract in a medium heavy-bottomed saucepan. To this add the egg yolk and half the milk. Whisk until smooth.
Now place the saucepan over low heat and cook, stirring constantly to prevent the mixture from curdling.
Add the remaining milk a little at a time, still stirring constantly. After about 12 minutes the mixture will be thick, free of lumps and beginning to bubble. (If you have a few lumps, don’t worry. You can push the cream through a fine-mesh strainer.)
Transfer the pastry cream to a bowl and cool to room temperature. Cover with plastic film and refrigerate at least 4 hours or overnight, until thoroughly chilled.

For the whipped cream:
Combine the cream, sugar and vanilla extract in a mixing bowl. Beat with an electric hand mixer or immersion blender until the mixture holds stiff peaks. Set aside.

To assemble the tiramisu:
Have ready a rectangular serving dish (about 8" by 8" should do) or one of your choice.
Mix together the warm espresso, rum extract and sugar in a shallow dish, whisking to mix well. Set aside to cool.
In a large bowl, beat the mascarpone cheese with a spoon to break down the lumps and make it smooth. This will make it easier to fold. Add the prepared and chilled zabaglione and pastry cream, blending until just combined. Gently fold in the whipped cream. Set this cream mixture aside.

Now to start assembling the tiramisu:
Working quickly, dip 12 of the ladyfingers in the sweetened espresso, about 1 second per side. They should be moist but not soggy. Immediately transfer each ladyfinger to the platter, placing them side by side in a single row. You may break a lady finger into two, if necessary, to ensure the base of your dish is completely covered.
Spoon one-third of the cream mixture on top of the ladyfingers, then use a rubber spatula or spreading knife to cover the top evenly, all the way to the edges.
Repeat to create 2 more layers, using 12 ladyfingers and the cream mixture for each layer. Clean any spilled cream mixture; cover carefully with plastic wrap and refrigerate the tiramisu overnight.
To serve, carefully remove the plastic wrap and sprinkle the tiramisu with cocoa powder using a fine-mesh strainer or decorate as you please. Cut into individual portions and serve.

MASCARPONE CHEESE

(Source: Vera’s Recipe for Homemade Mascarpone Cheese)
This recipe makes 12oz/ 340gm of mascarpone cheese

Ingredients:
474ml (approx. 500ml)/ 2 cups whipping (36 %) pasteurized (not ultra-pasteurized), preferably organic cream (between 25% to 36% cream will do)
1 tablespoon fresh lemon juice

Method:
Bring 1 inch of water to a boil in a wide skillet. Reduce the heat to medium-low so the water is barely simmering. Pour the cream into a medium heat-resistant bowl, then place the bowl into the skillet. Heat the cream, stirring often, to 190 F. If you do not have a thermometer, wait until small bubbles keep trying to push up to the surface.
It will take about 15 minutes of delicate heating. Add the lemon juice and continue heating the mixture, stirring gently, until the cream curdles. Do not expect the same action as you see during ricotta cheese making. All that the whipping cream will do is become thicker, like a well-done crème anglaise. It will cover a back of your wooden spoon thickly. You will see just a few clear whey streaks when you stir. Remove the bowl from the water and let cool for about 20 minutes. Meanwhile, line a sieve with four layers of dampened cheesecloth and set it over a bowl. Transfer the mixture into the lined sieve. Do not squeeze the cheese in the cheesecloth or press on its surface (be patient, it will firm up after refrigeration time). Once cooled completely, cover with plastic wrap and refrigerate (in the sieve) overnight or up to 24 hours.
Vera’s notes: The first time I made mascarpone I had all doubts if it’d been cooked enough, because of its custard-like texture. Have no fear, it will firm up beautifully in the fridge, and will yet remain lusciously creamy.
Keep refrigerated and use within 3 to 4 days.

LADYFINGERS/ SAVOIARDI BISCUITS
(Source: Recipe from Cordon Bleu At Home)
This recipe makes approximately 24 big ladyfingers or 45 small (2 1/2" to 3" long) ladyfingers.

Ingredients:
3 eggs, separated
6 tablespoons /75gms granulated sugar
3/4 cup/95gms cake flour, sifted (or 3/4 cup all purpose flour + 2 tbsp corn starch)
6 tablespoons /50gms confectioner's sugar,

Method:

Preheat your oven to 350 F (175 C) degrees, then lightly brush 2 baking sheets with oil or softened butter and line with parchment paper.
Beat the egg whites using a hand held electric mixer until stiff peaks form. Gradually add granulate sugar and continue beating until the egg whites become stiff again, glossy and smooth.
In a small bowl, beat the egg yolks lightly with a fork and fold them into the meringue, using a wooden spoon. Sift the flour over this mixture and fold gently until just mixed. It is important to fold very gently and not overdo the folding. Otherwise the batter would deflate and lose volume resulting in ladyfingers which are flat and not spongy.
Fit a pastry bag with a plain tip (or just snip the end off; you could also use a Ziploc bag) and fill with the batter. Pipe the batter into 5" long and 3/4" wide strips leaving about 1" space in between the strips.
Sprinkle half the confectioner's sugar over the ladyfingers and wait for 5 minutes. The sugar will pearl or look wet and glisten. Now sprinkle the remaining sugar. This helps to give the ladyfingers their characteristic crispness.
Hold the parchment paper in place with your thumb and lift one side of the baking sheet and gently tap it on the work surface to remove excess sprinkled sugar.
Bake the ladyfingers for 10 minutes, then rotate the sheets and bake for another 5 minutes or so until the puff up, turn lightly golden brown and are still soft.
Allow them to cool slightly on the sheets for about 5 minutes and then remove the ladyfingers from the baking sheet with a metal spatula while still hot, and cool on a rack.
Store them in an airtight container till required. They should keep for 2 to 3 weeks.

Friday, November 6, 2009

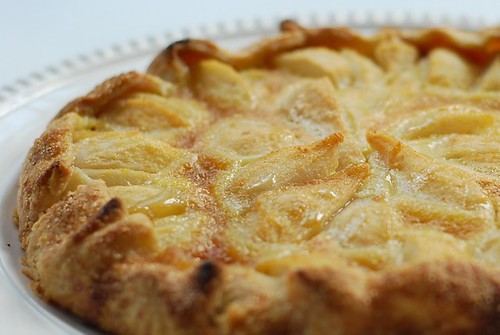
Pear Custard Galette

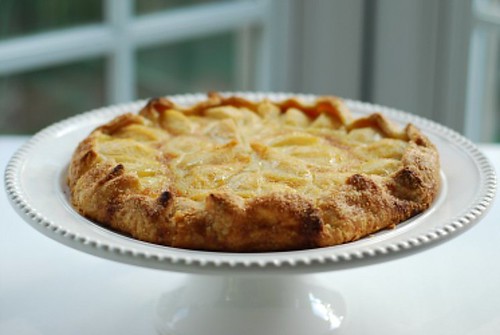
Pear Custard Galette

The recipe is from Dorie Greenspan's Baking From My Home To Yours. It is a recipe that can use just about any fruit you have and Dorie suggests a few in her book, including various stone fruits and rhubarb. These in-season Bosc pears held their shape and tasted sweet and delicious. There are no added spices so you really experience the pure taste of the fruit itself, so it's best to use the most flavorful in-season fruit you can find.  The recipe calls for assembling and baking the pear galette for a little while and then pour the custard mixture wherever there is room between pears and bake for a little longer for the custard to set up. Serve the galette while still slightly warm with a scoop of good vanilla ice cream or creme fraiche on the side. 

Pear Custard Galette


Pear Custard Galette
adapted from Dorie Greenspan's Baking: From My Home to Yours
serves 6-8

For the galette:
Pie Crust for a single crust (I use half of  this recipe)
2-3 Tablespoons jam or marmalade, ginger marmalade recommended, but you can use any you like
2 graham crackers, crushed
4-6 pears, ripe but firm
1 Tablespoon turbinado or similar coarse sugar

For the custard:
3 tablespoons unsalted butter, melted and cooled
1/3 cup sugar
1 large egg
1/2 teaspoon vanilla extract

Preheat oven to 425 F.   Roll out the dough into a 12-13-inch diameter circle, about 1/8" thick.  Transfer the crust to a baking sheet.  Lightly score a circle in the center with a 10-inch diameter.  You will arrange the filling inside this inner circle.  Spread the jam inside the smaller circle and sprinkle with graham cracker crumbs.  The juicier the fruit you have, the more crumbs you will want to add to absorb the moisture as the fruit cooks.  Place the crust in the refrigerator while you prepare the fruit.  Quarter the pears and remove the peel and core.  Arrange the pears on top of the graham cracker crumbs, cut side down in a circular pattern.  Fold the outer circle of the crust up over the edges of the fruit, making pleats as needed until you have brought all of the outer crust up over the edges of the pears.  Brush the top of the crust lightly with water or cream, and sprinkle with coarse sugar.  Bake the galette for 25 minutes.

While the galette is baking, prepare the custard.  Whisk all of the custard ingredients in a small bowl.  After the galette has baked 25 minutes, remove it from the oven, but leave the oven on.  Carefully pour as much of the custard around the pears that it will hold  (you will probably not use all of the custard mixture - I used about half).  Bake the galette for another 10-15 minutes or until the custard is set and no longer jiggles.  Cool the galette on the baking sheet on a cooling rack for 15 minutes, then transfer the galette to cool directly on the cooling rack.  Serve at warm or at room temperature, preferably the same day it is made, with a small scoop of vanilla ice cream.


Tuesday, August 25, 2009

Peach Pistachio Frangipane Tart


 Let's make a peach frangipane tart!  The last time I made a frangipane tart was about a year ago but with plums and almond frangipane (pronounced fran-je-pane). They're not too difficult to make, they make a lovely presentation, and they sound so fancy - most of all, they are delicious.  They remind me a little of the tarts we ate in New York City at Le Pain Quotidien. The are best eaten the day they are made, as the crust may become softer the following day.

Peach and Pistachio Frangipane Tart
adapted from In the Sweet Kitchen by Regan Daley via Dessert First
makes one 9-inch tart or six 3 1/2-inch tarts

1/2 recipe pate sucree, recipe below
1 cup shelled unsalted pistachios, skinned
1/3 cup (66 g) sugar
5 tablespoons (68 g) unsalted butter, room temperature
1 large egg
1 large egg yolk (save egg white for egg wash)
1/4 teaspoon almond extract
3 tablespoons (20 g) flour
2-3 ripe peaches
apricot jam for glaze
chopped pistachios for garnish

Place the mini tart pans on a baking sheet. Cut out circles of dough about an inch larger that the tart pans. Place the dough carefully into the tart pans, pressing lightly into fluted sides, being careful not to stretch the dough or it will shrink when baked. Cut off the extra dough with a knife or rolling pin. Place the tarts into the freezer to chill for about 10 minutes.
Meanwhile, heat the oven to 350 degrees F. Remove the shells from the freezer, prick the bottom of the tart with a fork several times, line the shells with foil and fill with dried beans or rice to keep the shells weighed down.
Bake shells for about 20 minutes until they are lightly colored and the shell feels dry to the touch. Remove from the oven and place on a rack. Remove the beans and parchment and brush the bottoms of the shells with a light egg wash (made from an egg white and a bit of water). Let finish cooling.

For the frangipane:
Place the pistachios in a food processor along with the sugar. Process until finely ground and combined. Add the butter and process until smooth. Add the egg and egg yolk and process until combined, scraping down the bowl as necessary. Add the almond extract and combine.
Add in the flour and pulse just until combined - do not overprocess.
You can use the frangipane at this point or refrigerate it for up to two days. Let it come to room temperature before using.

Assembling the tarts:
When you are ready to bake the tarts, preheat the oven to 350 degrees F. Spread the frangipane evenly into the shells - do not overfill because it will puff up in the oven.
Wash the peaches, slice in half and discard the stones. Slice each half into thin slices and arrange evenly over the frangipane on each tart.
Bake for about 25-30 minutes for small tarts, 50-60 minutes for a large tart, until the frangipane is puffed and golden and the center of the tart is firm to the touch.
Remove from the oven and let cool on a wire rack. Warm a bit of apricot jam in a saucepan or in the microwave to make a glaze, and brush gently over the entire top of the tart. Let cool before serving. Sprinkle with chopped pistachios if desired.

Pate Sucree
adapted from The Secrets of Baking by Sherry Yard
enough for two 9- or 10- inch tarts, or 16 mini tarts
1/2 pound butter, softened but still cool
1/2 cup sugar
1/2 teaspoon salt
2 large egg yolks, at room temperature
3 cups pastry flour, sifted
2 tablespoons heavy cream
1. Place the butter in the bowl of a standing mixer fitted with the paddle attachment. Beat on low speed for 2-3 minutes, or until lightly creamed. Stop the mixer and scrape down the sides of the bowl. Add the sugar and mix for 30 seconds.
2. Add the salt and egg yolks, one at a time, scraping down the sides of the bowl after each addition.
3. Add the flour and mix until the dough just about comes together, about 30 seconds. Add the cream, then pulse the mixer on low speed for 15-30 seconds, or until the dough is smooth.
4. Remove the dough from the bowl, divide it in half, and wrap each piece in plastic wrap. Chill for at least 4 hours. At this point, the dough will keep in the refrigerator for up to 3 days or may be rolled out and frozen for up to 1 month.
5. When you remove the dough from the refrigerator, it will be very hard. To make it pliable enough to roll out, you must soften it without warming it up too much. I cut the dough into several pieces and gently kneaded each piece, then gathered the pieces back together into a ball.

Wednesday, August 19, 2009

Lemon Blueberry Tartlettes


Lemon Blueberry Tartlettes

This recipe has five components, but only two of them require a recipe, and those can be made ahead for fast assembly shortly before you are serving the tartlettes.  You can make several tartelettes or one or two larger tarts with this recipe.

You will need:
1. The pate sucree. Pate sucree has more sugar than the Pate Brisee and is therefore a crispier, sweeter tart shell. See recipe below.
2. Raspberry jam.
3. Lemon Curd - recipe below or store-bought
4. Fresh fruit - any fruit in season would be wonderful on this tart.
5. Apricot jam. Strained and thinned with water for a shiny glaze.

Pate Sucree
adapted from The Secrets of Baking by Sherry Yard
enough for two 9- or 10- inch tarts, or 16 mini tarts

1/2 pound butter, softened but still cool
1/2 cup sugar
1/2 teaspoon salt
2 large egg yolks, at room temperature
3 cups pastry flour, sifted
2 tablespoons heavy cream

1. Place the butter in the bowl of a standing mixer fitted with the paddle attachment. Beat on low speed for 2-3 minutes, or until lightly creamed. Stop the mixer and scrape down the sides of the bowl. Add the sugar and mix for 30 seconds.
2. Add the salt and egg yolks, one at a time, scraping down the sides of the bowl after each addition.
3. Add the flour and mix until the dough just about comes together, about 30 seconds. Add the cream, then pulse the mixer on low speed for 15-30 seconds, or until the dough is smooth.
4. Remove the dough from the bowl, divide it in half, and wrap each piece in plastic wrap. Chill for at least 4 hours. At this point, the dough will keep in the refrigerator for up to 3 days or may be rolled out and frozen for up to 1 month.
5. When you remove the dough from the refrigerator, it will be very hard. To make it pliable enough to roll out, you must soften it without warming it up too much. I cut the dough into several pieces and gently kneaded each piece, then gathered the pieces back together into a ball.
6. Roll out the dough to 1/8" thickness, using a small amount of flour on the board and rolling pin to keep it from sticking. Cut the dough into circles about an inch wider than the tart pans and gently place the dough into the tart pan, being careful not to stretch the dough too much. Press the dough into the sides of the tart pan and use a rolling pin or a knife to cut off the excess dough. Place the tarts in the freezer while the oven is heating.
7. Preheat the oven to 350 degrees F. Adjust the rack to the lower third of the oven. Prick the bottom of the pastry shell a few times with a fork. Line each tart with a piece of aluminum foil and fill it with dried beans or uncooked rice. Bake for 15 minutes. Remove the foil and filling and bake 5-10 minutes more, or until deep golden brown. Cool on a rack before using.

Lemon Curd
from The Pastry Pal

3 large eggs
3 large eggs yolks
1/2 cup sugar
zest of 1 lemon
1/2 cup freshly squeezed lemon juice
pinch of salt
2 sticks (8 oz) unsalted butter, cut up into small pieces

1. Fill a medium pot with a couple of inches of water and bring to a boil.
2. Place the eggs, sugar, lemon zest, lemon juice and salt into a large metal mixing bowl and whisk together. Keep the butter chilled.
3. Set the bowl over the pot with boiling water. This is our faux double boiler.
4. You must whisk the entire time the bowl is over the water. Keep the mixture moving, so the eggs don’t get a chance to scramble. After a few minutes it starts to get frothy. (If necessary, hold the bowl still by gripping the edge with a kitchen towel.) Keep whisking. After a few more minutes, it transforms into something creamy. Whisk for another minute just to thicken it up.
5. Take the bowl off the heat. Feed it a handful of butter and whisk it in. The residual heat of the curd will melt it. Keep adding handfuls of butter until it’s all in and fully incorporated. If you still see any little lumps, return to the double boiler for a brief minute, until it disappears, but this is rarely necessary.
6. Push the curd though a fine mesh sieve into a container. Place a piece of plastic wrap directly on the surface of the lemon curd to prevent a skin from forming and refrigerate. Once it’s completely cold, wrap the whole container tightly and store. (The curd will firm up considerably as it cools. Give it a good stir to loosen it up again before using.) You can store it in the fridge for up to 5 days or freeze for up to a month. To defrost, let the container thaw in the fridge overnight.

To assemble the tarts:
1. Spread a thin layer of raspberry jam on the bottom of the tart shell.
2. Stir the refrigerated lemon curd until smooth and place enough in the tart to almost fill the tart shell.
3. Place the fresh fruit on top of the lemon curd.
4. With a pastry brush, apply a thin layer of strained apricot jam over the entire tart.
5. Garnish with a sprig of fresh mint if desired.
6. Refrigerate the tarts until ready to serve. Serve these tarts the same day they are assembled.

One year ago: Favorite Chicken Tortilla Soup

Monday, August 3, 2009

Cooking with Kids Episode 1 - Cream Puffs


I made a point not to overschedule summer for the kids - to give them time to relax and do a lot of nothing. Well, with a month left of summer vacation, my kids have been using the "B" word lately. They're "B"ored! So they begged me to make one of the recipes out of their kids cookbook - they wanted to make cream puffs! So there I was in the middle of my second batch of pesto and they want to get started - now! I really don't like to have two projects going on in the kitchen at the same time because the messes get a little out of control (I'll let the photos speak for themselves), but I let them do this recipe mostly on their own while I finished up with the abundant basil from the garden.


You might think cream puffs would be too difficult an undertaking for kids, but they really are pretty easy. I think those French chefs gave the dough the name Pate a Choux to make all of the rest of the world think it's a complicated pastry, but it's not complicated at all. Just mix up the dough in a pot on the stove and stir like crazy. Add eggs and stir again like crazy. Plop the dough onto a cookie sheet using a small ice cream scoop and bake. Once you've learned how to make this dough, you can make sweet chocolate eclairs or savory gougeres.


Let the puffs cool on a cooling rack, piercing each one to let out the steam.


Then slice each puff in half and fill with whipped cream - the homemade kind, sweetened just a bit.


By this time, I was finished with the basil and that left a little more room for the kids to work. Supervise carefully while the stove and sharp knives are being used, but otherwise just a little guidance is all that's needed.


Ellen's chopping chocolate...


and glazing the cream puffs with the dark chocolate sauce...


The hardest part was deciding who would do which job because of course they all wanted to do everything. But in the end, they took turns reading the recipe, performing the tasks, putting things away, and licking the bowls. I got the coveted job of doing the dishes, but at least I didn't have to hear the "B" word for the rest of that day!
And here comes the easiest part - eating them!


One year ago: My CSA and Dill Pickles and Blackberry Scones

Cream Puffs
from Children's Quick and Easy Cookbook by Angela Wilkes

For the pate a choux dough:
4 tablespoons butter
1/2 cup water
1/2 cup all-purpose flour
1 teaspoon superfine sugar
2 eggs
For the sauce
4 oz semisweet chocolate
2 tablespoons butter
4 tablespoons heavy cream
For the filling:
2/3 cup heavy cream
1 tablespoon superfine sugar

1. Preheat the oven to 400 degrees F. Line a cookie sheet with a silpat or cooking spray and sprinkle with water.
2. Cut up the butter and heat it in a saucepan with the water.
3. Sift the flour and sugar together. When the water boils, remove it from the heat and add the flour and sugar mixture.
4. Beat the mixture hard with a wooden spoon until it is smooth and comes away from the sides of the pan.
5. Beat the eggs, then beat them into the mixture, a little at a time, until you have a thick, smooth, glossy paste.
6. Put teaspoons of the mixture onto the cookie sheet and bake 20-25 minutes until puffy and golden brown.
7. Put the cream puffs on a wire rack to cool. Pierce them with a fork to let out any steam and to keep them from getting soft.
8. Break the chocolate into a saucepan. Add the butter and cream. Stir over low heat until the chocolate has melted.
9. Whip the cream and 1 T sugar with a hand mixer or stand mixer fitted with whisk attachment until thick. Slice each puff and fill with the cream.
10. Arrange the puffs on a serving plate and drizzle with chocolate sauce. Serve immediately.

Saturday, August 9, 2008

Roasted Plum Cakes


If you can remember Spring here in Pittsburgh (it seems like so long ago), you'll remember the flowering trees and how they seemed to be just loaded with blossoms this year. Well, those blossoms have turned into plums in a friend's yard. I wish I had taken a picture of the tree - the branches were threatening to break from the masses of fruit on each limb, with the branches bending down until they almost touched the ground. And when my friends offered me a bag to fill with plums well, for me, that's like offering candy to a baby! I thought about making one of those beautiful plum tarts with all the slices placed just so and glazed with a shiny coat of apricot jam. But these plums were a little small and I didn' t have the time for a fussy tart. So instead I decided to try the Roasted Plum Cakes from Baking with Julia. They are simple to make and so delicious served warm with a side of vanilla ice cream. You could substitute raspberries, blueberries or peaches for the plums if you had them on hand. I baked one with red raspberries and it was delicious too.


Roasted Plum Cakes
adapted from Baking with Julia

1 stick of unsalted butter at room temperature
2/3 cup brown sugar, divided (I used less for topping)
1/2 cup sugar
2 large eggs
1 tsp minced orange zest (I used lemon)
1/2 tsp vanilla extract
1 cup flour
3/4 tsp baking soda
1/4 cup buttermilk
4 large ripe plums, halved and pitted

Preheat oven to 350. Butter 8 ramekins and place them on a rimmed baking sheet. Cream the butter, 2 T of brown sugar, and the granulated sugar for 6 minutes, scraping down the sides of the bowl as needed. Add the eggs one at a time, mixing well after each addition. Add the zest and vanilla and mix well. Add the flour and baking soda and beat on low speed for only 15 seconds. Pour in the buttermilk and beat for 30 seconds more. Remove from mixer and use a spatula to finish blending the ingredients if necessary.

Spoon the batter into the ramekins, dividing the batter among them evenly. Place a half plum, cut side up, into each cup leaving the plum a bit higher than the batter so that the plum will show after the cakes rise in the oven. Sprinkle the remaining brown sugar evenly over each plum. Bake 25 minutes or until a toothpick inserted into the cake portion comes out clean. Cool the cakes 10 minutes. To serve, remove the cakes from the ramekins onto a dessert plate and serve with vanilla ice cream or whipped cream.

Monday, May 12, 2008

Strawberry Rhubarb Crisp


Don't you just love Spring? This is a picture of one of my rhubarb plants which comes out of the ground every Spring. When my mom and dad moved to North Carolina from Pennsylvania, they gave away their rhubarb plants to me and my brothers. Rhubarb requires a dormant period when the ground is frozen, so it doesn't do very well in warmer climates. I figure this plant has to be at least 25 years old and is still producing fabulously. Over the years, I have found that people either love it or they hate it. Fortunately, my family loves it. I usually make my mom's signature Rhubarb Custard Pie or my new favorite, Rhubarb Raspberry Pie, but last week I made a Strawberry Rhubarb Crisp since I had the ingredients on hand and it comes together quickly. The fruit looked great all by itself sprinkled with sugar.


I used the topping recipe from Heidi at 101cookbooks. This recipe uses white whole wheat flour and oats for a healthful whole grain topping, and yogurt in place of some, but not all, of the butter. You can substitute just about any fruit you have on hand.


Strawberry Rhubarb Crisp
adapted from 101 Cookbooks

2 pounds fresh fruit - I used 1 pound strawberries and 1 pound rhubarb
1/4 cup organic sugar or brown sugar
1 1/2 Tablespoons arrowroot starch or cornstarch

3/4 cup rolled oats
3/4 cup white whole wheat flour
1/2 cup organic sugar or brown sugar
1/2 teaspoon cinnamon
1/4 tsp salt
1/3 cup butter, melted
1/3 cup yogurt

Preheat oven to 400 degrees F.  Slice the strawberries and rhubarb into bite-sized pieces and place in a large bowl.  Combine the sugar and arrowroot starch and sprinkle the mixture over the fruit and stir to combine.  Transfer the fruit to an 8x8" or similar sized baking pan.

For the topping, combine the oats, flour, sugar, cinnamon and salt together in a medium bowl.  Stir in the butter and yogurt and mix until it comes together.  Sprinkle the mixture evenly over the fruit.  Bake for 20-25 minutes or until the topping is golden and the filling is bubbly.  Sprinkle a bit of coarse sugar on top as it comes out of the oven if you like.


LinkWithin

Related Posts Widget for Blogs by LinkWithin