Tuesday, November 30, 2010

Make and Freeze...Applesauce

Apples

Our new house has four huge oak trees on the property. Two are registered more than 200 years old and the other two are probably as old as our 80-year-old house. These oaks produce a ton of acorns and the squirrels have been scurrying around trying to collect what they can before winter settles in.

As I watch the squirrels do their thing, it occurred to me that I'm a little like that too. I hoard seasonal foods when they are plentiful and store them in my freezers to eat all winter long. When strawberries are plentiful, I'm freezing bags and bags of them to use in smoothies. When tomatoes are abundant, I make and freeze tomato puree for use in soups and sauces, and I freeze pizza sauce and marinara sauce in containers just the right size to serve my family one meal. I freeze raspberries for pies, locally raised chickens for roasting and local organic beef in 40-pound installments. I've got two full upright freezers and two refrigerator freezers and they're nice and full this time of year.

I thought some of you might be interested in some basic freezing advice and so I'm starting a new series called "Make and Freeze". Here I will highlight recipes and techniques for freezing foods that are in season for use throughout the year. If you have anything to add, or if you do it a little differently, I'd love to hear about it in your comments! So grab a bunch of apples and let's make and freeze some applesauce!

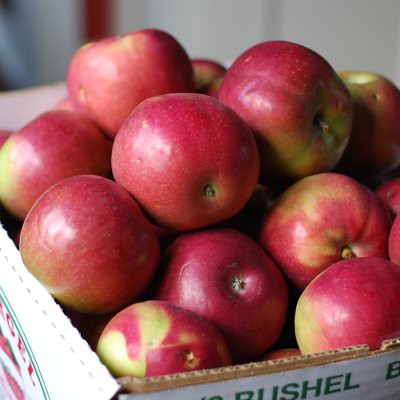
Choose your apples...
To make smooth applesauce, choose an apple variety which is soft and sweet such as Macintosh (used here), Galas or Fuji, or use any combination of these or other varieties of apples. If you're looking for more information, Pickyourown.org lists many of the varieties of apples and what they are best used for.

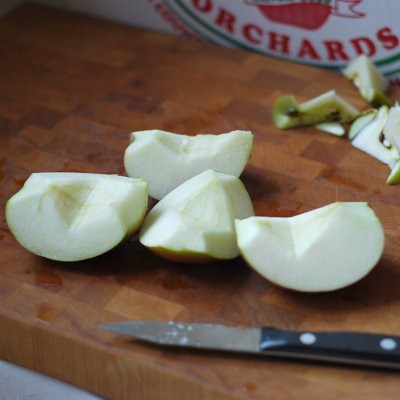
Prepare the apples...
Wash the apples in a tub of water, quarter them and remove the core. Some may think it's not necessary to remove the core, but I like to remove it just to be sure there won't be any hard bits of core that end up in the sauce. If you have a food mill, you can leave the skins on which will save you a lot of time. If you do not have a food mill, you can peel the apples and use a food processor or even a potato masher after the apples have been cooked.

Making Applesauce

Cook the apples...
Place the apples in a large stock pot and add just enough water or apple cider to coat the bottom of the pan to prevent scorching. I added about 1/4 cup of water. Place a tight-fitting lid on the pot and cook over med-high heat. Stir once or twice in the beginning until the apples start to release their juices, then lower the heat to medium and keep the lid on until the apples are completely steamed through. This might take 15 to 20 minutes or so.

Making Applesauce

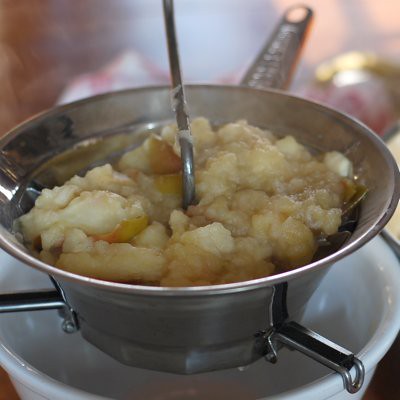
When the apples are cooked, the applesauce aroma will start to fill the kitchen and they should look like the photo below. Give the apples one more stir to feel for any apples which are not quite cooked. If you feel any uncooked apple chunks, cook for another 5 minutes or so with the lid on until all the apples are soft.

Making Applesauce

Mash the apples...
While still hot, spoon the apples into a food mill. I use the disc with medium holes since I like my applesauce not too chunky and not too smooth. If you have peeled your apples, you can let them cool a bit and use a food processor or simply mash them with a potato masher right in the pot.

Making Applesauce

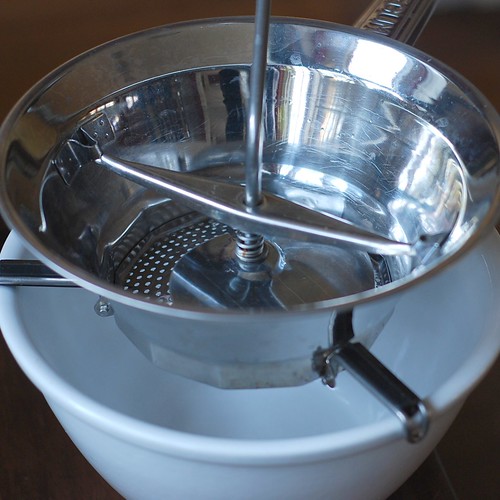
Kids love to help turn the crank on the food mill so if you've got any kids around, put them to work! Here are the apples - skins and all - ready for milling.

Making Applesauce

After the apples go through the mill, they will look like this.

Making Applesauce

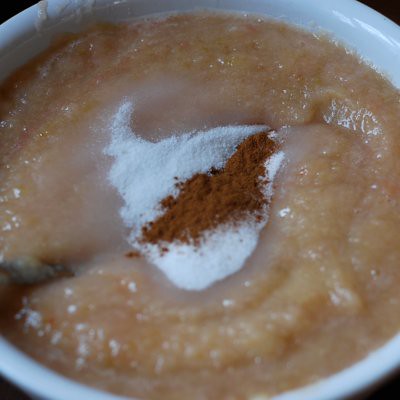
Sweeten and spice up your applesauce...
While the applesauce is still hot, you can add the cinnamon and sugar if you like. I prefer to leave them unsweetened these days, but if you want to add sugar,  add it when the sauce is still warm so the sugar will dissolve completely. Add just a little at a time and taste it as you go until the applesauce is just as sweet as you like it.  

Making Applesauce

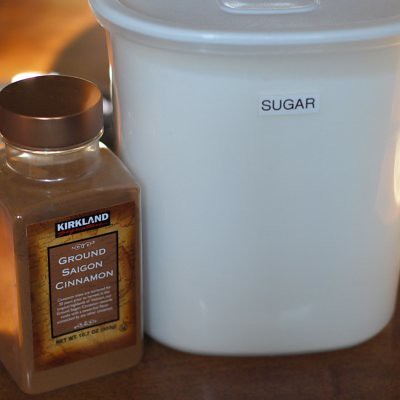
Do the same for the cinnamon. Cinnamon is not optional in my opinion, and if you add cinnamon, you might find you don't need to add as much sugar.  I like plenty of cinnamon, but you could omit it or add it later if you prefer.

Making Applesauce

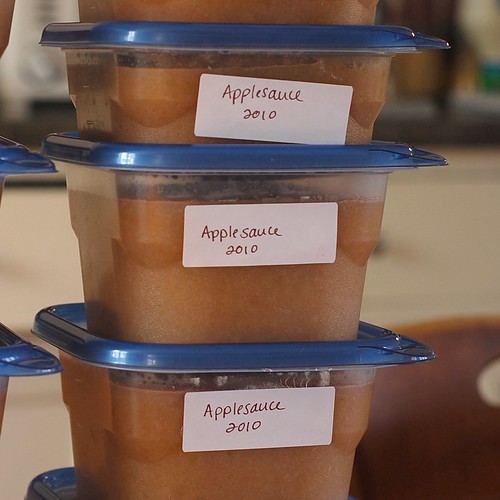
Contain and freeze your applesauce...
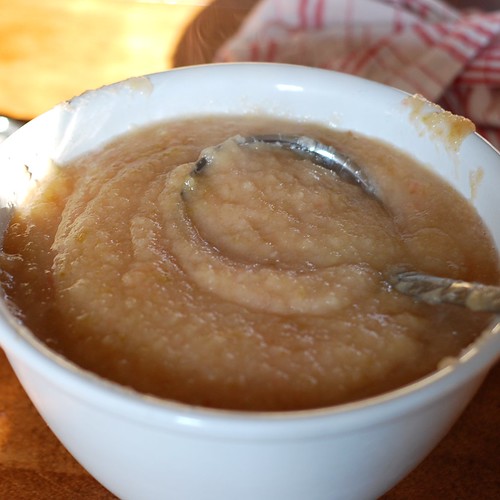
Place your applesauce in containers and let them cool to room temperature with the lids off until they come to room temperature or are just slightly warm, then cover and freeze. I love these Ziploc square quart-size containers. They stack nice and neat in the freezer and hold just the right amount to serve our family of 5 with dinner. A half bushel yielded about 10 quarts of applesauce and I filled about 3 stockpots full of uncooked apples.

Making Applesauce

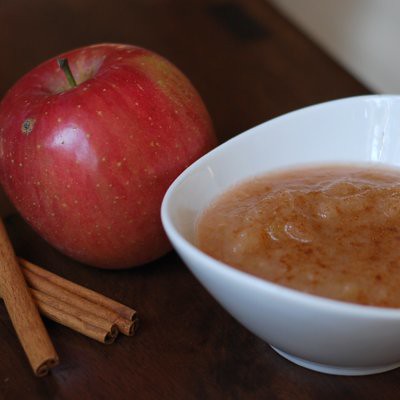
Be sure to label the containers with the contents and the date. This applesauce is so much more flavorful and thicker than the applesauce from the supermarket.  If you've got extra apples, make a little or a lot and freeze the extra.

Making Applesauce

Eat your applesauce...
I like to add just a sprinkling more cinnamon just for good measure!

Making Appplesauce

Thursday, November 25, 2010

Happy Thanksgiving!

Thanksgiving Cookies

Happy Thanksgiving!

A little Thanksgiving Trivia for you to ponder as you sit down to eat your Thanksgiving dinner...

Sarah Josepha Hale, born in New Hampshire in 1788, was a teacher, a writer, and a supporter of women's rights. She was also a single mother of five children after her husband died during the pregnancy of their fifth child. She spent 40 years writing to congressmen, lobbying five presidents, and writing numerous editorials in her campaign to create an national official day of thanks. Before then, it was only celebrated in New England states. President Lincoln was the first president to declare Thanksgiving a national holiday in 1863 as a result of Sarah's efforts. Thank you Sarah Hale!


Tuesday, November 16, 2010

Melomakarona - Walnut Stuffed Honey Cookies

Melomakarona

Melomakarona is a Greek walnut-filled spiced cookie soaked in honey. They are flavored with cinnamon, cloves, and orange zest. According to Aglaia Kremezi in her cookbook The Foods of the Greek Islands, Melomakarona are a popular cookie made year-round all over Greece and especially at Christmas.

Melomakarona
Melomakarona

They're odd-looking cookies, but one bite and you get over it. They are really good! They are even better alongside a cup of tea. The only thing that might improve afternoon tea and a Melomakarona cookie is actually being on one of the Greek Islands while having tea and cookies! Maybe someday...

Melomakarona

Melomakarona (Mel-o-MAK-re-na)
(Walnut Stuffed Honey Cookies)
adapted slightly from The Foods of the Greek Islands by Aglaia Kremezi

1 1/4 cups light olive oil or a combination of olive oil, canola oil, and/or safflower oil
1/3 cup sugar
grated zest of one orange
1 cup freshly squeezed orange juice
3-4 cups all-purpose flour
1 1/2 teaspoons baking powder
1 1/2 cups fine semolina flour
1/2 cup brandy
grated zest of one lemon
1 teaspoon ground cloves
1 teaspoon ground cinnamon

Filling:
2 cups finely chopped walnuts
1 tablespoon ground cinnamon
1 tablespoon sugar

Syrup:
1 cup sugar
1 cup honey
1 1/2 cups water


In a large bowl, beat the oil and sugar with an electric mixer until blended. Beat in the orange zest and juice. In a medium bowl, combine 2 cups of the flour and the baking powder. Gradually beat the flour mixture into the oil mixture. Beat in the semolina, brandy, lemon zest, cloves and cinnamon. Turn the dough out onto a lightly floured surface and knead, adding 1 cup or more flour as necessary to obtain a smooth, soft, oily dough. Cover with plastic wrap and let stand for 20 to 30 minutes.

Preheat the oven to 350°F. Make the filling by combining the walnuts, cinnamon and sugar in a medium bowl.

Take pieces of dough the size of a small egg and roll with your hands into ovals, about 2 1/2 inches long. Push three fingers into the bottom of each cookie to make an opening, and stuff with 1 teaspoon of the filling. Press the dough to close the opening. Slightly flatten each cookie and if you like, make an indentation on the top with the tines of a fork. Place the cookies on ungreased baking sheets about 1 inch apart. Set aside any remaining filling.

Bake for about 30 minutes, or until they just start to color. Allow the cookies to cool slightly.

Meanwhile, make the syrup: In a medium saucepan, simmer the sugar, honey and water for 10 minutes. Remove from the heat.

Place the cookies in a large dish or baking pan that holds them snugly, and pour the hot syrup over them. Let stand for 15 minutes. Turn the cookies to moisten the other sides and let stand until the cookies have absorbed all the syrup. Place the remaining filling on a plate and roll each cookie in it to coat on all sides. Place the cookies in an airtight container, with parchment or waxed paper between each layer. Let stand for at least 1 day before serving. Store for up to 1 month.

Thursday, November 11, 2010

Chocolate Caramel Mini Tartlets with Sea Salt

Chocolate Caramel Tartlets

Sweet and salty is all the rage right now and these bite-sized Chocolate Caramel Tartlets with Sea Salt are an impressive addition to your chocolate sampler tray next to your Chocolate Raspberry Truffles and Chocolate-Dipped Coconut Macaroons.

If you've tried your hand at ganache, caramel, and pastry then these will be a snap to make. If you haven't mastered these yet, then these tartlets are a good reason to try these techniques again. Use a 9" tart pan if you're not into making dozens of tiny tart shells.

I've had these little mini tartlet molds ever since I took a cooking class in a little local kitchen shop about 15 years ago. I'm embarassed to say that this is the first time I've used them. But then again, I got a little busy in those 15 years...(my kids are 14, 11, and 8!)

The tartlet shells are a sweet pate sucree dough. I pricked to bottoms with a fork to eliminate the possibility of air pockets. No need for pie weights with a shell this small but if you are making a larger tart, bake the shell for half the total baking time lined with parchment and pie weights, then remove the paper and weights and continue baking until golden brown.

I thought the tart shells looked just like sunflowers...

Chocolate Caramel Tartlets

Spoon in the caramel filling...

Chocolate Caramel Tartlets

And then top with chocolate ganache and a sprinkling of gourmet sea salt. I picked up this pink Himalayan Sea Salt at Marshall's. If you look closely, you can see a hint of pink.

Chocolate Caramel Tartlets

Place your chocolate goodies on a pretty platter. Now who could resist these?

Chocolate Caramel Tart with Sea Salt
Makes one 9-inch tart or about 24 mini tartlets
Note: to make the mini tart shells, I cut circles out of the rolled-out dough and worked the dough into the tartlet molds. Prick the bottoms with a fork and bake until golden, about 8-10 minutes.


1 9-inch pre-baked pate sucree tart shell or 24 mini tart shells

for the chocolate ganache:
8 ounces bittersweet chocolate, finely chopped
1 cup heavy cream

Sea Salt for garnish


Place the chocolate into a medium heat-proof bowl. Heat the heavy cream in a small saucepan until just boiling. Pour the heavy cream over the chocolate and let it sit for one minute. Stir with a rubber spatula or whisk in a small, quick circular motion, starting in the center of the bowl and working your way out until the ganache is shiny and all the chocolate has melted.

Assemble the tart:
Pour enough caramel into the tart shell to come up about 1/3 of the way up the sides of the tart shell. Refrigerate the tart for 30 minutes to harden the caramel. Pour the chocolate ganache over the caramel to fill about 2/3 of the tart shell. Sprinkle with sea salt and allow to set for 30 minutes in the refrigerator or 2 hours at room temperature.


Wednesday, November 10, 2010

Chocolate Dipped Coconut Macaroons

Coconut Macaroons

It's chocolate week here at Marzipan and I'm highlighting the best of the chocolate goodies I made for a friend's Wine, Cheese, and Chocolate Party. When choosing the menu, I wanted a variety of chocolatey things - some intensely chocolate, like Chocolate Raspberry Truffles, and some with just a bit of chocolate, like these coconut macaroons. Coconut is the star in these delicious cookies and the chocolate just dresses them up a bit. They'll give your chocolate tray a little texture and contrast.

When I made these, a bit of the egg mixture came out around the bottom of the cookies while baking. This has happened to me before with other macaroon recipes - it might be the type of coconut I use. If this happens to you, just cut around the bottom of the cookie (I used a round cookie cutter just the right size) after the cookie has cooled.

Coconut Macaroons
from Luscious Coconut Desserts by Lori Longbotham via Tish Boyle


1 ½ cups granulated sugar
5 large egg whites
¾ teaspoon pure vanilla extract
¼ teaspoon salt
4 cups shredded unsweetened dried coconut
6 ounces bittersweet chocolate, chopped, plus one 2-inch chunk of shiny, well-tempered chocolate

Make the cookies:
1. Preheat the oven to 350°F. Line two large baking sheets with silicone baking mats or parchment paper.
2. Whisk together the sugar, egg whites, vanilla, and salt in a large bowl until well combined. Add the coconut and stir until well combined. Drop the batter by packed level tablespoons onto the baking sheets using a medium cookie scoop, leaving an inch between cookies.
3. Bake the cookies for 20 to 25 minutes, or until an even golden brown and dry looking. Let cool completely on the baking sheets on wire racks.
4. To temper the chocolate and dip the macaroons: Melt the chopped chocolate in a bowl set over barely simmering water and stirring frequently (do not let the chocolate go above 120°F.) Add the chunk of well-tempered chocolate. Place the bowl in a cool place and let cool, stirring frequently, to 84°F. Return the bowl to its position over the hot water and stir until it thins slightly and reaches 90°F (but not higher—watch the chocolate carefully at this point).
5. Dip the bottoms of the cooled macaroons into the tempered chocolate, shake off the excess, and place the macaroons chocolate-side down on parchment-lined sheets. Let stand until chocolate sets.

Tuesday, November 9, 2010

Chocolate Raspberry Truffles

Raspberry Truffles

When is the last time you threw a real party? For us it's been quite a while. Of course we've had friends over for summer campfires and we've had family at the house for small birthday parties. A small party doesn't need to be fussy - some wine, a simple, delicious dinner and dessert doesn't require that much planning or energy.

But I can't remember the last time we had a "50 of your closest friends, neighbors, and co-workers party". We've been busy moving and doing new house stuff and old house stuff and kids' school stuff... oh, and working. We're just too exhausted to do anything else.

But one of our new neighbors threw a party like that last weekend. It was a "wine, cheese, and chocolate" party. She hired a caterer for the savory stuff, bought the wine, made adorable fall themed wine glass charms and made up the cheese plates herself, and asked me to help with the chocolate portion. So I hope you don't mind if the next few posts revolve around bite-sized chocolate goodies. (I didn't think so!)

So, first up....Raspberry Truffles! My first attempt at tempering chocolate and my thermometer goes on the blitz...actually two of my thermometers went on the blitz during my chocolate week, but all turned out ok in the end.

Raspberry Truffles

These truffles are flavored with strained raspberry jam and chambord. Of all the chocolate goodies I made for the party, these were the most time consuming, but well worth it!

Chocolate Raspberry Truffles

7 ounces dark chocolate, chopped (I used Callebeaut semi-sweet)
1/2 cup heavy cream
1 1/2 tablespoons strained raspberry jam
1 tablespoon Chambord or other raspberry-flavored liqueur
1/2 tsp pure vanilla extract

Tempered chocolate for dipping
Pink sugar crystals for garnish
Mini cupcake liners (these are made by Reynolds and can be found in the supermarket)

Bring the heavy cream just to a boil and pour it over the chopped chocolate in a bowl. Whisk until shiny and chocolate has melted completely. Stir in the jam, Chambord, and vanilla. Cover the bowl and chill at least 45 minutes. With a small ice cream scoop, make rounds of chocolate and place them on a baking sheet. Chill for another 45 minutes or freeze until ready to dip. Dip in tempered chocolate and sprinkle on the sugar crystals before the chocolate sets. After the chocolate has set, then transfer the truffles to mini cupcake liners. Store in the refrigerator.

LinkWithin

Related Posts Widget for Blogs by LinkWithin