Friday, January 29, 2010

Banana Cupcakes with Vanilla Pastry Cream

Banana Cupcakes with Pastry Cream

To end the month of January, which I have dubbed "Baked" month, I present to you these delicious Banana Cupcakes with Vanilla Pastry Cream Frosting. Think Banana Cream Pie in a cupcake...so so good!

Other fantastic Baked recipes I've made:
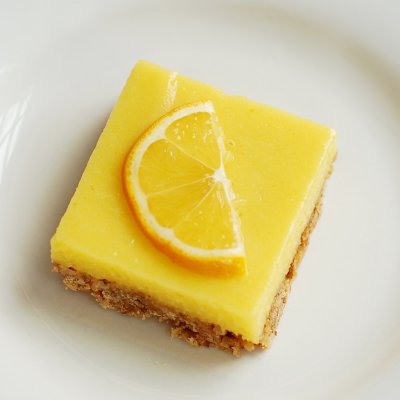
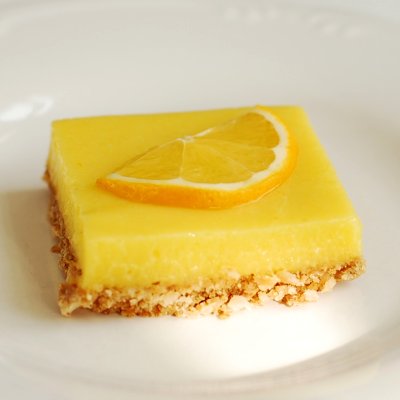
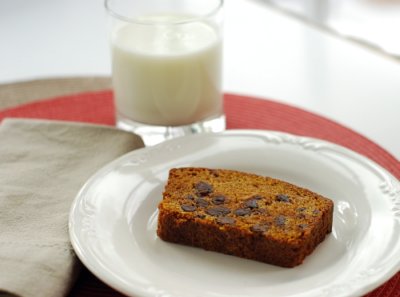
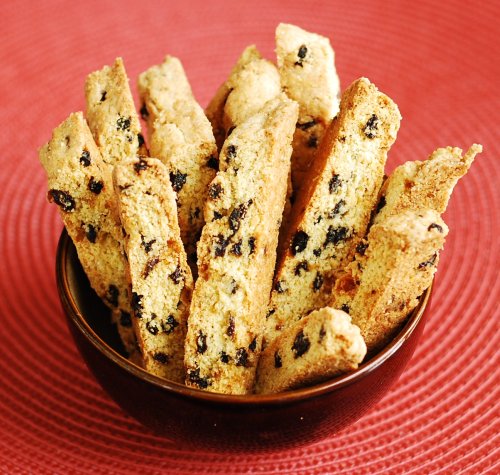
Root Beer Fudge Cupcakes

Banana Cupcakes with Vanilla Pastry Cream
from Baked: New Frontiers in Baking by Matt Lewis and Renato Poliafito

For the Cupcakes:
2 3/4 cups all-purpose flour
1 1/4 teaspoons baking powder
1 teaspoon baking soda
1/2 teaspoon salt
1/2 cup (1 stick) unsalted butter, softened
1/4 cup vegetable shortening at room temperature
1 3/4 cups sugar
2 teaspoons pure vanilla extract
2 large eggs
1 1/2 cups mashed very ripe bananas (about 4)
1/2 cup buttermilk

For the Vanilla Pastry Cream
3 cups half-and-half
6 large egg yolks
1/2 cup sugar
3 tablespoons cornstarch
1/4 teaspoon salt
1 teaspoon pure vanilla extract

Make the pastry cream:
In a medium saucepan, bring the half-and-half to a simmer and keep warm. In a medium bowl, whisk the egg yolks, sugar, cornstarch, and salt together until the mixture is pale, about one minute. Whisk half of the half-and-half into the egg yolk mixture, then pour the egg mixture back into the pot with the remaining half-and-half. Cook over medium heat, whisking constantly until thickened and boiling, about 6-10 minutes. Remove from the heat and whisk in the vanilla. Strain the pastry cream through a fine-mesh sieve into a container. Press a piece of plastic wrap directly onto the surface of the pastry cream to prevent a skin from forming. Chill at least one hour, overnight is better.

Make the cupcakes:
Preheat the oven to 325 degrees F. Line two 12-cup cupcake pans with paper liners.
Sift the flour, baking powder, baking soda, and salt together into a large bowl and set aside.
In the bowl of an electric mixer fitted with the paddle attachment, beat the butter and shortening together on medium speed until creamy, 3 to 4 minutes. Add the sugar and vanilla and beat until fluffy, about 3 minutes. Scrape down the bowl, add the eggs, and beat until just combined. Scrape down the bowl again and add the bananas, beating until just combined. Turn the mixer to low. Add the flour mixture, alternating with the buttermilk, in three additions, beginning and ending with the flour mixture. Remove the bowl from the mixer and scrape down the sides with a rubber spatula, giving the mixture a final stir to ensure it's combined.
Fill the cupcake liners about 3/4 full. Bake for 20-25 minutes, or until a toothpick inserted in the center comes out clean. Cool in pans on a wire rack for 20 minutes. Remove them from the pans and cool completely.

Assemble the cupcakes:
Place the vanilla pastry cream in a plastic disposable piping bag or a zip top gallon sized bag. Cut the end of the bag so that the opening is about a half inch in diameter. Pipe a dollop onto the cupcake (alternatively spoon a dollop onto the cupcake) and garnish with a dried banana slice.

Wednesday, January 27, 2010

Hockey Cookies and a Chocolate Chip Cookie Cake

Hockey Cookies

A friend asked me to make these hockey jersey cookies for her son, Cole, who was turning 11. They turned out really good but I had to laugh because they looked a lot like the puffy shirt from Seinfeld before the colored icing was applied - not exactly the tough hockey look I was going for! But add a little red and black and they came together nicely.

Hockey Cookies

Last week, I was also asked to make a chocolate chip cookie cake for my friend's daughter's birthday.

Chocolate Chip Cookie Cake

I took my basic chocolate chip cookie recipe and pressed all the dough into a parchment-lined and greased 14" straight-sided All-Clad saute pan, baked it at 375 until it looked nicely browned and done in the center. It was thicker and definitely better tasting than the cookie cakes you buy at the store and I was told it was delicious and the kids loved it. The flowers and butterflies were made of colored and rolled fondant to match the plates and napkins for the party. The outlining decoration was made of vanilla Swiss Buttercream icing. I didn't have ideal lighting for this photo, but you get the picture! Happy Birthday Cole and Julia!

Monday, January 25, 2010

Spaghetti Squash with Ricotta


Spaghetti Squash with Ricotta Cheese

My favorite way to eat spaghetti squash couldn't be simpler! Halve the spaghetti squash lengthwise and remove the seeds. Place some water and a steamer basket in a large pot with a lid over med-high heat. Place the two halves of the squash, cut side down in the pot and steam until tender when pierced with a knife, about 30 minutes. Using a fork, remove the flesh of the squash onto a serving plate or bowl. Top the steaming squash with a large dollop of ricotta cheese, drizzle a flavorful extra-virgin olive oil on top and season with salt and pepper. Enjoy!

Friday, January 22, 2010

The Resilient Tomato

Cherry Tomato in January
Can anyone explain how in the world this tomato looks so perfect even after all the below-freezing temperatures we've had in western Pennsylvania? I've been watching this tomato for months now (it's right outside our powder room window so I see it a few times every day). I'm simply amazed by its resilience. It has refused to let winter get the best of it! All of these photos were taken on the same day....

January 2010

Brrrrr!

January 2010

Perhaps this little tomato is a small reminder of when the garden was lush and green and the tomatoes were bountiful. Just when summer seems so long ago and Spring seems so far away, this tiny tomato gives me a little happiness and hope that Spring will come again.

Tuesday, January 19, 2010

Chocolate Peanut Butter Crispy Bars

Peanut Butter Crispies

It wasn't planned, but January has turned into "Baked" month because I can't stop finding good things to bake in this cookbook! It started with Pumpkin Chocolate Chip Loaf, and then the yummy Lemon Lime Bars and now....drum roll please...Chocolate Peanut Butter Crispy Bars! These have become one of my favorite recipes of all time.   Tell me, what's not to like?  ..a Crispy Rice layer (not a marshmallow in it)...a peanut butter and milk chocolate creamy layer...and a topping of dark chocolate.  The perfect combination of crunch and creamy and sweet.  Note that these must be refrigerated to keep them from getting too soft.

Peanut Butter Crispies

Other Peanut Butter and Chocolate recipes:


Chocolate Peanut Butter Crispy Bars

For the crispy crust:
1 3/4 cups crisped rice cereal
1/4 cup sugar
3 tablespoons light corn syrup
3 tablespoons unsalted butter, melted

For the milk chocolate peanut butter layer:
5 ounces good-quality milk chocolate, coarsely chopped
1 cup creamy peanut butter

For the chocolate icing:
3 ounces dark chocolate (60 to 72 percent cocoa), coarsely chopped
1/2 teaspoon light corn syrup
4 tablespoons (1/2 stick or 2 ounces) unsalted butter

Make the crispy crust:
Lightly spray a paper towel with nonstick cooking spray and use it to rub the bottom and sides of an 8-inch square baking pan.

Put the cereal in a large bowl and set aside.
Pour 1/4 cup water into a small saucepan. Gently add the sugar and corn syrup (do not let any sugar or syrup get on the sides of the pan) and use a small wooden spoon to stir the mixture until just combined. Put a candy thermometer in the saucepan. Cook over medium-high heat and bring to a boil; cook until the mixture reaches the soft ball stage, 235 degrees F.
Remove from the heat, stir in the butter, and pour the mixture over the cereal. Working quickly, stir until the cereal is thoroughly coated, then pour it into the prepared pan. Using your hands, press the mixture into the bottom of the pan (do not press up the sides). Let the crust cool to room temperature while you make the next layer.

Make the milk chocolate peanut butter layer:
In a large nonreactive metal bowl, stir together the chocolate and the peanut butter. Set the bowl over a saucepan of simmering water and cook, stirring with a rubber spatula, until the mixture is smooth. Remove the bowl from the pan and stir for about 30 seconds to cool slightly. Pour the mixture over the cooled crust. Put the pan in the refrigerator for 1 hour, or until the top layer hardens.

Make the chocolate icing:
In a large nonreactive metal bowl, combine the chocolate, corn syrup, and butter. Set the bowl over a saucepan of simmering water and cook, stirring with a rubber spatula, until the mixture is completely smooth. Remove the bowl from the pan and stir for 30 seconds to cool slightly. Pour the mixture over the chilled milk chocolate peanut butter layer and spread into an even layer. Put the pan into the refrigerator for 1 hour, or until the topping hardens. Cut into squares using a sharp knife run under hot water and dried for smooth edges and serve. The bars can be stored in the refrigerator, covered tightly, for up to 4 days.

Friday, January 15, 2010

Lemon Lime Bars with Graham Cracker Coconut Crust

Lemon Lime Bars

Looking at a bright yellow lemon bar almost makes you forget that it's winter outside. But it makes sense to make lemon bars in winter. Lemons are in their peak season right now.

Meyer Lemons

Meyer lemons are a cross between a true lemon and a mandarin orange. Their hue is more orange than a "regular" lemon and they're a bit sweeter and less acidic. They're simply beautiful! My son even mistook one for an orange and tried to peel it and eat it like an orange - surprise!

The difference between these lemon bars and your typical lemon bar is that you cook the lemon custard over the stove and then bake it for only a short time in the oven instead of pouring the custard mix over the crust and baking them until they're set. The photo below gives you a good idea what the crust is like. It's crumbly and deliciously paired with the citrus. The lemon curd itself is so good you'll want to eat it straight out of the bowl with a spoon.  This will be my go-to recipe for citrus curd from now on. Try this recipe - you will not be disappointed!

Lemon Lime Bars


One year ago: Chewy Molasses Cookies

Lemon Lime Bars
from Baked: New Frontiers in Baking
Note:  You can make half this recipe in an 8x8 pan.

Graham Cracker Coconut Crust
1 c. sweetened shredded coconut
2 c. graham cracker crumbs
2 T. firmly packed dark brown sugar
1 stick of unsalted butter, melted (use 5T of butter if you're cutting the recipe in half)

Lemon Lime Filling
11 large egg yolks
3 large eggs
1-3/4 c. sugar
3/4 c.fresh lemon juice
2 T fresh lime juice
2 T grated lemon zest
2 T grated lime zest
1-1/2 sticks of unsalted butter, softened and cut into small pieces
1/3 cup heavy cream

Make the Crust
1. Preheat the oven to 300 degrees. Butter or spray the bottom and sides of a 9x13 inch baking pan.

2. Line a baking sheet with parchment and toast the coconut until it starts to turn golden (7-10 minutes). Remove from the oven, toss the coconut and return it to the oven for 3 more minutes, or until it is nicely toasted.

3. Use a food processor to crush the graham crackers into crumbs or place the graham crackers in a zip top freezer bag and crush with a rolling pin into fine crumbs.

4. Put the graham cracker crumbs in a bowl. Using your hands, add the coconut and the brown sugar and mix well. Add the melted butter, and still using your hands, firmly press the crust into the prepared pan. Using a measuring cup as a press will help make an even crust.

5. Refrigerate the crust for 15 minutes, and then bake it for 10 minutes. Cool the crust before adding the filling.

Make the Filling

1. Increase the oven temperature to 325 degrees.

2. Mix the egg yolks, eggs, sugar, lemon and lime juices and zests in a deep clean metal pot. Cook over medium heat, whisking constantly until the mixture reaches 180 degrees. This may take 10 minutes.

3. Remove from the heat and whisk in the butter and the cream. Pour through a fine-mesh sieve directly onto the cooled crust. Make certain that you scrape the underside of the sieve to capture ALL of the filling. Tap the pan to make an even layer.

4. Bake for 8 to 10 minutes, or until the filling is just set. Test for "set" by shaking the pan. When it barely wiggles, it is done. Remove from the oven and cool on a wire rack. Wrap in plastic and refrigerate for a least two hours. Cut into squares.

Tuesday, January 12, 2010

Pumpkin Chocolate Chip Loaf

Pumpkin Chocolate Chip Loaf

I found some pumpkin puree in my freezer and decided to make this Pumpkin Chocolate Chip Loaf from the Baked cookbook. The texture was moist but not oily - perfect really.  Next time I'd probably leave out the chocolate chips and add walnuts or pecans instead because I prefer that flavor combination, but this was delicious too.

One Year Ago: Chocolate Cupcakes with Vanilla Cream Cheese Icing


Pumpkin Chocolate Chip Bread
adapted from Baked: New Frontiers in Baking

3 1/4 cups all purpose flour
2 tsp baking soda
2 tsp cinnamon
1/2 tsp nutmeg
1/2 tsp clove
1/2 tsp ginger
2 tsp salt
1 cup vegetable oil
1 3/4 cups pumpkin puree (15oz can)
3 cups granulated sugar
4 large eggs
1 tsp vanilla extract
2/3 cup water, room temperature
1 cup (12 oz) chocolate chips or chopped semisweet chocolate

Preheat the oven to 350F and position a rack in the middle. Grease and flour two 9x5 inch loaf pans and line the bottoms with parchment paper. Spray the parchment with cooking spray.

In a large bowl, whisk together the flour, baking soda, spices, and salt. Set aside.

In another large bowl, whisk together the oil and pumpkin puree. Add the granulated sugar and whisk to combine. Add the eggs, one at a time, followed by the vanilla extract and water. Mix in the chocolate with a rubber spatula.

Fold the dry ingredients into the wet ingredients until just combined. Do not overmix (and don't worry if you see a few small streaks of flour). Divide into the two pans and bake for 1 hour and 15 minutes, or until a toothpick inserted in the center comes out clean. Transfer pans to a wire rack to cool for 10 minutes, then unmold leave to cool completely.

Wednesday, January 6, 2010

Cornmeal-Currant Biscotti

Cornmeal-Currant Biscotti

These biscotti have a unique crunch from the cornmeal and just the right sweetness from the currants.    Great for dipping in coffee or tea.

One year ago: Pecan Sticky Buns

Tools helpful for making this recipe: Microplane Grater, Silpat mat, Wusthof serrated knife, a large cutting board

Cornmeal Currant Biscotti
adapted from Baking with Julia, recipe from Nick Malgieri

1 cup yellow cornmeal
1 cup all-purpose flour
1/3 cup sugar
1 teaspoon baking powder
1/4 teaspoon salt
4 ounces (1 stick) cold unsalted butter, cut into 6-8 pieces
1 cup currants
1 large egg
1 large egg yolk (reserve the egg white)
1 teaspoon grated lemon zest
1 teaspoon pure vanilla extract

Preheat oven to 350 degrees F. Line a baking sheet with a Silpat or parchment and set aside.
In a large bowl, combine the cornmeal, flour, sugar, baking powder, and salt. Add the butter pieces, and using your fingers, rub the butter and dry ingredients together until the mixture resembles coarse crumbs. Stir in the currants.
In a small bowl, whisk the egg and egg yolk with the lemon zest and vanilla extract. Add the wet mixture to the dry mixture and stir with a rubber spatula until mostly combined. Using your hands, knead the mixture 5 to 10 times in the bowl until the mixture is uniform and holds together. The dough will seem dry compared to other biscotti you may have made. If it doesn't hold together, add a bit of the reserved egg white and knead a few more times until the dough holds together. Divide the dough in half and, right on the baking sheet, shape each half into a flattened log about 2 inches wide and 1 inch high. Bake the logs for 20 minutes or until the logs start to lightly brown around the edges and is firm when touched lightly with your finger.
Remove from the oven, reduce the oven temperature to 325 degrees F and let the logs cool for 10 minutes on the baking sheet. Carefully transfer the logs to a large wooden cutting board and slice the logs on a diagonal with a large serrated knife about a 1/2 inch thick. Place the slices back on the baking sheet an bake for an additional 15 minutes. The cookies will become more crisp as they cool. Store in an airtight container up to one month.


LinkWithin

Related Posts Widget for Blogs by LinkWithin