Friday, January 30, 2009

"Baked" Lemon Loaf


This recipe comes from one of my favorite cookbooks - Baked - New Frontiers in Baking. The authors own a bakery in Brooklyn called Baked, which I was lucky enough to visit.  The cookbook contains all the elements you'd like to see from a baking cookbook, but it seems that each recipe has a unique twist which makes this cookbook special. This lemon loaf is not dense like pound cake but is delicious, moist, and light.


The cake itself has a good amount of lemon zest and some lemon juice. You drizzle the underside of the cake, which you've pierced with a toothpick, with lemon sugar syrup. After that's soaked in, dress the cake with a lemon glaze. One taste and you'll be in lemon paradise!

Lemon Lemon Loaf from Baked: New Frontiers in Baking
Makes 2 loaves

For the cake:
1 1/2 cups cake flour
1 1/2 cups all-purpose flour
2 tsp baking powder
1/4 tsp baking soda
1 tsp salt
2 1/4 cups sugar
8 large eggs, at room temperature
1/4 cups grated lemon zest, from about 4 lemons
2 cups (4 sticks) unsalted butter, melted and cooled
1/2 cup sour cream, at room temperature
2 tsp pure vanilla extract

For the syrup:
1/3 cup fresh lemon juice
1/3 cup sugar

For the glaze:
2 cups confectioner's sugar, sifted
4 to 6 Tablespoons fresh lemon juice

Preheat oven to 350 degrees F. Spray the sides and bottom of two 9x5x3 inch loaf pans with nonstick cooking spray. Line the bottom with parchment and spray the parchment.
Sift both of the flours, baking powder, baking soda, and salt together in a medium bowl using a whisk.
Put the sugar, eggs, lemon zest, and lemon juice in a food processor and pulse until combined. With the motor running, drizzle the butter in through the feed tube. Add the sour cream and vanilla and pulse until combined. Transfer the mixture to a large bowl.
Sprinkle in the flour mixture, one third at a time, folding gently after each addition until just combined. Do not overmix.
Divide the batter evenly between the prepared pans. Bake in the center of the oven for 20 minutes, rotate the pans, reduce the oven temperature to 325 degrees F, and bake for another 30-35 minutes, until a toothpick inserted in the center of the loaf comes out clean. Let cool in the pans for 15 minutes.
Meanwhile, make the lemon syrup...
In a small saucepan over medium heat, heat the lemon juice and sugar until the sugar is completely dissolved. Once dissolved, continue to cook for 3 more minutes. Remove from the heat and set aside.
Line a half sheet pan with parchment or waxed paper and invert the loaves onto the pan. Use a toothpick to poke holes in the tops and sides of the loaves.
Brush the tops and sides with lemon syrup. Let the syrup soak into the loaves and brush again. Let the cakes cool completely, about 30 minutes.
The soaked but unglazed loaves will keep, wrapped in two layers of plastic wrap and frozen, for up to 6 weeks.
While the cakes are cooling, make the lemon glaze...
In a small bowl, whisk together the confectioner's sugar and 4 tablespoons of the lemon juice. The mixture should be thick but pourable. If too stiff, add up to another 2 tablespoons of lemon juice, a little at a time until the right consistency is reached. Pour the lemon glaze over the top of each loaf and let it drip down the sides. Let the lemon glaze harden, about 15 minutes. The glazed loaves will keep up to 3 days, wrapped tightly in plastic, at room temperature.

Wednesday, January 28, 2009

Mark your cup!

I know there are a lot of cute and artistic ways to mark your cup, like the beautiful beaded wine glass markers from Joy Beadworks, or the adorable, creative shrinky dink coffee markers from Hope Studios. But when you're time challenged and you've got a whole crew of kids coming over and you want to keep their cups/cans/bottles straight, try this little trick...


Save some thick rubberbands from your grocery produce such as broccoli and asparagus. Place a rubberband around each cup and write one name on each with a ball point pen. The rubberband stays put and, at the end of the night, take the bands off and save them for the next time. There's no need for plastic cups, and you don't get a dishwasher full of cups because no one can remember which cup is theirs...re-using and recycling at its best!

Wednesday, January 21, 2009

Hot Chocolate and Chocolate Waffles

Forget the mixes and frozen foods! With some basic ingredients on hand and a handful of recipes, you can make it yourself. I have found that it only takes a little bit of extra time - not a lot - and you're saving money and packaging waste. We hosted a sleepover last weekend and I got a request for chocolate waffles the next morning. In no time, I found the recipe online, whipped them up and the girls devoured them! I know they're not the healthiest breakfast item, but at least I know what's in them (and I control the quality of the ingredients) and what's not (no preservatives, high fructose corn syrup, or trans fats!) Read the ingredients list on a box of cake mix, or frozen waffles, or Swiss Miss hot cocoa. There are just things in there that should not be, and I just can't bring myself to buy them anymore. You may have a few extra dishes to wash, but isn't it worth it to give your family good food with wholesome ingredients? Make this breakfast for your chocoholic sweetie on Valentine's Day - and you can boast that you made it from scratch! What says "I Love You" better than that?


Chocolate Waffles
from Alton Brown/The Food Network

7 ounces all-purpose flour or whole wheat pastry flour, approximately 1 1/2 cups

1 3/4 ounces sugar, approximately 3 tablespoons
1.5 ounces cocoa powder, approximately 1/2 cup
1 teaspoon baking powder
1 teaspoon salt
1/2 teaspoon baking soda
3 whole eggs, beaten
2 ounces unsalted butter, melted and slightly cooled
1 teaspoon pure vanilla extract
16 ounces buttermilk, room temperature
4 ounces chocolate chips, approximately 3/4 cup
Vegetable spray, for waffle iron

Preheat waffle iron according to manufacturer's directions.
In a medium bowl whisk together the flour, sugar, cocoa powder, baking powder, salt, and baking soda. In another bowl beat together the eggs and melted butter and vanilla, and then add the buttermilk. Add the wet ingredients to the dry and stir in the chocolate chips just until combined. Allow to rest for 5 minutes.
Ladle the recommended amount of waffle batter onto the center of the iron. Close the iron top and cook until the waffle is crispy on both sides and is easily removed from iron. Serve immediately or keep warm, uncovered in a 200 degree F oven until ready to serve.


Hot Cocoa
from Hershey's

1/2 cup sugar
1/4 cup HERSHEY'S Cocoa
Dash salt
1/3 cup hot water
4 cups (1 qt.) milk
3/4 teaspoon vanilla extract
Miniature marshmallows or sweetened whipped cream(optional)


Directions:1. Stir together sugar, cocoa and salt in medium saucepan; stir in water. Cook over medium heat, stirring constantly, until mixture comes to a boil. Boil and stir 2 minutes. Add milk; stirring constantly, heat to serving temperature. Do Not Boil. 2 Remove from heat; add vanilla. Beat with rotary beater or whisk until foamy. Serve topped with marshmallows or whipped cream, if desired. Five 8-oz. servings. Variation: Add a few drops of peppermint extract or some espresso powder.

MICROWAVE SINGLE SERVING: Combine 1 heaping teaspoon HERSHEY'S Cocoa, 2 heaping teaspoons sugar and dash salt in microwave-safe cup or mug. Add 2 teaspoons cold milk; stir until smooth. Fill cup with milk. Microwave at HIGH (100%) 1 to 1-1/2 minutes or until hot. Stir to blend; serve.

Friday, January 16, 2009

Goodbye until next year, and I've been tagged...


Each year they come trickling in around the first week in December. By the end of the month I've got a wall covered with treasured photos of friends and their kids and families. You see, on the wall behind my desk area in the kitchen, I have a bulletin board which spans the entire 9-ft length of my desk. I made this bulletin board when we moved in 8 years ago by cutting some homosote (available at building supply stores) to size and covering it with sage colored linen, simply using a heavy duty stapler to affix the material on the back. It sits right on top of the backsplash and is fitted just under the cabinets so it doesn't even require nails or screws to keep it secure. During the year I post library receipts, party invitations, and other things I like to have within sight. Come December, it's all cleared off to make way for the adorable photos and Christmas greetings. I'm sad whenever it's time to take them down, but I'll save them in a box with all of the other years' pictures and even look back at them from time to time. So the bulletin board is clear now and I'll say goodbye to all our friends and wait until next year when we'll see them again, one year older and comment on how they've changed and grown up and how this one or that one looks exactly like their mother/father. I just love my wall of pictures!


Also, I've been tagged by Jennifer at Hope Studios and was asked to cite 6 random things about myself. Nothing very exciting but here goes...

1.) I wear knitted scarves all winter, inside or out. I'm wearing one right now.
2.) I feel like I can't breathe whenever bacon is cooking nearby or when I walk down the cleaning supplies aisle of the store
3.) I have at least 7 different types of honey in my pantry.
4.) I have a hard time keeping the house picked up - it's a constant battle! (I'm sure I'm not alone on this one!)
5.) I sleep on a pillow filled with water.
6.) I have a friend who recently purchased an iphone. She showed it to me yesterday and now I know what I'm going to spend my "Mimi's money" on!

Coq au Vin


It's bitter cold...so cold they've cancelled school for the day. Why not spend some time in a warm kitchen making some comfort food?  This is one of my very favorite dinner recipes.  Leftovers freeze beautifully.  Use a bottle of Pinot Noir which you would enjoy drinking - the result is delicious, warming, and comforting.

Coq au VinFrom Cook's Illustrated, November, 2006.
1 bottle Pinot Noir
2 cups
low-sodium chicken broth
10
sprigs fresh parsley leaves
2 tablespoons minced fresh parsley leaves
2 sprigs fresh thyme
1 bay leaf
4 ounces
bacon, cut crosswise into 1/4-inch pieces
2 1/2 pounds boneless, skinless chicken thighs , trimmed of excess fat and cut in half crosswise
Table salt and ground black pepper
5 tablespoons unsalted butter
24 frozen pearl onions , thawed, drained, and patted dry about 1 cup (I used chopped yellow onions)
8 ounces cremini mushrooms , wiped clean, stems trimmed, halved if small and quartered if large
2 medium cloves garlic , minced or pressed through garlic press (about 2 teaspoons)
1 tablespoon
tomato paste
2 tablespoons
all-purpose flour


1. Bring all but 1 tablespoon wine (reserve for later use), broth, parsley sprigs, thyme, and bay to simmer in large saucepan over medium-high heat. Cook until reduced to 3 cups, about 25 minutes. Discard herbs.
2. Meanwhile, cook bacon in large Dutch oven over medium heat until browned, 7 to 8 minutes. Using slotted spoon, transfer bacon to paper-towel-lined plate. Reserve 2 tablespoons fat in small bowl; discard remaining fat.
3. Lightly season chicken with salt and pepper. Heat 1 tablespoon reserved bacon fat in Dutch oven over medium-high heat until just smoking. Add half of chicken in single layer and cook until lightly browned, about 2 minutes per side. Transfer to plate and repeat with remaining chicken and 1 tablespoon bacon fat.
4. Melt 3 tablespoons butter in now-empty Dutch oven over medium-high heat. When foaming subsides, add pearl onions and mushrooms; cook, stirring occasionally, until lightly browned, 5 to 8 minutes. Reduce heat to medium, add garlic, and cook until fragrant, about 30 seconds. Add tomato paste and flour; cook, stirring frequently, until well combined, about 1 minute.
5. Add reduced wine mixture, scraping bottom of pot with wooden spoon to loosen browned bits; add 1/4 teaspoon pepper. Return chicken, any accumulated juices, and reserved bacon to pot; increase heat to high and bring to boil. Reduce heat to medium-low, cover pot, and simmer until chicken is tender, about 25 minutes, stirring halfway through cooking time.
6. Using slotted spoon, transfer chicken to large bowl; tent with foil to keep warm. Increase heat to medium-high and simmer sauce until thick and glossy and measures 3 cups, about 5 minutes. Off heat, stir in remaining 2 tablespoons butter and reserved 1 tablespoon wine. Season to taste with salt. Return chicken to pot and top with minced parsley. Serve immediately.

Tuesday, January 13, 2009

Chewy Molasses Crinkles


If you like molasses cookies which are flat and chewy, these are the ones for you.


Who wouldn't love to receive a bag full of these as a thank you?


These flat and chewy cookies are perfect for using up extra cream cheese icing in a cookie sandwich...YUM!

Chewy Molasses Crinkles
from Martha Stewart's Cookies

1/2 cup unsalted butter, room temperature
1 cup packed light brown sugar
1/2 cup granulated sugar, plus 1/4 cup for rolling
2 large eggs
1/2 cup unsulphured molasses
2 tablespoons vegetable oil
2 cups all-purpose flour
1 tsp baking soda
1 tsp ground cinnamon
1 tsp ginger
1 tsp allspice
1/2 tsp salt

Combine flour, baking soda, spices, and salt in a small bowl and whisk to combine; set aside. Cream butter, brown sugar and 1/2 cup granulated sugar in the bowl of an electric mixer fitted with the paddle attachment. Beat until smooth, about 3 minutes. Mix in the eggs, one at a time, mixing well after each. Add molasses and oil and beat until well combined.
Reduce speed to low; gradually mix in flour mixture and beat until just combined. Cover with plastic wrap and refrigerate 1 hour or overnight.
Preheat oven to 325. Put the remaining 1/4 cup granulated sugar in a bowl. Using a 1 3/4-inch ice-cream scoop, form balls of dough. Roll balls in sugar to coat. (You can freeze the sugar-coated dough balls on a baking sheet and transfer them to a plastic bag to have cookies on demand!) Space the cookies 3 inches apart on baking sheets lined with parchment or a Silpat. Bake until cookies are flat and centers are set, about 17 minutes.  Let cool completely before storing in an airtight container.

Friday, January 9, 2009

Cupcake of the Month - Chocolate with Vanilla Icing


Chocolate Cupcakes with Vanilla Icing
From Martha Stewart, courtesy of Georgetown Cupcake.

Makes 16-17 cupcakes.
1 1/4 cups all-purpose flour, sifted
1/2 teaspoon baking soda, sifted
1/4 teaspoon salt
1 cup milk
1 1/4 teaspoons pure vanilla extract
1/2 cup (1 stick) unsalted butter, preferably European-style, room temperature
1 1/4 cups sugar
2 large eggs, room temperature
1/2 cup cocoa powder, sifted

Directions
Preheat oven to 350 degrees. Line a standard muffin tin with 16-17 cupcake liners; set aside.
In a large bowl, whisk together flour, baking soda, and salt; set aside. In a small bowl, add milk and vanilla extract; stir to combine and set aside.
In the bowl of an electric mixer fitted with the paddle attachment, cream together butter and sugar until light and fluffy, about 5 minutes. With the mixer on low, add eggs, one at a time, mixing well after each addition. Add flour mixture in three parts, alternating with milk mixture; beat until just combined. Add cocoa powder and beat until just combined.
Fill each muffin cup two-thirds full with batter. (Do not overfill!) Transfer to oven and bake until a cake tester inserted into the center of a cupcake comes out clean, 18 to 20 minutes. Let cool in pans for two minutes before transferring to a wire rack to cool completely.
Pipe or spread frosting onto cooled cupcakes.

Vanilla Frosting

Ingredients
Makes enough for at least 2 dozen cupcakes.
4 tablespoons unsalted butter, room temperature
4 cups confectioners' sugar, sifted
1/4 teaspoon pure vanilla extract
6 ounces cream cheese, room temperature

Place all ingredients in the bowl of an electric mixer fitted with the paddle attachment; beat until well combined. Add a tablespoon of milk if the icing seems too thick and beat well.

Saturday, January 3, 2009

The Successful Pecan Sticky Bun


These sticky buns can be made weeks ahead and frozen, unbaked. We hauled these frozen buns (along with our own!) all the way to North Carolina and baked them up on New Year's Day.


Straight out of the oven they were gorgeous and browned and cinnamony.


Turn them over to find a delicious sticky goo!


Make the extra gooey pecan topping and you've got one sinfully delicious sticky bun!

Sticky Buns with Pecans for Freezing
Makes twelve 3 1/2-inch buns. Published May 1, 2007 in Cook's Illustrated

Dough:
3 large eggs at room temperature
3/4 cup
buttermilk at room temperature
¼ cup granulated sugar
1 ¼ teaspoons
table salt
2 ¼ teaspoons instant yeast
4 ¼ cups
unbleached all-purpose flour (21 1/4 ounces), plus additional for dusting work surface
6 tablespoons unsalted butter , melted and cooled until warm

Caramel Glaze:
6 tablespoons unsalted butter
¾ cup
packed light brown sugar (5 1/4 ounces)
3 tablespoons corn syrup , light or dark
2 tablespoons heavy cream
Pinch
table salt

Cinnamon-Sugar Filling:
¾ cup
packed light brown sugar (5 1/4 ounces)
2 teaspoons
ground cinnamon
¼ teaspoon ground cloves (I will omit this next time)
Pinch
table salt
1 tablespoon unsalted butter , melted

Pecan Topping:
3 tablespoons unsalted butter
¼ cup
packed light brown sugar (1 3/4 ounces)
3 tablespoons corn syrup , light or dark
Pinch
table salt
1 teaspoon
vanilla extract
¾ cup pecans (3 ounces), toasted in a skillet over medium heat until fragrant and browned, about 5 minutes, then cooled and coarsely chopped

For the dough: In bowl of standing mixer, whisk eggs to combine; add buttermilk and whisk to combine. Whisk in sugar, salt, and yeast. Add about 2 cups flour and butter; stir with wooden spoon or rubber spatula until evenly moistened
and combined. Add all but about 1/4 cup remaining flour and knead with dough hook at low speed 5 minutes. Check consistency of dough (dough should feel soft and moist but should not be wet and sticky; add more flour, if necessary); knead at low speed 5 minutes longer (dough should clear sides of bowl but stick to bottom). Turn dough out onto lightly floured work surface; knead by hand about 1 minute to ensure that dough is uniform (dough should not stick to work surface during hand kneading; if it does stick, knead in additional flour 1 tablespoon at a time).


Lightly spray large bowl or plastic container with nonstick cooking spray. Transfer dough to bowl, spray dough lightly with cooking spray, then cover bowl tightly with plastic wrap and set in warm, draftfree spot until doubled in volume, 2 to 2 1/2 hours.

For the glaze: Meanwhile, combine all ingredients for glaze in small saucepan; cook over medium heat, whisking occasionally, until butter is melted and mixture is thoroughly combined. Pour mixture into nonstick metal 13- by 9-inch baking dish; using rubber spatula, spread mixture to cover surface of baking dish. Set baking dish aside.

To assemble, store, and reheat buns: For filling, combine brown sugar, cinnamon, cloves, and salt in small bowl and mix until thoroughly combined, using fingers to break up sugar lumps; set aside. Turn dough out onto lightly floured work surface. Gently shape dough into rough rectangle with long side nearest you. Lightly flour dough and roll to 16 by 12-inch rectangle. Brush dough with 1 tablespoon melted butter, leaving 1/2-inch border along top edge; with butter remaining on brush, brush sides of baking dish. Sprinkle filling mixture over dough, leaving 3/4-inch border along top edge; smooth filling in even layer with hand, then gently press mixture into dough to adhere. Beginning with long edge nearest you, roll dough into taut cylinder. Firmly pinch seam to seal and roll cylinder seam side down. Very gently stretch to cylinder of even diameter and 18-inch length; push ends in to create even thickness. Using serrated knife and gentle sawing motion, slice cylinder in half, then slice each half in half again to create evenly sized quarters. Slice each quarter evenly into thirds, yielding 12 buns (end pieces may be slightly smaller).

Arrange buns cut side down in prepared baking dish; cover tightly with plastic wrap and set in warm, draft-free spot until puffy and pressed against one another, about 1 1/2 hours. Place baking dish in freezer; store for up to 1 month.

To bake, adjust oven rack to middle position and heat oven to 350 degrees. Remove buns from freezer, remove plastic wrap, wrap dish tightly with foil, and set on baking sheet. Bake buns for 30 minutes, then remove foil and continue to bake until golden brown and center of dough registers about 180 degrees on instant-read thermometer, about 20 minutes longer. Cool on wire rack 10 minutes; invert onto rimmed baking sheet, large rectangular platter, or cutting board. With rubber spatula, scrape any glaze remaining in baking dish onto buns; let cool while making pecan topping. For the topping: Combine butter, brown sugar, corn syrup, and salt in small saucepan and bring to simmer over medium heat, whisking occasionally to thoroughly combine. Off heat, stir in vanilla and pecans until pecans are evenly coated. Using soupspoon, spoon heaping tablespoon nuts and topping over center of each sticky bun. Continue to cool until sticky buns are warm, 15 to 20 minutes. Pull apart or use serrated knife to cut apart sticky buns; serve.

New Year's Eve in North Carolina

It's a long drive from PA to NC - about 10 long hours in the car. One can get a lot of knitting done in those hours. On the way down, the kids asked at least 30 times, "When are we going to be there, how many more hours???" They were so excited to see their Grandma and Grandpa, their aunts and uncles, and to have all 8 cousins together.


The kids were so content hanging with their cousins and didn't nag us for anything the 3 whole days we were there! I believe that may be a record.


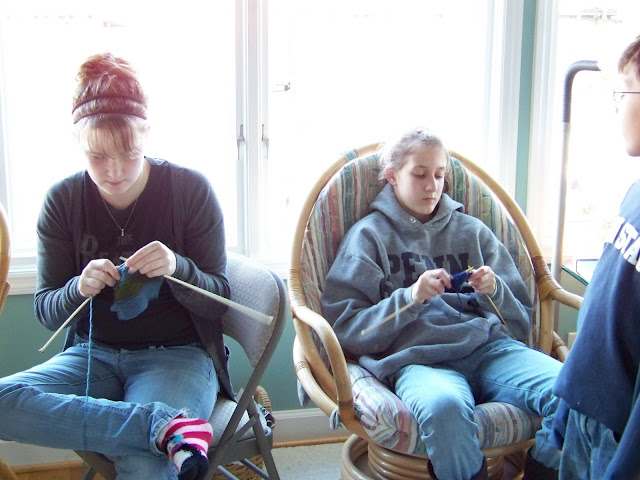
We did a puzzle and started knitting projects... we exchanged white elephant gifts...

We had grilled oysters dipped in butter...


and yes, we formed rock bands! It was worth the drive. Thanks Mom and Dad!

LinkWithin

Related Posts Widget for Blogs by LinkWithin