Monday, March 1, 2010

The Best Baklava

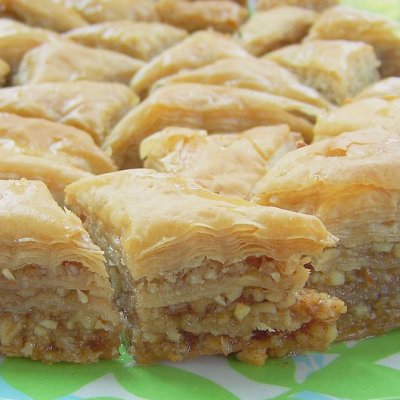
Baklava

Classic Baklava
by Cindy Mushet for Fine Cooking Magazine
Yields about 30 pieces

Ingredients:
1-lb. “twin pack” phyllo dough (two 8-oz. packs, each containing about twenty 9x14-inch sheets)
10 oz. (1-1/4 cups) unsalted butter for brushing the phyllo

For the filling:
1 lb. unsalted walnuts and almonds
1/2 cup granulated sugar
1 tsp. ground cinnamon
1/2 tsp. ground cardamom, optional

For the syrup:
1 cup sugar
1/2 cup honey
2/3 cup water
1-1/2 tsp. orange flower water (I omitted)

Directions:
Thaw the phyllo overnight in the refrigerator. Then put the phyllo box on the counter to come to room temperature, 1-1/2 to 2 hours.
Make the filling:
Put the nuts, sugar, cinnamon, and cardamom (if using) in a food processor. Process until the nuts are finely chopped (the largest should be the size of small dried lentils), 15 to 20 seconds. Set aside.
Assemble the baklava:
Unfold one pack of the phyllo sheets and stack them so that they lie flat on your work surface. Cover the top with plastic wrap, letting some excess plastic fall over all four edges. Dampen and wring out a kitchen towel and drape it on top of the plastic wrap; this will hold the plastic in place and prevent the phyllo from drying out.
Melt the butter in a small saucepan. Brush the bottom of a 9x13-inch metal pan (preferably with straight sides and a light-color interior to prevent overbrowning on the edges) with some of the butter. Remove a sheet of phyllo from the stack, re-cover the rest (be sure to cover the remaining sheets each time you remove a new one), and put the sheet in the bottom of the pan.
Brush the sheet with some of the melted butter but don’t soak the phyllo (remember, you’ll have about 40 layers of buttered phyllo by the time you’re done). Repeat until you have layered and buttered about half the sheets from the first pack—about 10 sheets in all. If your pan has slightly angled sides, arrange the sheets so the excess falls on the same side of the pan and cut the extra off every few layers with a paring knife.
Sprinkle about one-third of the filling evenly over the phyllo.
Repeat layering and buttering the remaining sheets from the first pack and sprinkle on another third of the filling. Open, unfold, and cover the second pack of phyllo. Layer and butter it as described above, sprinkling the remaining filling after layering about half the phyllo, and ending with a final layer of phyllo (you may not need all of the butter). Cover loosely and put the pan of baklava in the freezer for 30 minutes (this makes it much easier to cut the pastry).
Bake the baklava:
Position an oven rack in the center of the oven and heat the oven to 350°F.
Before baking, use a thin, sharp knife (I prefer serrated) and a gentle sawing motion to cut the baklava on the diagonal at 11/2-inch intervals in a diamond pattern. Try not to compress the pastry by pressing down on it with one hand while cutting with the other. Not only are you cutting serving portions, you are also cutting pathways for the flavored syrup to permeate the pastry, so be sure to cut the pastry all the way to the bottom of the pan. If you have an electric carving knife, this is the perfect time to use it.
Bake the baklava until golden, 40 to 45 minutes. Transfer to a rack and let cool completely.
Make the syrup:
Put the sugar, honey and 2/3 cup water in a small saucepan and bring to a simmer over medium heat, stirring occasionally, until the sugar is dissolved and the liquid is clear, about 5 minutes. Remove the pan from the heat and stir in the orange flower water (if using).
Pour the syrup evenly over the entire surface of the baklava, allowing it to run down into the cut marks and along the sides of the pan. Allow the baklava to cool to room temperature before serving.


Sunday, February 21, 2010

Jazz in the Park Sugar Cookies

Jazz Cookies
Last weekend, my kids' school held their annual auction fundraiser.
It was a huge success!

The party was held at the Lexus Club at PNC Park, home of the Pittsburgh Pirates.
The entertainment was the school's fabulous Jazz Ensemble.
Hence, the theme of the party : "Jazz in the Park"!

I was lucky enough to be asked to make the favors for each attendee to take home with them.

Jazz Cookies

More then a week's worth of baking and icing and piping...

Jazz Cookies

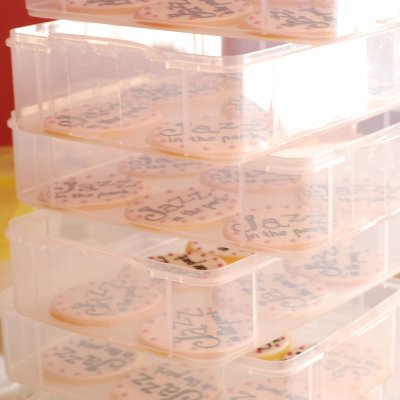
and drying (in my awesome snapware cupcake carriers) ...
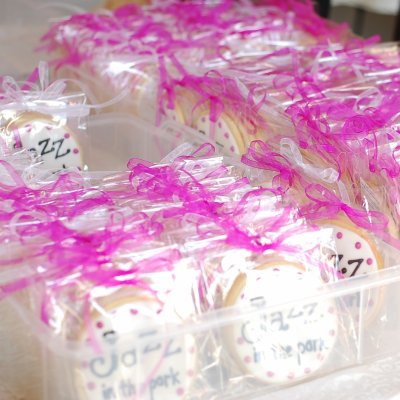
and bagging...
and tying ribbons...

Jazz Cookies

271 times to be exact! Everyone loved the cookies and I am so grateful for all the great feedback!

But I guess it'd be OK if I don't see another sugar cookie... for a little while anyway!

Jazz Cookies

These sugar cookies were some of the best I've ever made. They were the perfect balance between crisp and soft and the addition of almond extract gave them delicious flavor.

Sugar Cookies

Note: This recipe is double the amounts in the cookbook with a couple of adjustments...I added a bit more flour and used almond extract...the key (in my opinion) to lovely tasting sugar cookies.

4 cups all-purpose flour
1/2 teaspoon salt
1/2 teaspoon baking powder
3 1/2 sticks butter, softened to cool room temperature
1 1/3 cup sugar
2 large eggs
1 1/2 teaspoon vanilla extract
1/2 teaspoon almond extract

In a medium bowl, whisk together the flour, salt, and baking powder and set aside.

In the bowl of an electric mixer fitted with a paddle attachment, beat the butter, shortening, and sugar together until light and fluffy. Add the eggs and vanilla and beat until combined, scraping the bowl as needed. Add the flour mixture and mix until incorporated. Wrap the dough in plastic and refrigerate for at least 4 hours.

Preheat the oven to 350 degrees. Line two baking sheet with Silpat mats or parchment paper.

Dust a work surface liberally with flour. Unwrap the chilled dough, sprinkle with more flour and roll with a rolling pin to 1/4 inch thick (or a little thinner). Lift the dough and add a bit more flour underneath and on top if the dough gets sticky. If the dough is too hard to work with and wants to crack, break the dough into tennis ball sized pieces and knead each piece briefly to make the dough pliable, then knead all the pieces together one or two times, then you can roll out to an even thickness with a rolling pin. Transfer the cookies to the cookie sheets with a thin metal spatula. Place the cookie sheets in the freezer for at least 15 minutes (this keeps the cookies from spreading during baking, then bake the cookies for about 12 minutes. I peek into the oven and give the cookies a quick touch with my finger. The cookies are done if they provide resistance to your fingertip. They are not quite done if your finger sinks into the cookie and leaves an impression. I set the timer for 12 minutes and check every minute after that if the cookies are not done. Let the cookies cool for 5 minutes on the baking sheet, then transfer to a cooling rack to cool completely.

Royal Icing
I've tried several recipes for royal icing and this is what I did this time - it was quick, easy, and hardened nicely. You can use fresh egg whites if you like, but I loved the convenience of the egg whites in the carton.

pasteurized egg whites, about 1/4 to 1/2 cup
powdered sugar - have about a pound or two on hand for this recipe
clear vanilla extract
food coloring if desired

I don't have exact measurements for this icing because I was making so many at a time, but here's the gist:

Pour a splash (1/4 to 1/2 cup) of pasteurized egg whites into a medium to large bowl. Whisk a bit to loosen up the mixture. Add flavoring if you like (clear vanilla extract if the icing will be white, lemon juice, real vanilla or almond extract). Using a mesh sieve, sift about a cup of powdered sugar into the egg white mixture (I use a large spoon to push the sugar through the sieve). Mix well with a whisk. Keep adding powdered sugar, a cup at a time, until the desired consistency is reached.

Using the 10-second rule, if you drag a spoon or knife through the icing, it should take about 10 seconds for the line to disappear completely. If it takes less than that, the icing is too thin and you should add more sifted powdered sugar. If it takes longer, add a little more egg white, about a teaspoon at a time until it's perfect. Add food coloring if desired. (I used Spectrum white for the background, and black and burgundy for the piping.)

Once you have the right consistency, slowly stir the icing with a spoon to break some of the air bubbles. Keep the icing covered airtight until ready to use. After icing, allow the cookies to dry for at least 24 hours before any additional decorating or packing.

What worked for me...
I did not use the pipe and flood technique to cover these cookies with white icing. That would have taken me forever! I simply used a spoon to place a good-sized dollop of icing on each cookie and then pushed the icing to the edges and then evened the icing out with the back of a spoon. If you have the right icing consistency, it will not drip over the edges of the cookie, and it is a LOT faster.

Sunday, February 14, 2010

Heart-Shaped Peppermint Marshmallows

Marshmallows and Hot Chocolate

Happy Valentine's Day! With all the snow we've had in the past week, the kids have been playing in the snow quite a bit. It doesn't seem to matter if they're out in the snow 5 minutes or 5 hours...they gotta have some hot chocolate when they come inside. These marshmallows are terrific in a cup of hot chocolate - better than they are all by themselves. The underside begins to melt and flavor the hot chocolate with subtle mint as soon as the marshmallow hits the hot liquid, creating a delicious foam on top. Make your own hot cocoa mix, or use a good quality store-bought mix.

We tried cooking these over the fire and they wouldn't hold their shape, but they were gooey and delicious.  If you are looking for a recipe for marshmallows that will hold up over a fire, try these.

Homemade Heart-Shaped Marshmallows
adapted from Epicurious

about 1 cup confectioners' sugar for coating
3 1/2 envelopes (2 tablespoons plus 2 1/2 teaspoons) unflavored gelatin (such as Knox)
1/2 cup cold water
2 cups granulated sugar
1/2 cup light corn syrup
1/2 cup hot water (about 115°F.)
1/4 teaspoon salt
2 large egg whites*
1 teaspoon pure vanilla extract
1/2 teaspoon peppermint extract (optional)

*if egg safety is a problem in your area, substitute powdered egg whites reconstituted according to manufacturer's instructions

Oil bottom and sides of a 13- by 9- by 2-inch rectangular metal baking pan and dust bottom and sides with some confectioners' sugar. In bowl of a standing electric mixer or in a large bowl sprinkle gelatin over cold water and let stand to soften. In a 3-quart heavy saucepan cook granulated sugar, corn syrup, hot water, and salt over low heat, stirring with a wooden spoon, until sugar is dissolved. Increase heat to moderate and boil mixture, without stirring, until a candy or digital thermometer registers 240°F., about 12 minutes. Remove pan from heat and pour sugar mixture over gelatin mixture, stirring until gelatin is dissolved. With standing or a hand-held electric mixer beat mixture on high speed until white, thick, and nearly tripled in volume, about 6 minutes if using standing mixer or about 10 minutes if using hand-held mixer. In a large bowl with cleaned beaters beat whites (or reconstituted powdered whites) until they just hold stiff peaks. Beat whites and vanilla into sugar mixture until just combined. Pour mixture into baking pan and sift 1/4 cup confectioners― sugar evenly over top. Chill marshmallow, uncovered, until firm, at least 3 hours, and up to 1 day. Run a thin knife around edges of pan and invert pan onto a large cutting board. Lifting up 1 corner of inverted pan, with fingers loosen marshmallow and let drop onto cutting board. With a heart shaped cookie cutter, cut marshmallow into heart shapes. Sift remaining confectioners' sugar into a large bowl and add marshmallows in batches, tossing to evenly coat. Marshmallows keep in an airtight container at cool room temperature 1 week.

Friday, February 12, 2010

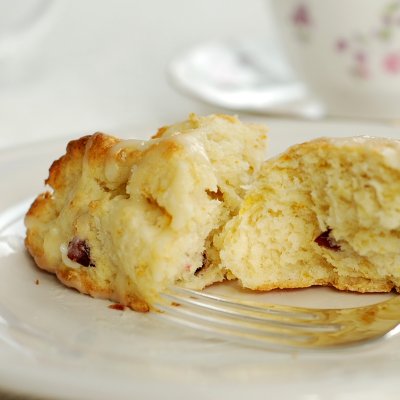
Cranberry-Orange Scones

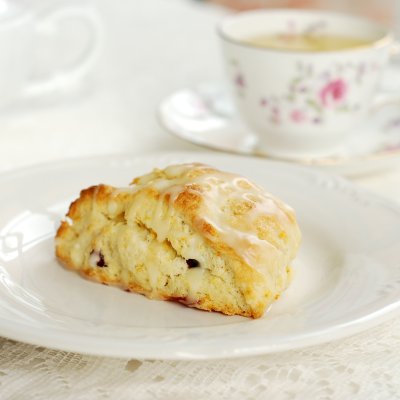
Cranberry-Orange Scones

Oh yes, Cranberry Orange Scones. These are flaky, moist, and slightly addictive.  The recipe comes from Baking with Julia and they are so simple to make. The orange zest in the dough and in the glaze makes these ultra delicious! Serve these to your sweetie for breakfast on Valentine's Day and it will be a special day indeed!

Cranberry-Orange Scones


Buttermilk Scones
adapted from a Marion Cunningham recipe from Baking with Julia
Makes 12 scones

3 cups all-purpose flour
1/3 cup sugar
2 1/2 teaspoons baking powder
1/2 teaspoon baking soda
3/4 teaspoon salt
1 1/2 sticks (6 ounces) cold unsalted butter, cut into small pieces
1 cup buttermilk
1 tablespoon orange zest
1/2 cup dried cranberries

Preheat the oven to 425 degrees F.

In a medium bowl, whisk to combine the flour, sugar, baking powder, baking soda, and salt. Add the cold butter pieces and using your fingertips, work the butter into the flour mixture until the mixture resembles coarse cornmeal with a few larger pieces. Add 1 cup buttermilk, cranberries, and orange zest and mix with a fork until ingredients are just moistened. If the dough looks dry, add another tablespoon of buttermilk. Gather the dough into a ball, pressing it gently so that it holds together, and turn it out onto a lightly floured surface. Knead it briefly, about 10 times or so, and then cut the dough in half.

On a lightly floured surface, roll one piece of dough into a 1/2-inch thick circle that is about 7 inches across. If you are going to bake the scones right away, brush the dough with heavy cream and sprinkle with coarse or regular sugar (or omit the sugar and glaze the scones after they are baked - glaze recipe below), and cut the circle into 6 wedges. Place the scones on an ungreased cookie sheet (I use a Silpat mat). Repeat with the other half of the dough. Bake the scones for 10-12 minutes until the tops and bottoms are golden brown. Transfer the scones to a rack to cool slightly before serving.

To make ahead the night before:
Cut the dough circle into 6 wedges but do not brush with butter or cream and do not sprinkle with sugar. Transfer the triangles to a cookie sheet and cover with plastic wrap and refrigerate overnight. In the morning, brush each triangle with melted butter or cream and sprinkle with sugar (or glaze after baking). Bake 10-12 minutes as above.

To make days ahead: Freeze the dough circles, wrapped in a double layer of plastic wrap for up to two weeks. Thaw the circles overnight in the refrigerator, cut into wedges as above, brush with cream, sprinkle with sugar, (alternatively, glaze the scones after baking) and bake for 10-12 minutes until golden.

Orange Glaze

1 cups sifted confectioners' sugar
2 tablespoons or so of orange juice
fine zest of one orange

Place the sugar in a bowl. Add the orange zest and enough orange juice to make the icing thin enough to drizzle. Add more sugar if too thin and add more juice if too thick. Using a spoon, drizzle the icing over the scones.

Monday, February 8, 2010

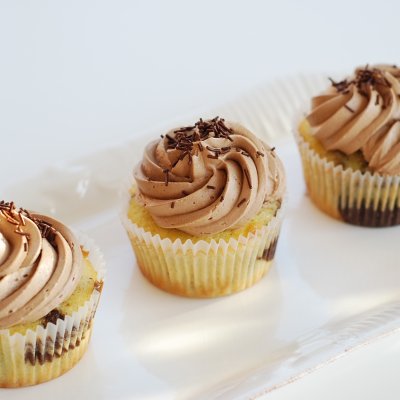
Chocolate Swiss Buttercream and How to Decorate Cupcakes

Marble Cupcakes

Since some of you inquired about cupcake decorating after my last post for Chocolate Mint Cupcakes, I will take this opportunity today to show you an easy and quick method for decorating cupcakes

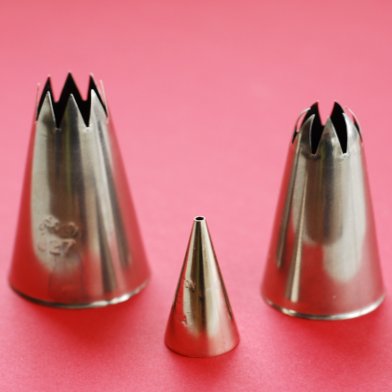
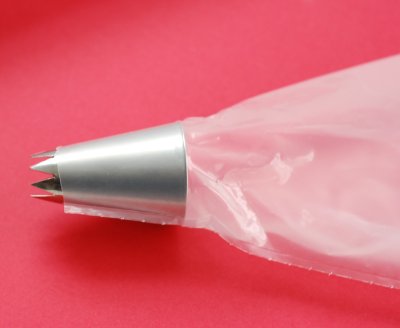
In the picture below, you will see the piping tips I used for both cupcakes. I have included a standard small piping tip to show the relative size of the tips I used. That's right, these are monster piping tips!

Piping Tips

The tip on the left is an Ateco #827 which I used for the Marbled cupcakes. The tip on the right is Ateco#846 which I used on the Chocolate Mint cupcakes. Notice how the points are shaped differently - the one on the left has teeth that stand up mostly straight and the tip on the right has teeth that curve in slightly. These shapes will give you a slightly different look to your icing. You may not readily find these large tips in JoAnn's or Michael's, but you can easily find them on the web - just google the tip name and number. If you have a cake and candy supply store near you, they may carry a larger selection of tips.

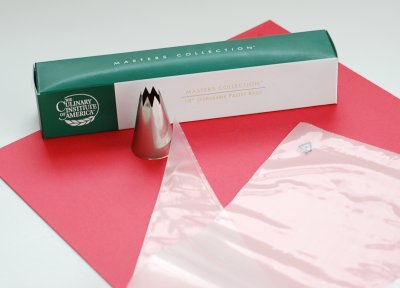
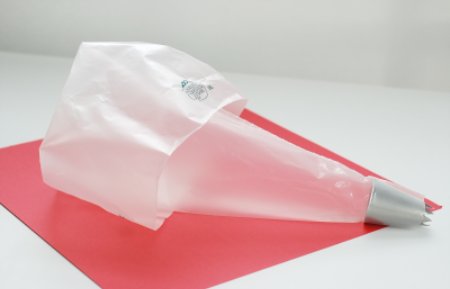
For frosting cupcakes, you'll need a large piping bag. Below is a photo of an 18" disposable piping bag I found at a discount store. You can also buy these online, at craft stores, or at cake supply stores.

Piping Bag

Cut the tip off the piping bag and slip the tip into it. Don't make the hole too big at first- you can always make the hole bigger if the tip isn't entirely exposed.

Piping Bag and Tip

To fill the piping bag, fold the top of the piping bag down a good bit. Slip your non-dominant hand under the cuff of the piping bag while you fill the bag with icing using a large rubber scraper. You can use the hand that is under the cuff to "scrape" the icing from the rubber spatula. Fill the bag no more than half full, twist the top of the bag and squeeze the icing out by applying pressure from the top of the bag where it is twisted closed. You may want to place a twist tie at the top of the bag to keep the icing from oozing out the top, but as long as you squeeze from the top of the bag instead of the middle, oozing shouldn't be a problem.

Piping Bag and Tip

The great thing about these large piping tips is that the decorating is so easy! You don't need an incredibly steady hand to make the icing look good. Just squeeze and give it a slight swirl (as I did for the Marbled) or squeeze and keep the tip in one place (like I did for the Mint). The tip does all the work! I hope this answers some of your questions about cupcake decorating...now onto the Chocolate Swiss Meringue Buttercream...

Make the basic icing recipe as directed.  When it comes time to add the flavoring, omit the peppermint extract and add about 4-5 ounces of melted and cooled (but still liquid) good-quality chocolate along with the vanilla in the recipe.  Then beat the icing with the stand mixer until that smooth consistency is achieved. Pipe the icing on as instructed above (or just spread it on with a knife or spoon or small offset spatula). Sprinkle with real chocolate sprinkles

Thursday, February 4, 2010

Chocolate Mint Cupcakes

Chocolate Mint Cupcakes

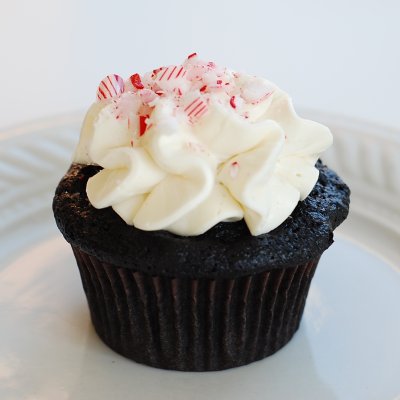
These Chocolate Mint Cupcakes were light and moist and reminiscent of a Thin Mint Girl Scout Cookie.

Chocolate Mint Cupcakes
from Martha Stewart's CupcakesMakes about 18

For the cupcakes:
1 1/2 cups all-purpose flour
3/4 cup unsweetened Dutch-process cocoa powder
1 1/2 cups sugar
1 1/2 teaspoons baking soda
3/4 teaspoon baking powder
3/4 teaspoon salt
2 large eggs
3/4 cup buttermilk
3 tablespoons vegetable oil
3/4 cup warm water
1 teaspoon pure peppermint extract
Swiss Meringue Buttercream (recipe follows)
crushed peppermint candies or candycanes

Directions:
Preheat oven to 350 degrees. Line standard muffin tins with paper liners. Whisk together flour, cocoa powder, sugar, baking soda, baking powder, and salt. Add eggs, buttermilk, oil, water, and peppermint extract, and beat with a mixer on low speed until smooth.

Divide batter among muffin cups, filling each 2/3 full. Bake, rotating tins halfway through, until a tester inserted in the center comes out clean, 20 to 25 minutes. Let cupcakes cool in tins on wire racks for 10 minutes. Transfer cupcakes to racks, and let cool completely. Undecorated cupcakes will keep, covered, for 1 day, or frozen for up to 2 months.

Frost cupcakes with buttercream and sprinkle crushed candy on top.

Swiss Meringue Buttercream
From Martha Stewart's CupcakesMakes 5 cups (more than enough for this cupcake recipe)

1 1/4 cups sugar
5 large egg whites
pinch of salt
1 pound (4 sticks) unsalted butter, cut into tablespoons, room temperature
1 teaspoon pure vanilla extract
1 teaspoon peppermint extract

Combine sugar, egg whites and salt in mixer bowl, and set over a pan of simmering water. Whisk constantly until sugar is dissolved and mixture registers 140 degrees on an instant-read thermometer.

Transfer bowl to mixer; whisk on medium-high speed until whites are fluffy and cooled, about 10 minutes. Continue to whisk until stiff, glossy peaks form.

Reduce speed to medium-low; add butter by the tablespoon, whisking well after each addition. Whisk in vanilla and peppermint extracts. Switch to the paddle attachment and continue beating until smooth. Buttercream can be refrigerated in an airtight container up to 3 days or frozen up to 1 month. Bring to room temperature before using; beat on lowest speed until smooth, about 3 minutes.

Friday, January 29, 2010

Banana Cupcakes with Vanilla Pastry Cream

Banana Cupcakes with Pastry Cream

To end the month of January, which I have dubbed "Baked" month, I present to you these delicious Banana Cupcakes with Vanilla Pastry Cream Frosting. Think Banana Cream Pie in a cupcake...so so good!

Other fantastic Baked recipes I've made:
Root Beer Fudge Cupcakes

Banana Cupcakes with Vanilla Pastry Cream
from Baked: New Frontiers in Baking by Matt Lewis and Renato Poliafito

For the Cupcakes:
2 3/4 cups all-purpose flour
1 1/4 teaspoons baking powder
1 teaspoon baking soda
1/2 teaspoon salt
1/2 cup (1 stick) unsalted butter, softened
1/4 cup vegetable shortening at room temperature
1 3/4 cups sugar
2 teaspoons pure vanilla extract
2 large eggs
1 1/2 cups mashed very ripe bananas (about 4)
1/2 cup buttermilk

For the Vanilla Pastry Cream
3 cups half-and-half
6 large egg yolks
1/2 cup sugar
3 tablespoons cornstarch
1/4 teaspoon salt
1 teaspoon pure vanilla extract

Make the pastry cream:
In a medium saucepan, bring the half-and-half to a simmer and keep warm. In a medium bowl, whisk the egg yolks, sugar, cornstarch, and salt together until the mixture is pale, about one minute. Whisk half of the half-and-half into the egg yolk mixture, then pour the egg mixture back into the pot with the remaining half-and-half. Cook over medium heat, whisking constantly until thickened and boiling, about 6-10 minutes. Remove from the heat and whisk in the vanilla. Strain the pastry cream through a fine-mesh sieve into a container. Press a piece of plastic wrap directly onto the surface of the pastry cream to prevent a skin from forming. Chill at least one hour, overnight is better.

Make the cupcakes:
Preheat the oven to 325 degrees F. Line two 12-cup cupcake pans with paper liners.
Sift the flour, baking powder, baking soda, and salt together into a large bowl and set aside.
In the bowl of an electric mixer fitted with the paddle attachment, beat the butter and shortening together on medium speed until creamy, 3 to 4 minutes. Add the sugar and vanilla and beat until fluffy, about 3 minutes. Scrape down the bowl, add the eggs, and beat until just combined. Scrape down the bowl again and add the bananas, beating until just combined. Turn the mixer to low. Add the flour mixture, alternating with the buttermilk, in three additions, beginning and ending with the flour mixture. Remove the bowl from the mixer and scrape down the sides with a rubber spatula, giving the mixture a final stir to ensure it's combined.
Fill the cupcake liners about 3/4 full. Bake for 20-25 minutes, or until a toothpick inserted in the center comes out clean. Cool in pans on a wire rack for 20 minutes. Remove them from the pans and cool completely.

Assemble the cupcakes:
Place the vanilla pastry cream in a plastic disposable piping bag or a zip top gallon sized bag. Cut the end of the bag so that the opening is about a half inch in diameter. Pipe a dollop onto the cupcake (alternatively spoon a dollop onto the cupcake) and garnish with a dried banana slice.

LinkWithin

Related Posts Widget for Blogs by LinkWithin