Wednesday, May 5, 2010

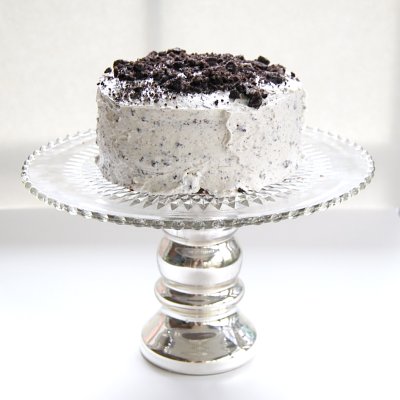
Devil's Food Chocolate Cake with Cookies 'n Cream Icing

Cookies and Cream

Could the month of May get any busier? Seriously, this is crazy. First Communion, Confirmation, my son's birthday, parents visiting, husband traveling, craft sale, 5th grade Oklahoma! musical, making cookies for the 5th grade Oklahoma! musical cast party, 5th grade graduation, Faculty Appreciation Luncheon, hockey, lacrosse, piano, making scones for the church tea, renovating a kitchen, planning vacation...I'm certain I left out a dozen more things.

Even so, the baking must go on. (It's just the blogging about it that goes by the wayside.) This one, however, just couldn't wait.
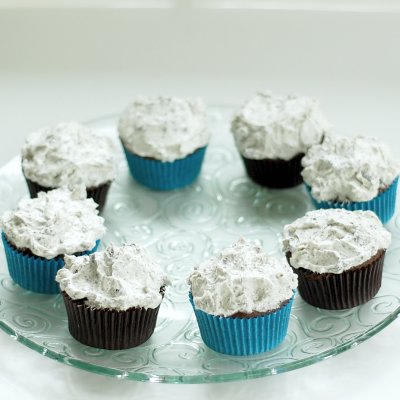
Cookies and Cream

The devil's food cake recipe comes from the Sky High Cookbook. (Would you please just go out and get this book already!) The cake itself was so delicious! It was soft and light and moist, with a fine crumb. Unbelievably good. Just look at that crumb...(below)
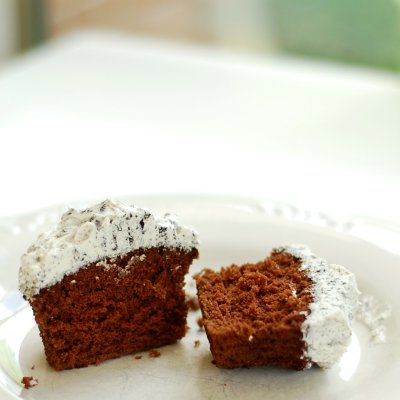

Devil's Food Cake with Cookies and Cream Icing

There's no way you're getting that from a boxed cake mix.

And the icing - Light, creamy, smooth and delicious, it tasted just like cookies and cream ice cream. I used my favorite vanilla buttercream recipe and added crushed Oreos - maybe one row of the cookies in the package - don't be shy...I almost wish I had added more to the icing. I'll be dreaming about this in my sleep - oh, that's right- there's no time for sleep! It's May!


Devil’s Food Cake
From Sky High: Irresistible Triple-Layer Cakes by Alisa Huntsman and Peter Wynne
Makes an 8-inch triple layer cake

Note: I cut the cake recipe in half and made two 6-inch round layers and 8 cupcakes. Baking times need to be adjusted for different size pans.

1 cup of unsweetened cocoa, not Dutch process
1 ¼ cups of hot water
3 cups of light brown sugar; packed
2 2/3 cups cake flour
1 ½ teaspoons baking soda
¾ teaspoon of salt
9 ounces of unsalted butter at room temperature [2 sticks plus 2 tablespoons]
3 large eggs
1 ½ teaspoons of vanilla extract
¾ cup of cold water

Preheat the oven to 325 degrees F.

Butter the bottoms and sides of three 8-inch round cake pans. Line the bottoms of the pans with parchment paper and grease the paper as well.

Place the cocoa in a medium bowl and add the hot water. Whisk until smooth and let it cool to room temperature.

In the bowl of an electric mixer, combine the sugar, flour, baking soda, and salt. With the mixer on low blend to combine. Add the butter and the dissolved cocoa. Then raise the mixer to medium speed and beat for 2 minutes until light and fluffy.

In a medium bowl whisk together the eggs, vanilla, and cold water until combined. Add this liquid to the batter in three additions scraping down the sides of the bowl between additions. Divide the batter among the three pans.

Bake for 35-45 minutes or until a cakes tester inserted into the almost comes out clean. There should be a few crumbs attached still. Cool the cakes in the pans for 15 minutes. Then invert and remove parchment paper and cool completely on a wire rack.


Cookies and Cream Buttercream Frosting
adapted from Katherine Seeley/Fine Cooking

Note: I made a single batch of the icing and had some leftover. Not much is worse than not having enough icing. Better to make too much than have too little. The extra icing will keep in the freezer.

Yields 7-1/2 to 8 cups enough to fill and frost a 9-inch four-layer cake or about 5 dozen cupcakes

5 large egg whites
1-1/4 cups granulated sugar
1/2 cup plus 2 Tbs. light corn syrup
1 lb., 4 oz. (2-1/2 cups) unsalted butter, at room temperature
1 Tbs. vanilla extract
about 20 Oreo cookies, crushed with some bigger pieces remaining

Place the egg whites in the clean bowl of a stand mixer fitted with the whisk attachment and whisk on medium-high speed until foamy. Sprinkle in 6 Tbs. of the sugar and beat on high speed to medium peaks (the whites should be smooth, full, and shiny, and the peaks should curl a little). Turn off the mixer.

Combine the remaining 3/4 cup plus 2 Tbs. sugar and the corn syrup in a medium (3-quart) saucepan over medium high heat, stirring briefly to dissolve the sugar. Continue to cook just until the mixture comes to a rolling boil.

Immediately remove the syrup from the heat, turn the mixer onto medium-high speed, and slowly pour the syrup down the side of the bowl in a steady stream, being very careful not to let the syrup hit the whisk.

Reduce the speed to medium and continue whisking until the whites are barely warm, 5 to 7 minutes. Add the butter 1 Tbs. at a time. Add the vanilla and continue beating until the frosting is smooth and creamy. Fold in crushed Oreo cookies.

Saturday, April 24, 2010

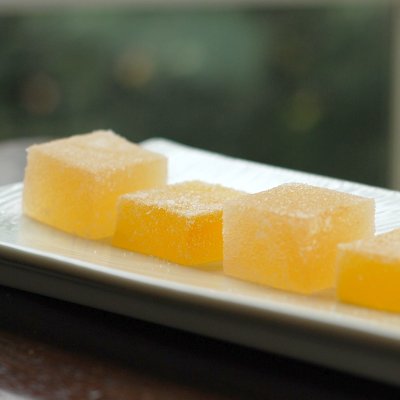
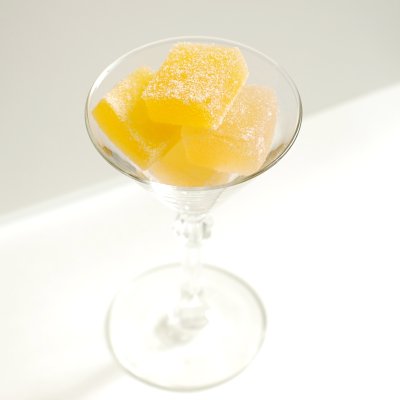
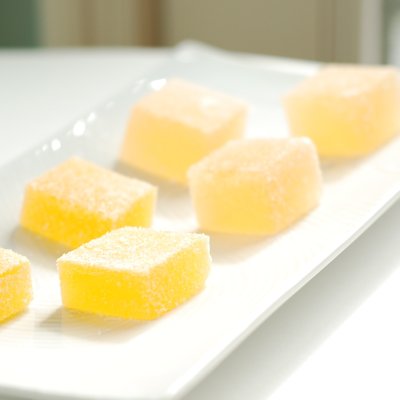
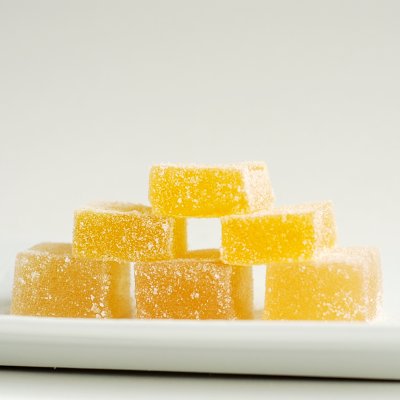
Lemon and Tangerine Pates de Fruit

Pate de fruit


Silly, I know, but I debated over the title of this post. I made lemon pate de fruit and tangerine pate de fruit, so is the plural pates de fruit or pate de fruits? Or maybe it's pate des fruits. I wish I'd paid better attention in French class... either way, these were so fun to make!

Pate de fruit

Let's talk about these delectable little pates de fruit.

First, they are delicious bites of real fruit juice mixed with sugar and pectin. The lemon are the thicker of the two (I used a slightly different sized pan) and I preferred them just a bit over the tangerine flavor.

Pate de fruit

Second, they are fun to eat, fun to play with and beautiful to photograph as you can see from all the different photos here.

Pate de fruit


Third, they can be made with any fruit juice. Add a little citric acid (used in sour candies and can be found in candy-making supply stores) if you want to see your friends pucker their lips!

Sherry Yard in The Secrets of Baking makes one from a Blackberry Merlot sauce which I'd love to try. I'd love to bake my way through that entire book someday but then, instead of SMS for Sweet Melissa Sundays, or TWD for Tuesdays with Dorie, or DB for Daring Bakers, I'd have to name the group SOB for Secrets of Baking and that sounds more to me like cussing than a baking group. But I digress...

This recipe for pate de fruit, however, comes from cookbook author and editor of Dessert Professional magazine, Tish Boyle, and her delicious blog named Sweet Dreams.

Pâte de Fruit
from Tish Boyle, original recipe here
Makes 45 confections

2/3 cup fruit juice, such as fresh tangerine or pomegranate (or lemon)
6 tablespoons apple sauce (smooth, not chunky)
1 3/4 cups granulated sugar, divided
1 3-ounce envelope liquid pectin
2 teaspoons lemon juice

1. Lightly oil a 9-by-5-inch loaf pan. Line the pan with plastic wrap, letting it extend beyond the short ends of the pan, and lighlty oil the wrap.
2. In a medium, heavy saucepan, stir together the juice and apple sauce until well combined. Stir in 1½ cups of the sugar. Open the packet of liquid pectin and stand it up in a glass so it can be added quickly to the mixture when it’s ready. Cook the juice mixture over medium-high heat, stirring constantly, until the mixture registers 238°F on a candy thermometer. Add the pectin and continue to boil for 1 minute. Remove the pan from the heat and stir in the lemon juice. Immediately pour the hot mixture into the prepared pan. Sprinkle the top of the candy with a thin layer of granulated sugar. Let stand until set, about 1½ hours.
3. Using the ends of the plastic wrap as handles, carefully lift the confection out of the pan. Cut the pâte de fruit into 1 inch squares (or any size or shape you like) and roll them in the remaining sugar until they are well coated on all sides. Store the pâte de fruit in an airtight container at room temperature for up to 1 month.

Friday, April 16, 2010

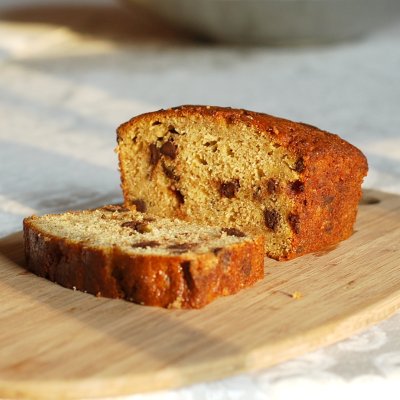
Chocolate Chip Banana Bread

Chocolate Chip Banana Bread

Here's another delicious way to use up those ripe bananas. My kids and I loved this recipe - a moist quick-bread with pure banana flavor with a little chocolate in every bite. Yum.

Chocolate Chip Banana Bread
adapted from Sarah's Cucina Bella
Makes one 9x5-inch Loaf

1/2 cup unsalted butter, softened to room temperature
1 cup packed light brown sugar
2 large eggs
2 tsp vanilla extract
3 ripe bananas, mashed
2 cups all-purpose flour
1 tbsp baking powder
1/2 tsp table salt
1/2 cup semisweet chocolate chips

Preheat the oven to 350 degrees. Spray a 9 inch by 5 inch loaf pan with cooking oil spray. Set aside. ( I always line the bottom of the loaf pan with parchment, and lightly spray the parchment as well.)

Combine the butter and sugar in the bowl of a stand mixer fitted with the paddle attachment. Mix on medium speed until the mixture looks light and fluffy. Add one egg at a time, beating well each time. Add the vanilla and bananas to the mixture and mix well on medium speed.

In a small bowl, sift together the flour, baking powder and salt. With the mixer running on its lowest speed, add the flour mixture to the bowl little by little, until just combined.


Add the chocolate chips to the batter and mix until just combined. Pour the batter into the prepared loaf pan and spread with a spatula to even it out.


Slide the pan into the preheated oven and cook for about 1 hour. The bread is done when a toothpick inserted in the center comes out clean. Let cool before slicing and serving.

Monday, April 12, 2010

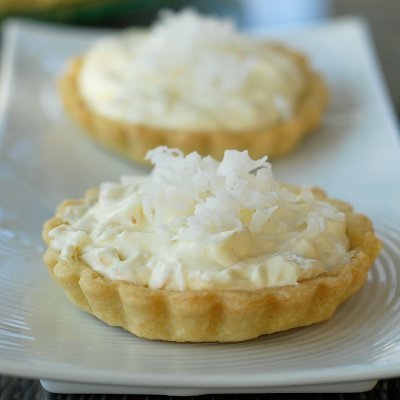
Coconut Cream Tart with Pecan Crust

Coconut Cream Tart

This past Easter is the last one we'll spend in this house, the house we built 10 years ago. What memories were made in this house - basically our kids grew up here. Annie, our youngest, is almost 8.

Usually on Easter, the Easter bunny will leave a note for the kids - a rhyming limerick with clues indicating where the baskets are hidden. My husband always comes up with clever plays on words which I've saved through the years.

Easter 2010

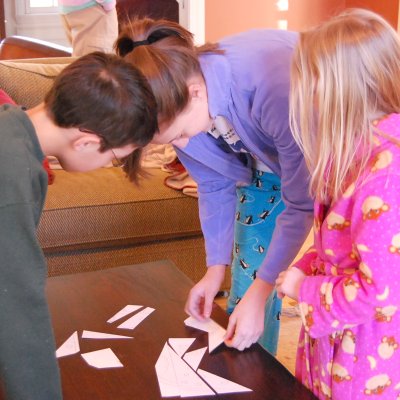
This year, the Easter bunny (you can see his shirt in the background - the traditional Easter rugby pulled out every year just for the occasion) thought of another idea. He commissioned his cartographer to draw a map of our yard with the house on it. The map was made into a puzzle and the pieces were hidden all over the house. The kids were to find the pieces, put the map together, and find out where their baskets were according to where their name was located on the map. I've never seen such teamwork! Not to mention the added bonus of sharpening their map-reading skills!

Easter 2010

It was the warmest Easter in recent memory, so he hid the baskets outside - Annie's by the hammock, Ben's by the basketball hoop, and Ellen's by her favorite flowering dogwood tree in the front of the house.
And voila! more memories are made - oh happiness!

Easter 2010

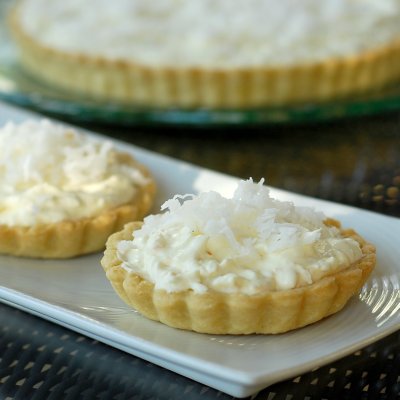
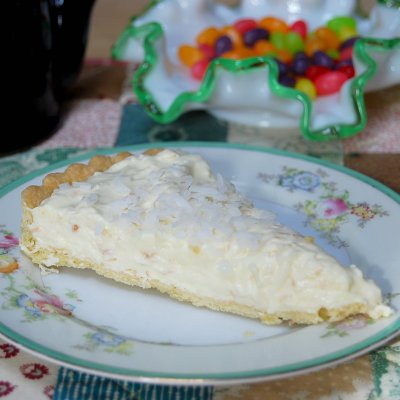
This coconut cream tart was unbelievably good. The filling was light and creamy, perfect for a Spring holiday dessert. The filling is made in two steps. First make a vanilla pastry cream and refrigerate overnight. Next add the chilled pastry cream to some heavy cream and sugar, essentially making a whipped cream filling with a bit more substance to it. Add the toasted coconut and fill the pre-baked tart shell.

Coconut Cream Tart

The original recipe is adapted from the recipe for Coconut Cream Pie with Pecan Crust in the cookbook Luscious Creamy Desserts by Lori Longbotham. I chose to use a plain tart dough only because I had the dough already made in the freezer, but I imagine the pecan crust would be fantastic.

A tart holds less filling than a pie therefore you get a higher crust to filling ratio - the perfect balance in my opinion. Only I had lots of extra filling leftover. I managed to get two tartlet shells out of the leftover dough and filled them, but still had extra filling.  To make a 9-inch tart, you might want to cut the filling recipe in half.

Coconut Cream Tart

Coconut Cream Tart with Pecan Crust
Serves 8 with extra filling left over
Adapted from Luscious Creamy Desserts by Lori Longbotham

For the filling:
1 1/4 cups finely shredded unsweetened coconut
3/4 cup sugar, divided
2 tablespoons cornstarch
2 3/4 cups whipping cream, divided
2 large egg yolks
1/2 teaspoon vanilla extract

Preheat the oven to 350 degrees F. Toast the coconut for 5-7 minutes on a baking sheet, stirring once or twice during that time.

Stir together 1/2 cup sugar and the cornstarch in a small bowl. Whisk 1/2 cup of the cream and and egg yolk in a medium bowl. Whisk in the sugar/cornstarch mixture.

Heat 1 1/4 cups cream in a medium heavy saucepan over medium heat until hot. Slowly pour the cream into the yolk mixture, whisking constantly. Return the mixture to the saucepan, reduce the heat to medium low and cook, whisking constantly for 5-7 minutes, or until thickened. Pour the pastry cream through a coarse strainer set over a bowl. Whisk in the vanilla, and place a piece of plastic wrap directly on the surface of the pastry cream to keep a skin from forming. Let cool to room temperature, then refrigerate the pastry cream for at least 2 hours, or up to one day.

Once the pastry cream is thoroughly chilled, place the pastry cream in a large bowl with remaining 1 cup of heavy cream and 1/4 sugar. Beat with an electric mixer until the mixture forms soft peaks when the beaters are lifted. Fold in the toasted coconut and spoon the mixture into the pie crust. Sprinkle with a small handful of sweetened shredded coconut. Chill the tart for at least 2 hours or up to 6 hours before serving.

For the crust:
Note: I used a basic pate brisee tart crust for this recipe 'cause I had it in the freezer. Use your favorite tart dough recipe or use the one below.  

1 cup pecans
1/2 cup flour
1/4 cup (1/2 stick) unsalted butter, at room temperature
1/4 cup sugar
1/4 teaspoon salt
1 egg yolk

Pulse the pecans and flour in a food processor just until the pecans are finely ground. With an electric mixer, beat the butter, sugar, and the salt until light and fluffy. Add the egg yolk and beat until well combined. Add the pecan mixture and stir with a rubber spatula until combined. Shape the dough into a disk, wrap in wax paper, and refrigerate for at least one hour or up to one day.

Roll out the dough between two sheets of wax paper to a 12-inch circle. remove the top shhet of paper and invert the crust into a 9-inch tart pan. Gently ease the dough into the pan, and remove the remaining wax paper. Trim the excess dough.

Press a piece of aluminum foil snugly into the bottom and up the sides of the pastry shell and fill with uncooked rice or dried beans. Bake for 15 minutes, remove the foil and beans, and bake for another 15 minutes until golden brown. Prick the dough with a fork if you see the dough starting to bubble. Let cool on a wire rack.


Monday, March 29, 2010

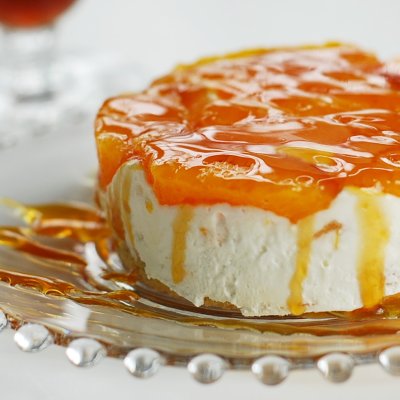
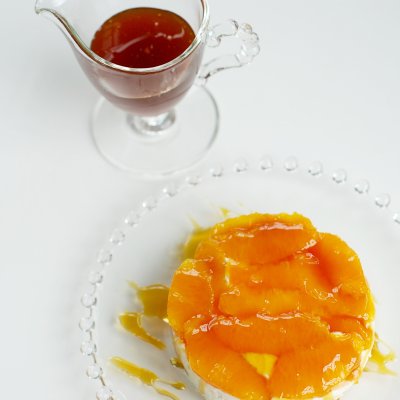
Orange Tian with The Daring Bakers

Orange Tian

{The 2010 March Daring Baker's challenge was hosted by Jennifer of Chocolate Shavings. She chose Orange Tian as the challenge for this month, a dessert based on a recipe from Alain Ducasse's Cooking School in Paris.}

If I were to come across this recipe in a cookbook, I might not have chosen it as one of the first to try. Just the length of the recipe would probably discourage me from trying it! But I'm so glad that Jennifer picked it for all of the Daring Bakers to make this month. This is just one of the reasons I like the Daring Bakers. It takes me beyond the chocolate desserts and the lemony sweets I am drawn to and is expanding my horizons with every challenge.

Orange Tian

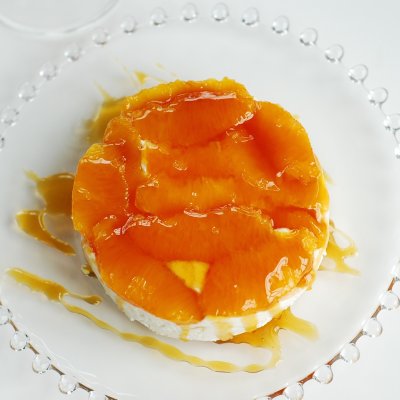
This tian is a molded layered dessert comprised of 5 components (this seems to be a recurring theme as last month's tiramisu had multiple components as well.) None of the components were particularly hard to make, except I did have my typical fear of caramel. This recipe uses the dry method of melting the sugar creating a bit of sugar anxiety for me, but even so, the caramel was successful. The greatest challenge was probably keeping track of all the recipes and directions and organizing the game plan - and for me, finishing the challenge on time!

Here are the components listed in order from bottom layer to top layer, as well as the make-ahead suggestions:

Pate sucree - a sweet pastry dough, much like a cookie - make the dough the day before, refrigerate overnight, roll out and bake the day of serving
Homemade Orange Marmalade - can be prepared several days ahead
Whipped Cream stabilized with Gelatine and flavored with Orange Marmalade - make just before assembling
Caramel-soaked Orange Slices - prepared the day before and refrigerated overnight; I ran out of orange slices on the sixth mold, so I'd make a few more next time
Orange Caramel Sauce - prepared the day before. Half is used to soak the oranges, the other half is reduced to a thick clear caramel sauce.

The result is a light dessert with bright flavors. It was delicious! I used 6 mini (4-inch diameter) springform pans with the bottoms removed to make this dessert, but they were a bit large for a single serving but perfect for two to share. A 3-inch mold would be better for a single serving. If I make this again (perhaps for Easter) I think I'll try using the same components and make tartlets or a larger tart to cut into slices. This tian would also be delicious if you used peaches or raspberries with a corresponding jam in place of the oranges and marmalade. Yum!

Orange Tian

Orange Tian

For the Pate Sablee:

2 medium-sized egg yolks at room temperature

granulated sugar 6 tablespoons + 1 teaspoon; 2.8 oz; 80 grams

vanilla extract ½ teaspoon

Unsalted butter ¼ cup + 3 tablespoons; 3.5 oz; 100 grams ice cold, cubed

Salt 1/3 teaspoon; 2 grams

All-purpose flour 1.5 cup + 2 tablespoons; 7 oz; 200 grams

baking powder 1 teaspoon ; 4 grams


Put the flour, baking powder, ice cold cubed butter and salt in a food processor fitted with a steel blade.
In a separate bowl, add the eggs yolks, vanilla extract and sugar and beat with a whisk until the mixture is pale. Pour the egg mixture in the food processor.
Process until the dough just comes together. If you find that the dough is still a little too crumbly to come together, add a couple drops of water and process again to form a homogenous ball of dough. Form into a disc, cover with plastic wrap and leave to rest in the fridge for 30 minutes.

Preheat your oven to 350 degree Fahrenheit.
Roll out the dough onto a lightly floured surface until you obtain a ¼ inch thick circle.
Using your cookie cutter, cut out circles of dough and place on a parchment (or silicone) lined baking sheet. Bake for 15-20 minutes or until the circles of dough are just golden.

For the Marmalade:

Freshly pressed orange juice ¼ cup + 3 tablespoons; 3.5 oz; 100 grams

1 large orange used to make orange slices

cold water to cook the orange slices

pectin 5 grams

granulated sugar: use the same weight as the weight of orange slices once they are cooked

Finely slice the orange. Place the orange slices in a medium-sized pot filled with cold water. Simmer for about 10 minutes, discard the water, re-fill with cold water and blanch the oranges for another 10 minutes.
Blanch the orange slices 3 times. This process removes the bitterness from the orange peel, so it is essential to use a new batch of cold water every time when you blanch the slices.
Once blanched 3 times, drain the slices and let them cool.

Once they are cool enough to handle, finely mince them (I suggest a food processor).
Weigh the slices and use the same amount of granulated sugar . If you don’t have a scale, you can place the slices in a cup measurer and use the same amount of sugar.
In a pot over medium heat, add the minced orange slices, the sugar you just weighed, the orange juice and the pectin. Cook until the mixture reaches a jam consistency (10-15 minutes). (It will thicken as it cools.)
Transfer to a bowl, cover with plastic wrap and put in the fridge.

For the Orange Segments:
For this step you will need 8 oranges.
Cut the oranges into segments over a shallow bowl. Do not drain the juice off.

For the Caramel:

granulated sugar 1 cup; 7 oz; 200 grams

orange juice 1.5 cups + 2 tablespoons; 14 oz; 400 grams

Place the sugar in a pan on medium heat and begin heating it.
Once the sugar starts to bubble and foam, slowly add the orange juice. As soon as the mixture starts boiling, remove from the heat and pour half of the mixture over the orange segments.
Reserve the other half of the caramel mixture in a small bowl — you will use this later to spoon over the finished dessert. When the dessert is assembled and setting in the freezer, heat the kept caramel sauce in a small saucepan over low heat until it thickens and just coats the back of a spoon (about 10 minutes). (I did this the night before just after dividing the caramel in half.)

[Tip: Be very careful when making the caramel — if you have never made caramel before, I would suggest making this step while you don’t have to worry about anything else. Bubbling sugar is extremely, extremely hot, so make sure you have a bowl of ice cold water in the kitchen in case anyone gets burned!]

For the Whipped Cream:

heavy whipping cream 1 cup; 7 oz; 200 grams

3 tablespoons of hot water

1 tsp Gelatine

1 tablespoon of confectioner's sugar

orange marmalade (see recipe above) 1 tablespoon

In a small bowl, add the gelatine and hot water, stirring well until the gelatine dissolves. Let the gelatine cool to room temperature while you make the whipped cream. Combine the cream in a chilled mixing bowl. Whip the cream using a hand mixer on low speed until the cream starts to thicken for about one minute. Add the confectioner sugar. Increase the speed to medium-high. Whip the cream until the beaters leave visible (but not lasting) trails in the cream, then add the cooled gelatine slowly while beating continuously. Continue whipping until the cream is light and fluffy and forms soft peaks. Transfer the whipped cream to a bowl and fold in the orange marmalade.
[Tip: Use an ice cold bowl to make the whipped cream in. You can do this by putting your mixing bowl, cream and beater in the fridge for 20 minutes prior to whipping the cream.]

Assembling the Dessert:
Make sure you have some room in your freezer. Ideally, you should be able to fit a small baking sheet or tray of desserts to set in the freezer.
Line a small tray or baking sheet with parchment paper or a silicone sheet. Lay out 6 cookie cutters onto the parchment paper/silicone.
Drain the orange segments on a kitchen towel.
Have the marmalade, whipped cream and baked circles of dough ready to use.
Arrange the orange segments at the bottom of each cookie cutter. Make sure the segments all touch either and that there are no gaps. Make sure they fit snuggly and look pretty as they will end up being the top of the dessert. Arrange them as you would sliced apples when making an apple tart.
Once you have neatly arranged one layer of orange segments at the bottom of each cookie cutter, add a couple spoonfuls of whipped cream and gently spread it so that it fills the cookie cutter in an even layer. Leave about 1/4 inch at the top so there is room for dough circle.
Using a butter knife or small spoon, spread a small even layer of orange marmalade on each circle of dough.
Carefully place a circle of dough over each ring (the side of dough covered in marmalade should be the side touching the whipping cream). Gently press on the circle of dough to make sure the dessert is compact.
Place the desserts to set in the freezer to set for 10 minutes. ( I suggest 20 to 30 minutes.)
Using a small knife, gently go around the edges of the cookie cutter to make sure the dessert will be easy to unmold. Gently place your serving plate on top of a dessert (on top of the circle of dough) and turn the plate over. Gently remove the cookie cutter, add a spoonful of caramel sauce and serve immediately.

Friday, March 19, 2010

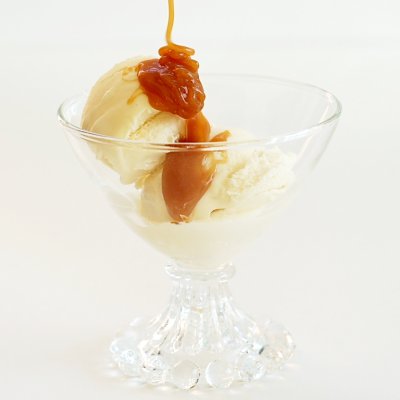
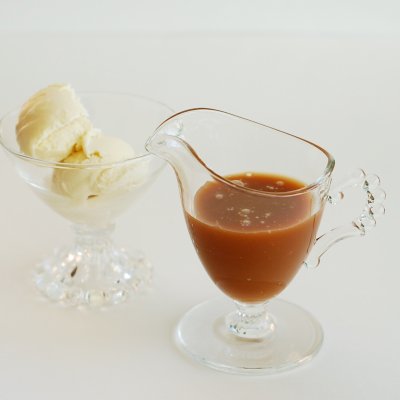
Homemade Caramel Sauce

Caramel Sauce

The first (and second and third) time I tried to make homemade caramel sauce, it didn't turn out quite right. And so I've had this fear of melting sugar...I mean, how much simpler can you get? It's just sugar and water and heavy cream and I think the water is optional, and you don't even need a candy thermometer. Yet, it's a bit tricky. Stir too much and the caramel crystallizes. Gritty caramel? No, thanks. Cook too little and it's sweet and tasteless, like eating raw sugar. Cook too much and it'll taste burned, almost bitter.

Caramel Sauce

But getting it just right...well it's perfection...especially atop some vanilla ice cream or combined with hazelnuts and drizzled over Emily Luchetti's Chocolate Truffle and Vanilla Pastry Cream Tart. So if at first you don't succeed...try, try again.

Caramel Sauce
adapted from Classic Stars Desserts by Emily Luchetti

1 1/2 cups granulated sugar
1/2 cup water
1 cup heavy whipping cream

In a heavy nonreactive saucepan, stir together the sugar and water. Place over medium heat and cook, stirring occasionally, until the sugar dissolves and the mixture comes to a boil.

(Tip: While the sugar is boiling, keep handy a bowl of water and a clean pastry brush. As you see crystals forming up the sides of the pan, dip the brush in water and brush down the sides of the pan to dissolve the crystals.)

Increase the heat to high and cook, without stirring, until the mixture becomes a golden amber color. You can gently swirl the pan occasionally to prevent hot spots that could burn, but don't stir or you'll get that gritty caramel sauce I was talking about.

(Tip: as the sugar is cooking and changing color, place a few drops on a clean, white plate to see the color more accurately. The sugar mixture will look darker in a stainless pan and you may end up under-cooking the caramel. Stop cooking when the drop of caramel on the white plate is a nice medium amber color.)

Remove from the heat and let the bubbles subside for a few seconds. Stir in the cream, very slowly and carefully. The caramel will bubble up when you add the cream so take extra caution as boiling sugar is very hot and could burn you. Serve the sauce warm or refrigerate for later use.

Saturday, March 6, 2010

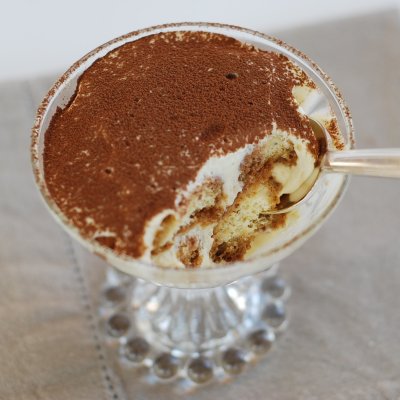
Tiramisu

Tiramisu

This is my very first Daring Bakers Challenge. All the components were made from scratch - the ladyfingers, the zabaglione, the vanilla pastry cream, the whipped cream, and the mascarpone cheese. Here's my take on each component...

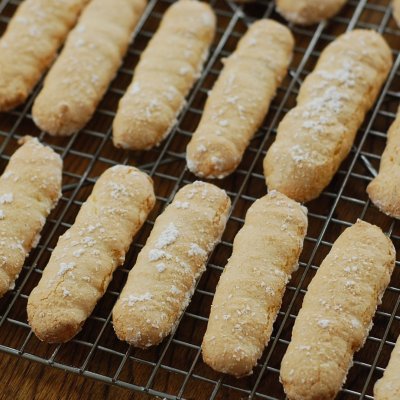
The ladyfingers...easy and delicious...perfect for tiramisu...didn't get quite enough of them for three layers in an 8x8 pan.

Savoiardi Biscuits

The zabaglione...not at all difficult, I think I would try adding coffee instead of the Marsala next time.
The vanilla pastry cream...very good.
The whipped cream... delicious.
The mascarpone...caused me the most worry...couldn't find cream that wasn't ultra-pasteurized but it seemed to work...firmed up nicely in the fridge, but when I stirred it again to make it smooth, it became almost liquid again...did this happen to anyone else? The resulting mixture was fine in the end...still, I worried it would be runny.  I think I'll just buy it next time.

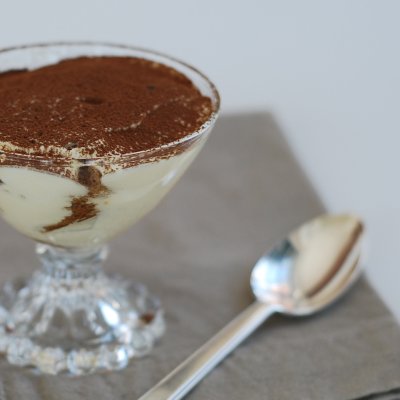
Tiramisu

The final result...so delicious. I just wish I'd counted the number of dishes and utensils this project required me to wash...let's just say it was ALOT! There's got to be an easier way, but I can't deny this dessert is fantastic! And I learned quite a bit just making this - and that's the whole reason I joined the Daring Bakers! I'm looking forward to the next challenge!

{The February 2010 Daring Bakers’ challenge was hosted by Aparna of My Diverse Kitchen and Deeba of Passionate About Baking. They chose Tiramisu as the challenge for the month. Their challenge recipe is based on recipes from The Washington Post, Cordon Bleu at Home and Baking Obsession.}

TIRAMISU

(Recipe source: Carminantonio's Tiramisu from The Washington Post, July 11 2007 )
This recipe makes 6 servings (at least)

Ingredients:
For the zabaglione:
2 large egg yolks
3 tablespoons sugar/50gms
1/4 cup/60ml Marsala wine (or port or coffee)
1/4 teaspoon/ 1.25ml vanilla extract
1/2 teaspoon finely grated lemon zest

For the vanilla pastry cream:
1/4 cup/55gms sugar
1 tablespoon/8gms all purpose flour
1/2 teaspoon finely grated lemon zest
1/2 teaspoon/ 2.5ml vanilla extract
1 large egg yolk
3/4 cup/175ml whole milk

For the whipped cream:
1 cup/235ml chilled heavy cream (we used 25%)
1/4 cup/55gms sugar
1/2 teaspoon/ 2.5ml vanilla extract

To assemble the tiramisu:
2 cups/470ml brewed espresso, warmed
1 teaspoon/5ml rum extract (optional)
1/2 cup/110gms sugar
1/3 cup/75gms mascarpone cheese
36 savoiardi/ ladyfinger biscuits (you may use less)
2 tablespoons/30gms unsweetened cocoa powder

Method:
For the zabaglione:
Heat water in a double boiler. If you don’t have a double boiler, place a pot with about an inch of water in it on the stove. Place a heat-proof bowl in the pot making sure the bottom does not touch the water.
In a large mixing bowl (or stainless steel mixing bowl), mix together the egg yolks, sugar, the Marsala (or espresso/ coffee), vanilla extract and lemon zest. Whisk together until the yolks are fully blended and the mixture looks smooth.
Transfer the mixture to the top of a double boiler or place your bowl over the pan/ pot with simmering water. Cook the egg mixture over low heat, stirring constantly, for about 8 minutes or until it resembles thick custard. It may bubble a bit as it reaches that consistency.
Let cool to room temperature and transfer the zabaglione to a bowl. Cover and refrigerate at least 4 hours or overnight, until thoroughly chilled.

For the pastry cream:
Mix together the sugar, flour, lemon zest and vanilla extract in a medium heavy-bottomed saucepan. To this add the egg yolk and half the milk. Whisk until smooth.
Now place the saucepan over low heat and cook, stirring constantly to prevent the mixture from curdling.
Add the remaining milk a little at a time, still stirring constantly. After about 12 minutes the mixture will be thick, free of lumps and beginning to bubble. (If you have a few lumps, don’t worry. You can push the cream through a fine-mesh strainer.)
Transfer the pastry cream to a bowl and cool to room temperature. Cover with plastic film and refrigerate at least 4 hours or overnight, until thoroughly chilled.

For the whipped cream:
Combine the cream, sugar and vanilla extract in a mixing bowl. Beat with an electric hand mixer or immersion blender until the mixture holds stiff peaks. Set aside.

To assemble the tiramisu:
Have ready a rectangular serving dish (about 8" by 8" should do) or one of your choice.
Mix together the warm espresso, rum extract and sugar in a shallow dish, whisking to mix well. Set aside to cool.
In a large bowl, beat the mascarpone cheese with a spoon to break down the lumps and make it smooth. This will make it easier to fold. Add the prepared and chilled zabaglione and pastry cream, blending until just combined. Gently fold in the whipped cream. Set this cream mixture aside.

Now to start assembling the tiramisu:
Working quickly, dip 12 of the ladyfingers in the sweetened espresso, about 1 second per side. They should be moist but not soggy. Immediately transfer each ladyfinger to the platter, placing them side by side in a single row. You may break a lady finger into two, if necessary, to ensure the base of your dish is completely covered.
Spoon one-third of the cream mixture on top of the ladyfingers, then use a rubber spatula or spreading knife to cover the top evenly, all the way to the edges.
Repeat to create 2 more layers, using 12 ladyfingers and the cream mixture for each layer. Clean any spilled cream mixture; cover carefully with plastic wrap and refrigerate the tiramisu overnight.
To serve, carefully remove the plastic wrap and sprinkle the tiramisu with cocoa powder using a fine-mesh strainer or decorate as you please. Cut into individual portions and serve.

MASCARPONE CHEESE

(Source: Vera’s Recipe for Homemade Mascarpone Cheese)
This recipe makes 12oz/ 340gm of mascarpone cheese

Ingredients:
474ml (approx. 500ml)/ 2 cups whipping (36 %) pasteurized (not ultra-pasteurized), preferably organic cream (between 25% to 36% cream will do)
1 tablespoon fresh lemon juice

Method:
Bring 1 inch of water to a boil in a wide skillet. Reduce the heat to medium-low so the water is barely simmering. Pour the cream into a medium heat-resistant bowl, then place the bowl into the skillet. Heat the cream, stirring often, to 190 F. If you do not have a thermometer, wait until small bubbles keep trying to push up to the surface.
It will take about 15 minutes of delicate heating. Add the lemon juice and continue heating the mixture, stirring gently, until the cream curdles. Do not expect the same action as you see during ricotta cheese making. All that the whipping cream will do is become thicker, like a well-done crème anglaise. It will cover a back of your wooden spoon thickly. You will see just a few clear whey streaks when you stir. Remove the bowl from the water and let cool for about 20 minutes. Meanwhile, line a sieve with four layers of dampened cheesecloth and set it over a bowl. Transfer the mixture into the lined sieve. Do not squeeze the cheese in the cheesecloth or press on its surface (be patient, it will firm up after refrigeration time). Once cooled completely, cover with plastic wrap and refrigerate (in the sieve) overnight or up to 24 hours.
Vera’s notes: The first time I made mascarpone I had all doubts if it’d been cooked enough, because of its custard-like texture. Have no fear, it will firm up beautifully in the fridge, and will yet remain lusciously creamy.
Keep refrigerated and use within 3 to 4 days.

LADYFINGERS/ SAVOIARDI BISCUITS
(Source: Recipe from Cordon Bleu At Home)
This recipe makes approximately 24 big ladyfingers or 45 small (2 1/2" to 3" long) ladyfingers.

Ingredients:
3 eggs, separated
6 tablespoons /75gms granulated sugar
3/4 cup/95gms cake flour, sifted (or 3/4 cup all purpose flour + 2 tbsp corn starch)
6 tablespoons /50gms confectioner's sugar,

Method:

Preheat your oven to 350 F (175 C) degrees, then lightly brush 2 baking sheets with oil or softened butter and line with parchment paper.
Beat the egg whites using a hand held electric mixer until stiff peaks form. Gradually add granulate sugar and continue beating until the egg whites become stiff again, glossy and smooth.
In a small bowl, beat the egg yolks lightly with a fork and fold them into the meringue, using a wooden spoon. Sift the flour over this mixture and fold gently until just mixed. It is important to fold very gently and not overdo the folding. Otherwise the batter would deflate and lose volume resulting in ladyfingers which are flat and not spongy.
Fit a pastry bag with a plain tip (or just snip the end off; you could also use a Ziploc bag) and fill with the batter. Pipe the batter into 5" long and 3/4" wide strips leaving about 1" space in between the strips.
Sprinkle half the confectioner's sugar over the ladyfingers and wait for 5 minutes. The sugar will pearl or look wet and glisten. Now sprinkle the remaining sugar. This helps to give the ladyfingers their characteristic crispness.
Hold the parchment paper in place with your thumb and lift one side of the baking sheet and gently tap it on the work surface to remove excess sprinkled sugar.
Bake the ladyfingers for 10 minutes, then rotate the sheets and bake for another 5 minutes or so until the puff up, turn lightly golden brown and are still soft.
Allow them to cool slightly on the sheets for about 5 minutes and then remove the ladyfingers from the baking sheet with a metal spatula while still hot, and cool on a rack.
Store them in an airtight container till required. They should keep for 2 to 3 weeks.

LinkWithin

Related Posts Widget for Blogs by LinkWithin