Thursday, November 25, 2010

Happy Thanksgiving!

Thanksgiving Cookies

Happy Thanksgiving!

A little Thanksgiving Trivia for you to ponder as you sit down to eat your Thanksgiving dinner...

Sarah Josepha Hale, born in New Hampshire in 1788, was a teacher, a writer, and a supporter of women's rights. She was also a single mother of five children after her husband died during the pregnancy of their fifth child. She spent 40 years writing to congressmen, lobbying five presidents, and writing numerous editorials in her campaign to create an national official day of thanks. Before then, it was only celebrated in New England states. President Lincoln was the first president to declare Thanksgiving a national holiday in 1863 as a result of Sarah's efforts. Thank you Sarah Hale!


Tuesday, November 16, 2010

Melomakarona - Walnut Stuffed Honey Cookies

Melomakarona

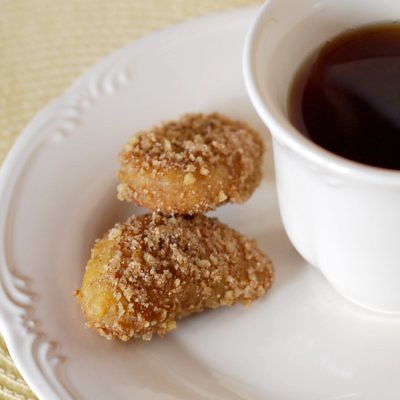
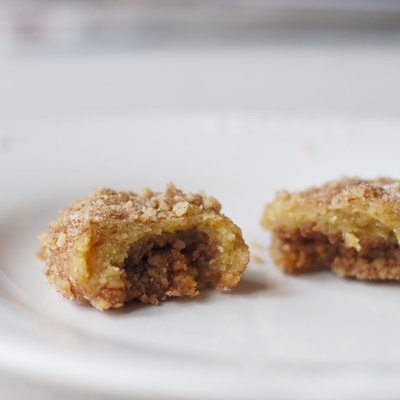
Melomakarona is a Greek walnut-filled spiced cookie soaked in honey. They are flavored with cinnamon, cloves, and orange zest. According to Aglaia Kremezi in her cookbook The Foods of the Greek Islands, Melomakarona are a popular cookie made year-round all over Greece and especially at Christmas.

Melomakarona
Melomakarona

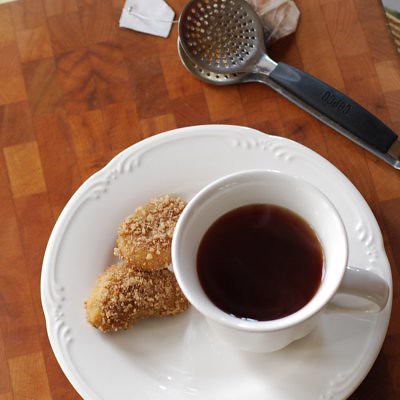
They're odd-looking cookies, but one bite and you get over it. They are really good! They are even better alongside a cup of tea. The only thing that might improve afternoon tea and a Melomakarona cookie is actually being on one of the Greek Islands while having tea and cookies! Maybe someday...

Melomakarona

Melomakarona (Mel-o-MAK-re-na)
(Walnut Stuffed Honey Cookies)
adapted slightly from The Foods of the Greek Islands by Aglaia Kremezi

1 1/4 cups light olive oil or a combination of olive oil, canola oil, and/or safflower oil
1/3 cup sugar
grated zest of one orange
1 cup freshly squeezed orange juice
3-4 cups all-purpose flour
1 1/2 teaspoons baking powder
1 1/2 cups fine semolina flour
1/2 cup brandy
grated zest of one lemon
1 teaspoon ground cloves
1 teaspoon ground cinnamon

Filling:
2 cups finely chopped walnuts
1 tablespoon ground cinnamon
1 tablespoon sugar

Syrup:
1 cup sugar
1 cup honey
1 1/2 cups water


In a large bowl, beat the oil and sugar with an electric mixer until blended. Beat in the orange zest and juice. In a medium bowl, combine 2 cups of the flour and the baking powder. Gradually beat the flour mixture into the oil mixture. Beat in the semolina, brandy, lemon zest, cloves and cinnamon. Turn the dough out onto a lightly floured surface and knead, adding 1 cup or more flour as necessary to obtain a smooth, soft, oily dough. Cover with plastic wrap and let stand for 20 to 30 minutes.

Preheat the oven to 350°F. Make the filling by combining the walnuts, cinnamon and sugar in a medium bowl.

Take pieces of dough the size of a small egg and roll with your hands into ovals, about 2 1/2 inches long. Push three fingers into the bottom of each cookie to make an opening, and stuff with 1 teaspoon of the filling. Press the dough to close the opening. Slightly flatten each cookie and if you like, make an indentation on the top with the tines of a fork. Place the cookies on ungreased baking sheets about 1 inch apart. Set aside any remaining filling.

Bake for about 30 minutes, or until they just start to color. Allow the cookies to cool slightly.

Meanwhile, make the syrup: In a medium saucepan, simmer the sugar, honey and water for 10 minutes. Remove from the heat.

Place the cookies in a large dish or baking pan that holds them snugly, and pour the hot syrup over them. Let stand for 15 minutes. Turn the cookies to moisten the other sides and let stand until the cookies have absorbed all the syrup. Place the remaining filling on a plate and roll each cookie in it to coat on all sides. Place the cookies in an airtight container, with parchment or waxed paper between each layer. Let stand for at least 1 day before serving. Store for up to 1 month.

Thursday, November 11, 2010

Chocolate Caramel Mini Tartlets with Sea Salt

Chocolate Caramel Tartlets

Sweet and salty is all the rage right now and these bite-sized Chocolate Caramel Tartlets with Sea Salt are an impressive addition to your chocolate sampler tray next to your Chocolate Raspberry Truffles and Chocolate-Dipped Coconut Macaroons.

If you've tried your hand at ganache, caramel, and pastry then these will be a snap to make. If you haven't mastered these yet, then these tartlets are a good reason to try these techniques again. Use a 9" tart pan if you're not into making dozens of tiny tart shells.

I've had these little mini tartlet molds ever since I took a cooking class in a little local kitchen shop about 15 years ago. I'm embarassed to say that this is the first time I've used them. But then again, I got a little busy in those 15 years...(my kids are 14, 11, and 8!)

The tartlet shells are a sweet pate sucree dough. I pricked to bottoms with a fork to eliminate the possibility of air pockets. No need for pie weights with a shell this small but if you are making a larger tart, bake the shell for half the total baking time lined with parchment and pie weights, then remove the paper and weights and continue baking until golden brown.

I thought the tart shells looked just like sunflowers...

Chocolate Caramel Tartlets

Spoon in the caramel filling...

Chocolate Caramel Tartlets

And then top with chocolate ganache and a sprinkling of gourmet sea salt. I picked up this pink Himalayan Sea Salt at Marshall's. If you look closely, you can see a hint of pink.

Chocolate Caramel Tartlets

Place your chocolate goodies on a pretty platter. Now who could resist these?

Chocolate Caramel Tart with Sea Salt
Makes one 9-inch tart or about 24 mini tartlets
Note: to make the mini tart shells, I cut circles out of the rolled-out dough and worked the dough into the tartlet molds. Prick the bottoms with a fork and bake until golden, about 8-10 minutes.


1 9-inch pre-baked pate sucree tart shell or 24 mini tart shells

for the chocolate ganache:
8 ounces bittersweet chocolate, finely chopped
1 cup heavy cream

Sea Salt for garnish


Place the chocolate into a medium heat-proof bowl. Heat the heavy cream in a small saucepan until just boiling. Pour the heavy cream over the chocolate and let it sit for one minute. Stir with a rubber spatula or whisk in a small, quick circular motion, starting in the center of the bowl and working your way out until the ganache is shiny and all the chocolate has melted.

Assemble the tart:
Pour enough caramel into the tart shell to come up about 1/3 of the way up the sides of the tart shell. Refrigerate the tart for 30 minutes to harden the caramel. Pour the chocolate ganache over the caramel to fill about 2/3 of the tart shell. Sprinkle with sea salt and allow to set for 30 minutes in the refrigerator or 2 hours at room temperature.


Wednesday, November 10, 2010

Chocolate Dipped Coconut Macaroons

Coconut Macaroons

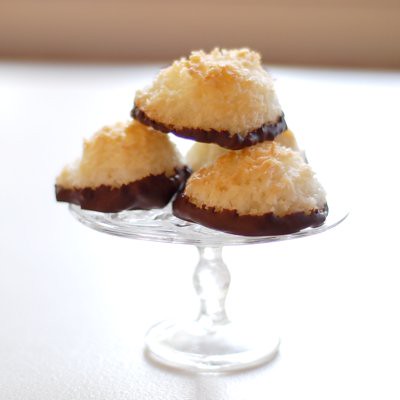
It's chocolate week here at Marzipan and I'm highlighting the best of the chocolate goodies I made for a friend's Wine, Cheese, and Chocolate Party. When choosing the menu, I wanted a variety of chocolatey things - some intensely chocolate, like Chocolate Raspberry Truffles, and some with just a bit of chocolate, like these coconut macaroons. Coconut is the star in these delicious cookies and the chocolate just dresses them up a bit. They'll give your chocolate tray a little texture and contrast.

When I made these, a bit of the egg mixture came out around the bottom of the cookies while baking. This has happened to me before with other macaroon recipes - it might be the type of coconut I use. If this happens to you, just cut around the bottom of the cookie (I used a round cookie cutter just the right size) after the cookie has cooled.

Coconut Macaroons
from Luscious Coconut Desserts by Lori Longbotham via Tish Boyle


1 ½ cups granulated sugar
5 large egg whites
¾ teaspoon pure vanilla extract
¼ teaspoon salt
4 cups shredded unsweetened dried coconut
6 ounces bittersweet chocolate, chopped, plus one 2-inch chunk of shiny, well-tempered chocolate

Make the cookies:
1. Preheat the oven to 350°F. Line two large baking sheets with silicone baking mats or parchment paper.
2. Whisk together the sugar, egg whites, vanilla, and salt in a large bowl until well combined. Add the coconut and stir until well combined. Drop the batter by packed level tablespoons onto the baking sheets using a medium cookie scoop, leaving an inch between cookies.
3. Bake the cookies for 20 to 25 minutes, or until an even golden brown and dry looking. Let cool completely on the baking sheets on wire racks.
4. To temper the chocolate and dip the macaroons: Melt the chopped chocolate in a bowl set over barely simmering water and stirring frequently (do not let the chocolate go above 120°F.) Add the chunk of well-tempered chocolate. Place the bowl in a cool place and let cool, stirring frequently, to 84°F. Return the bowl to its position over the hot water and stir until it thins slightly and reaches 90°F (but not higher—watch the chocolate carefully at this point).
5. Dip the bottoms of the cooled macaroons into the tempered chocolate, shake off the excess, and place the macaroons chocolate-side down on parchment-lined sheets. Let stand until chocolate sets.

Tuesday, November 9, 2010

Chocolate Raspberry Truffles

Raspberry Truffles

When is the last time you threw a real party? For us it's been quite a while. Of course we've had friends over for summer campfires and we've had family at the house for small birthday parties. A small party doesn't need to be fussy - some wine, a simple, delicious dinner and dessert doesn't require that much planning or energy.

But I can't remember the last time we had a "50 of your closest friends, neighbors, and co-workers party". We've been busy moving and doing new house stuff and old house stuff and kids' school stuff... oh, and working. We're just too exhausted to do anything else.

But one of our new neighbors threw a party like that last weekend. It was a "wine, cheese, and chocolate" party. She hired a caterer for the savory stuff, bought the wine, made adorable fall themed wine glass charms and made up the cheese plates herself, and asked me to help with the chocolate portion. So I hope you don't mind if the next few posts revolve around bite-sized chocolate goodies. (I didn't think so!)

So, first up....Raspberry Truffles! My first attempt at tempering chocolate and my thermometer goes on the blitz...actually two of my thermometers went on the blitz during my chocolate week, but all turned out ok in the end.

Raspberry Truffles

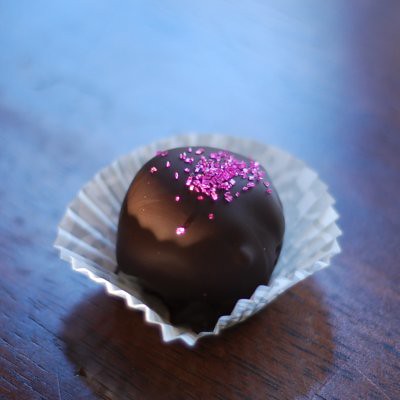
These truffles are flavored with strained raspberry jam and chambord. Of all the chocolate goodies I made for the party, these were the most time consuming, but well worth it!

Chocolate Raspberry Truffles

7 ounces dark chocolate, chopped (I used Callebeaut semi-sweet)
1/2 cup heavy cream
1 1/2 tablespoons strained raspberry jam
1 tablespoon Chambord or other raspberry-flavored liqueur
1/2 tsp pure vanilla extract

Tempered chocolate for dipping
Pink sugar crystals for garnish
Mini cupcake liners (these are made by Reynolds and can be found in the supermarket)

Bring the heavy cream just to a boil and pour it over the chopped chocolate in a bowl. Whisk until shiny and chocolate has melted completely. Stir in the jam, Chambord, and vanilla. Cover the bowl and chill at least 45 minutes. With a small ice cream scoop, make rounds of chocolate and place them on a baking sheet. Chill for another 45 minutes or freeze until ready to dip. Dip in tempered chocolate and sprinkle on the sugar crystals before the chocolate sets. After the chocolate has set, then transfer the truffles to mini cupcake liners. Store in the refrigerator.

Saturday, October 30, 2010

Happy Haunted Birthday!

Happy Haunted Birthday Cake

Now if that didn't scare you, maybe this will....


Halloween 2009

Happy Halloween!


Wednesday, October 27, 2010

How to Make Homemade Hostess Cupcakes

Making Hostess Cupcakes

These cupcakes are so incredible! (Read: these are nothing like the store bought ones.) And I'm going to teach you my method for making them. I love to share my recipes and I don't believe in keeping recipes secret - until it came to this recipe, that is. I'm not sure why, but this recipe is so perfect and so special that I didn't want to share. But I'm over it, so consider this your lucky day!

{I don't generally have the patience to take step-by-step photos, but I thought I'd try it here because frankly, I don't know how I'd explain the process using only words. Some of the photos are a little blurry, but hopefully you'll get the idea. I have whole new respect for you bloggers who take a picture of every step of a recipe!}

Making Hostess Cupcakes

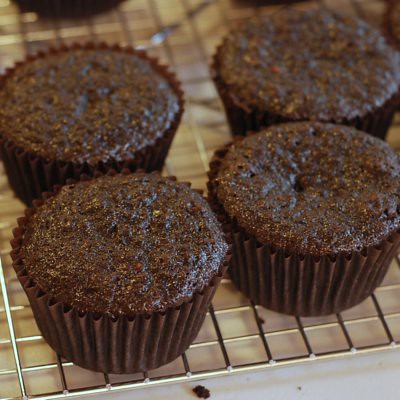
First, make the retro vanilla filling and the chocolate glaze (recipes follow). These can be made a day ahead. Then bake your cupcakes. The recipe below makes about 45 cupcakes. You want a nice flat cupcake, not a domed one. The secret is not to fill the liners too full - 1/2 to 2/3 full at the most. It's always tempting to fill the liners a bit more, but please try to resist!
Making Hostess Cupcakes

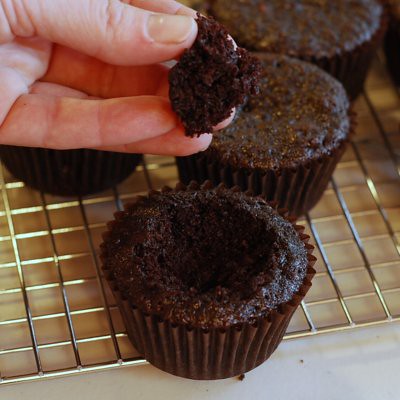
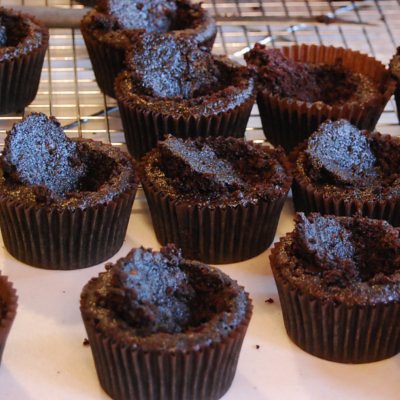
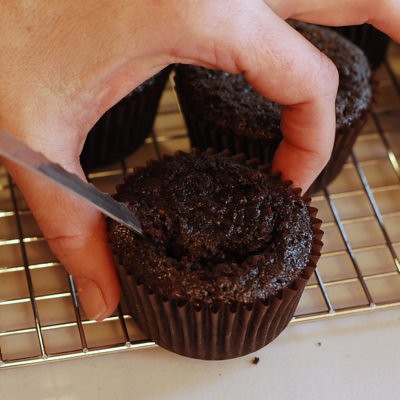
After the cupcakes are completely cool, take a thin knife - this $5 Rada tomato knife is perfect - and cut at an angle, with the point of the knife near the bottom center of the cupcake, all the way around until you've cut an upside-down cone shape out of the cupcake. 

Making Hostess Cupcakes

See how it comes to a point at the bottom?

Making Hostess Cupcakes

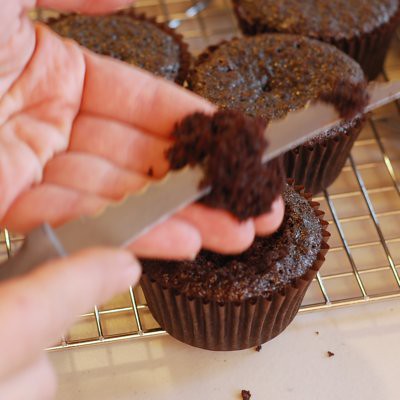
Holding the cone with the pointed end up, slice off the pointed end with your knife. You'll end up with just the top layer of the cupcake plug. Discard the cutaway scraps. Rest the "lid" on top of your cupcake and cut the remaining cupcakes in the same manner.

Making Hostess Cupcakes

Here are the cupcakes all ready to be filled.

Making Hostess Cupcakes

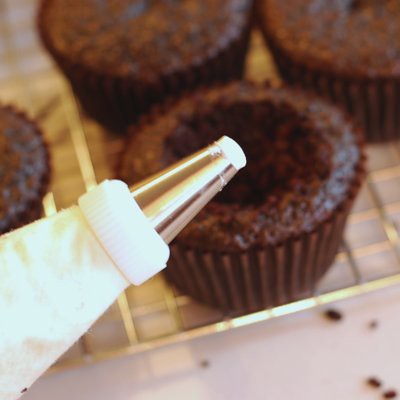
Fit a piping bag with a coupler and a medium-sized round tip and fill the bag with your vanilla retro filling.

Making Hostess Cupcakes

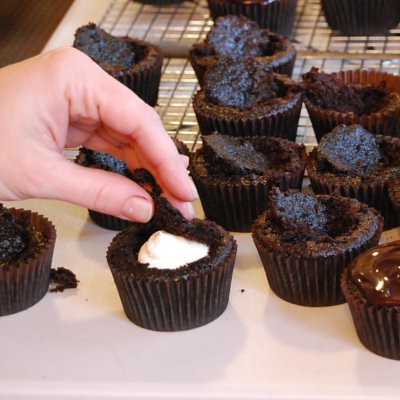
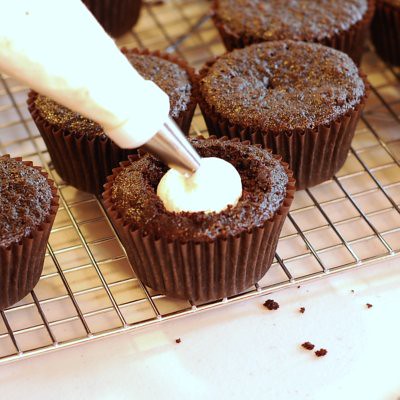
Fill the hole with filling ...

Making Hostess Cupcakes

...and replace the top of the cupcake. Press down lightly on the top.
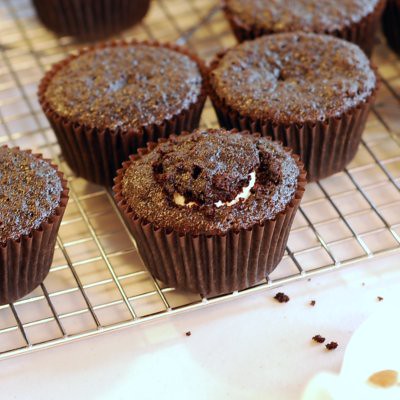
Making Hostess Cupcakes

Your cupcake will now look like this.

Making Hostess Cupcakes

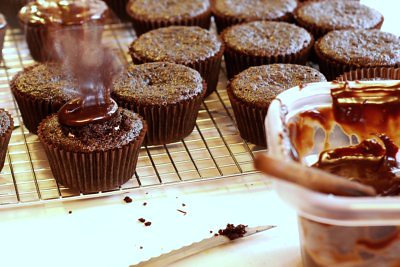
Dollop a spoonful of chocolate glaze on the top of the cupcake and spread it out with a small spatula or butter knife. Let this set for a few minutes before decorating.
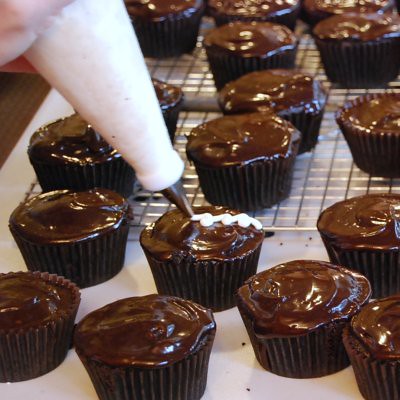
Making Hostess Cupcakes

Swap the tip of your piping bag filled with retro filling to a small round tip - around size 3 or so. Using a coupler on the piping bag makes it easy to change tips. Then pipe the characteristic squiggly on top,

Hostess Cupcakes with Chocolate Espresso Glaze

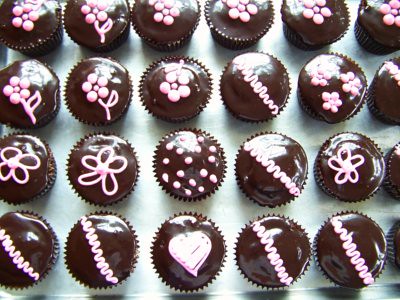
or pipe whatever you like - an initial, stripes, dots, whatever tickles your fancy.

Sloat Cupcakes

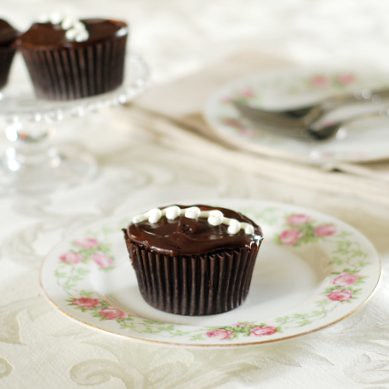
I'm pretty sure I could open a shop that sold only these cupcakes and it would be a roaring success...

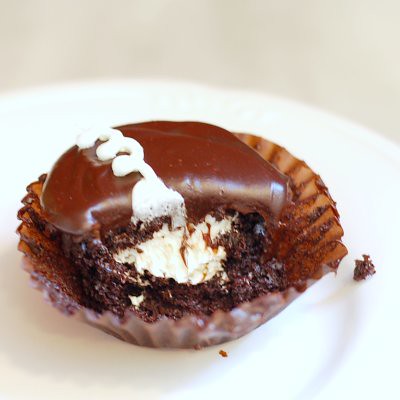
Eating Hostess Cupcakes

But for now I'll settle for just eating them. Oh, and grab a fork - they're oooey, gooey, and delicious - the perfect meld of vanilla and chocolate with a hint of espresso!

Chocolate Cake
from Sky High by Alisa Huntsman and Peter Wynne
Makes a 9-inch triple layer cake, Serves 16-20

2 1/4 cups all purpose flour
1 cup unsweetened cocoa powder
2 1/4 teaspoons baking soda
1 1/4 teaspoons baking powder
1 teaspoon salt
2 1/2 ounces unsweetened chocolate, coarsely chopped
1 cup milk
1 1/4 cups hot, strongly brewed coffee
2 eggs
1 cup real mayonnaise
1 1/2 teaspoons vanilla extract
2 1/4 cups sugar

1. Preheat the oven to 350 degrees F. Butter three 9-inch round cake pans, line the bottoms with parchment and spray the parchment with cooking spray.
2. Brew the strong coffee. While the coffee is brewing, sift together the flour, cocoa, baking soda and powder, salt, and cinnamon and set aside.
3. Put the chocolate in a large heatproof bowl. Bring the milk to a simmer. Pour the hot coffee and milk over the chocolate and let stand for a minute. Then whisk the mixture until smooth and set aside to cool slightly.
4. In a mixer bowl, beat together the eggs, mayonnaise, and vanilla until well blended. Gradually beat in the sugar. Add the dry ingredients and mocha liquid alternately in 2 or 3 additions, beating until smooth and well blended. Divide the batter among the 3 cake pans.
5. Bake for 25-28 minutes, or until a cake tester inserted in the center comes out almost clean. (I also lightly press a finger on top of the cake and if it springs back, it's done.) Let the cakes cool in their pans on wire racks for 10-15 minutes. Unmold onto racks; carefully peel off the parchment and let cool completely, at least one hour.
6. To assemble the cake, place one layer on a cake stand. Cover the top evenly with half the White Chocolate Mousse, leaving a 1/4 -inch margin around the edge. Repeat with the second layer and the remaining mousse. Set the third layer on top and pour half the Sour Cream Chocolate Icing over the filled cake. Spread all over the sides and top. Don't worry if some of the cake shows through. Refrigerate, uncovered, for at least 30 minutes to allow the icing to set. Cover the rest of the icing and set aside at room temperature.
7. Frost the top and sides of the cake with the remaining icing, which should have the consistency of mayonnaise. If the icing is too soft, chill briefly. If it is too stiff, microwave on high for just 2-3 seconds to soften, then stir to mix well. Use an offset spatula to swirl the frosting around the cake.


Retro Vanilla Filling

1/4 pound or one stick of unsalted butter, at room temperature
1/2 cup or 2oz powdered sugar
1/8 teaspoon salt
1/4 teaspoon vanilla extract
8 oz marshmallow creme (marshmallow fluff)

In the bowl of an electric mixer, beat the butter and sugar until light and fluffy. Add the vanilla and salt and blend well. Add the marshmallow cream and beat only until combined. Store at room temperature.

Chocolate Glaze

8 ounces or 1 cup sugar
3 ounces espresso
1/2 pound bittersweet chocolate, chopped
2 ounces unsweetened chocolate, chopped
1/4 cup or 1 ounce unsweetened cocoa
1/2 teaspoon salt
1/2 cup light corn syrup
1 cup or 2 sticks butter

In a medium saucepan, bring the sugar and espresso to a boil. Whisk in the chocolates, cocoa powder, and salt until smooth.

Place the mixture in the bowl of an electric mixer fitted with the paddle attachment. On low speed, add the corn syrup and butter. Beat until smooth and cool. Store at room temperature. The mixture should be somewhat liquid so that it makes a smooth icing on the cupcake, but not so runny that it drips down the sides. If it is too stiff, you can microwave it for about 10 seconds once or twice until it is the correct consistency.


LinkWithin

Related Posts Widget for Blogs by LinkWithin