Thursday, March 17, 2011

Olive and Thyme Bread


Our local grocery store used to make a delicious olive bread in their bakery. I would slice it into thick slices and toast it and butter it and eat it for breakfast, or lunch, or dinner. Then one day, they stopped selling it. That was maybe 10 years ago, make that 15 - I don't think kids were in the picture yet. Back then I never would have thought that I could make it in my own oven. I just carried on - without olive bread.

Then I came upon this recipe in The Art and Soul of Baking and the memory of that olive bread came back to me. With more bread-baking experience under my belt, I decided to give this recipe a try. It was wonderful. It's moist and has just the right amount of olive flavor, not overpowering. It's even better than the bread I remembered. I still like it thickly sliced and toasted with butter, and now I'll even sprinkle a little extra sea salt on top.  It's nice to know I'll never need to go without olive bread again.

Rustic Olive and Thyme Bread
from The Art and Soul of Baking by Cindy Mushet (not a bad recipe from this book yet!)

Ingredients
Poolish (Pre-Ferment)
1 cup warm water
1/2 teaspoon active dry yeast or 1/4 teaspoon instant yeast
1 cup (5 ounces) bread flour or unbleached all-purpose flour

Dough
1/2 cup warm water
1 teaspoon sugar
1 1/2 teaspoons active dry yeast, or 1 1/8 tsp instant yeast
3 cups (15 ounces) bread flour or unbleached all-purpose flour
1 1/2 teaspoons salt
2 tablespoons olive oil
1 tablespoon plus 1 teaspoon finely chopped fresh thyme (I used a little less of dried thyme)
1 cup pitted and coarsely chopped kalamata olives

1. Pour the water into a medium bowl and whisk in the yeast. Let the mixture stand for 10 minutes, or until the yeast is activated and looks creamy. Stir in the flour and mix until no patches of dry flour remain. Cover the bowl with plastic wrap and set aside for 4 to 6 hours at room temperature, or 24 hours in the refrigerator.

2. Pour the warm water into the bowl of a stand mixer. Add the sugar and yeast, whisk by hand to blend, and allow the mixture to sit for 10 minutes, or until the yeast is activated and foamy or bubbling. Add the poolish and whisk by hand to blend well. Add the flour, salt, olive oil, thyme, and olives (make sure the olives are coated with flour before kneading). Knead the dough on low speed until is comes together in a cohesive mass, about 3 or 4 minutes. Cover the bowl with plastic wrap and let the dough rest for 20 minutes to allow it to fully hydrate before further kneading. Turn the mixer to medium-low and continue to knead until the dough is firm, elastic, and smooth, 3 to 6 minutes.

3. Lightly oil a bowl, scrape the dough into it, and lightly cost the surface of the dough with a little oil. Cover the bowl tightly with plastic warp and let the dough rise until doubled, 1 1/2 to 3 hours.

4. Turn the dough out onto a lightly floured work surface. Press down on the dough firmly to expel some of the air bubbles, but don't knead the dough again or it will be too springy and difficult to shape. Divide the dough in half and shape into two round, taut loaves.

5. Line a baking sheet with parchment paper or a silicon mat and place the loaves on the sheet about 5 inches apart, seam sides down. Brush the loaves lightly with oil. Cover loosely with plastic wrap. Allow the loaves to rise until they are almost doubled in size and look like they have taken a deep breath, 45 to 60 minutes.

6. Preheat the oven to 425 degrees and position a rack in the lower third of the oven. Slash a pattern into the top of the dough with a chef's knife. Bake for 25 to 30 minutes, until their internal temperature registers 200 degrees. Transfer to a rack to cool completely. Slice with a serrated knife.

Monday, March 14, 2011

Baking with Kids: Monkey Bread


Last week I posted a recipe for white sandwich bread. It was very good, but not very exciting.
So Annie and I were "monkeying around" and made that dough into something sweet and delicious - monkey bread. The dough was just finishing the first rise when she came home from school. We broke the dough into little balls, and dipped them in melted butter, and then cinnamon sugar...


...then dropped the buttery, sugary, cinnamony balls in a loaf pan and let them rise for a while.


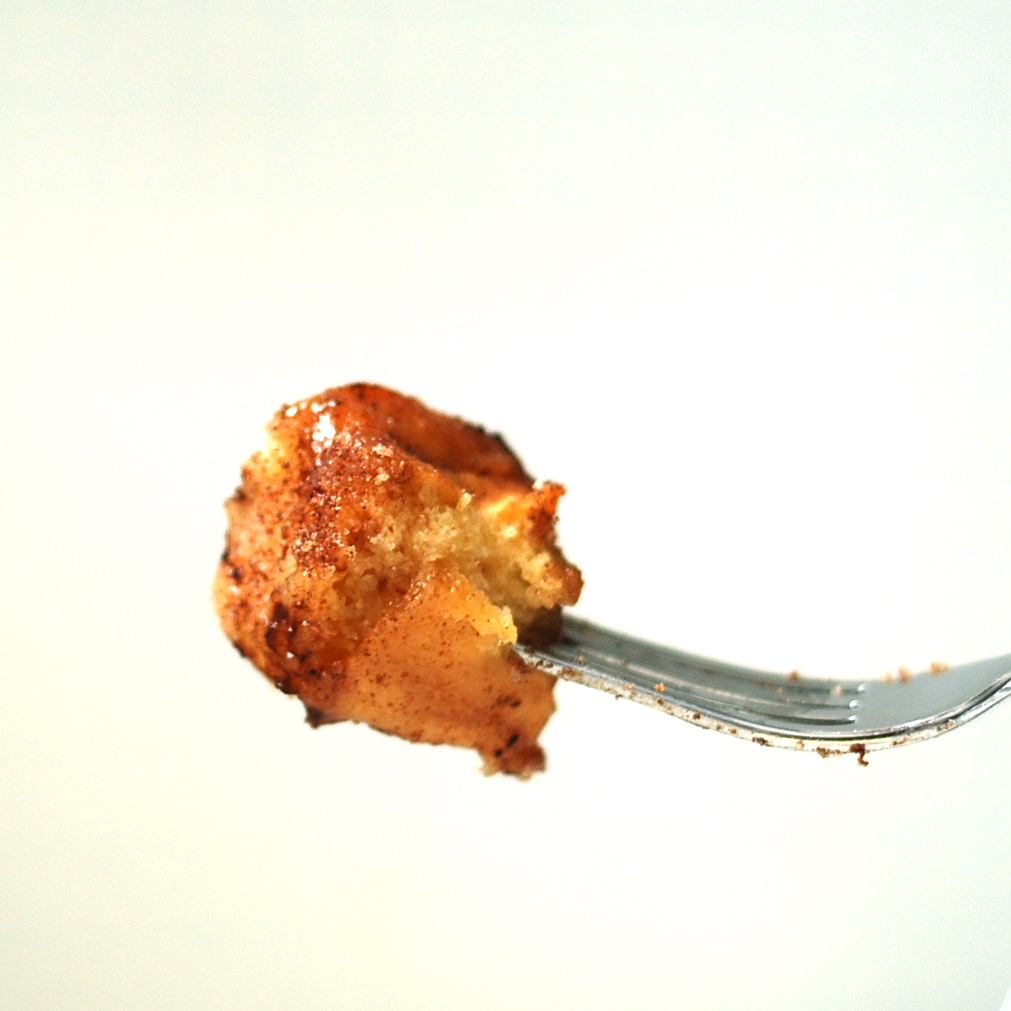
The whole house smelled wonderful as they were baking. I couldn't even get a picture before we all started digging into the pan. They were gone in record time.


Wanna bite?


Monkey Bread
from The Art and Soul of Baking by Cindy Mushet

For the dough:
¼ cup warm water (110 to 115F)
1 teaspoon sugar
1 tablespoon active dry yeast, or 2 ¼ teaspoons instant yeast
1 cup warm whole milk (110 to 115F)
2 tablespoons unsalted butter, melted
3 cups bread flour or unbleached all-purpose flour
1 ½ teaspoons salt

For the cinnamon-sugar coating:
1 stick (4 ounces) unsalted butter
1 1/4 cups sugar
4 teaspoons cinnamon

Place the water, sugar, and yeast in the small bowl and whisk to blend. Allow the mixture to sit for 10 minutes, or until the yeast is activated and foamy. In the medium bowl, whisk together the warm milk and melted butter.

Place the flour and salt in the bowl of the stand mixer. Mix briefly to blend. Add the yeast mixture and milk mixture and mix on medium speed just until the dough comes together, 2 to 3 minutes. Cover the bowl with plastic wrap or a damp lint-free cotton towel and let the dough rest for 20 minutes to allow it to fully hydrate before further kneading. Turn the speed to medium-low and continue to knead until the dough is firm, elastic, and smooth, 3 to 6 minutes. Finish by kneading by hand for another minute or two.

Place the dough in a lightly oiled bowl or tub and coat the surface of the dough with a little oil. Cover the bowl with plastic wrap or a damp lint-free cotton towel and let the dough rise until doubled, 45 to 60 minutes (longer if the room is cold).

After 45 minutes, leave the dough covered, and start working on the cinnamon- sugar coating. Melt the butter in a bowl in the microwave. Allow to cool until still liquid, but not too hot for little fingers to dip in. In a separate bowl, mix together the sugar and cinnamon. Lightly butter a loaf pan.

After the dough has doubled, turn the dough out onto a lightly floured work surface. Press down the dough firmly to expel some of the air bubbles, but don’t knead the dough again or it will be too springy and difficult to shape (if this happens, simply cover the dough with plastic wrap or a damp lint-free cotton towel and let it rest for 10 to 15 minutes to give the gluten some time to relax.) Flatten the dough into a rough rectangle and using a bench scraper, cut the dough into small pieces about the size of cherries.

Dip the dough pieces in the melted butter, and then roll them in the cinnamon sugar. Place the pieces side by side in the loaf pan. Fill the whole bottom layer evenly, and then move onto the next layer, arranging the pieces the same way, until all of the dough has been used up. Press down lightly on the top, and then cover the pan with the damp towel. Let the dough proof (or rise) for another 45 minutes.

Meanwhile, preheat your oven to 375 degrees. When the dough is ready, uncover the dough, and transfer to the oven. Bake for 40 minutes, or until golden brown and instant-read thermometer registers 200 degrees.

Transfer pan to wire rack to cool. When cool enough to handle, turn monkey bread out onto a dish or serving platter. (We just ate the pieces right out of the pan.)

Thursday, March 10, 2011

White Sandwich Bread, No Monkey Business


As I get older, I find that I prefer bread with at least a little whole grain, but sometimes, a really great white bread is required. For instance, I can't eat a BLT without white bread. And a grilled cheese and tomato is just better on the white stuff.

I have a bread machine, but I haven't used it in a very long time. A bread machine takes all the fun out of making bread. You can make bread dough in a Kitchenaid, and I often do, but I like to knead the dough by hand too. And even if I do make the dough in the mixer, I always like to finish by kneading the dough on the counter for a minute or two. It's a good practice to get into, so you can get used to how the dough is supposed to feel.

If you've never made bread, this is a good recipe to start with. It takes some practice, but each time you'll get better at knowing when to stop kneading and when to punch the dough down after the first rise.


This is a white bread you can feel good about eating - no high-fructose corn syrup or preservatives. It's nice a soft too. The crust gets a great caramelization, but it's not too strong-tasting either. The kids will still pick the super-soft supermarket bread over any other, if given the choice. But someday, when their taste buds are more discriminating, I know they'll prefer this one, like I do.

Next time, I'll show you how we "monkeyed around" with this recipe to make something no one in the house could resist!

White Sandwich Bread

Makes 1 loaf

¼ cup warm water (110 to 115F)
1 teaspoon sugar
1 tablespoon active dry yeast, or 2 ¼ teaspoons instant yeast
1 cup warm whole milk (110 to 115F)
2 tablespoons unsalted butter, melted
3 cups bread flour or unbleached all-purpose flour
1 ½ teaspoons salt
1 egg, lightly beaten


Place the water, sugar, and yeast in the small bowl and whisk to blend. Allow the mixture to sit for 10 minutes, or until the yeast is activated and foamy. In the medium bowl, whisk together the warm milk and melted butter.

Place the flour and salt in the bowl of the stand mixer. Mix briefly to blend. Add the yeast mixture and milk mixture and mix on medium speed just until the dough comes together, 2 to 3 minutes. Cover the bowl with plastic wrap or a damp lint-free cotton towel and let the dough rest for 20 minutes to allow it to fully hydrate before further kneading. Turn the speed to medium-low and continue to knead until the dough is firm, elastic, and smooth, 3 to 6 minutes. Finish by kneading by hand for another minute or two.

Place the dough in a lightly oiled bowl or tub and coat the surface of the dough with a little oil. Cover the bowl with plastic wrap or a damp lint-free cotton towel and let the dough rise until doubled, 45 to 60 minutes (longer if the room is cold).

Turn the dough out onto a lightly floured work surface. Press down the dough firmly to expel some of the air bubbles, but don’t knead the dough again or it will be too springy and difficult to shape (if this happens, simply cover the dough with plastic wrap or a damp lint-free cotton towel and let it rest for 10 to 15 minutes to give the gluten some time to relax.) Shape the dough into a loaf. Lightly coat the loaf pan with melted butter, or a high-heat canola oil spray. Place the dough, seam side down, in the pan.

Lightly oil the top of the dough to keep it moist. Cover the pan loosely with plastic wrap or a damp lint-free cotton towel and allow the dough to rise again until its top is ½ to 1 inch above the rim of the pan, 45 to 60 minutes.

Preheat the oven to 400F and position an oven rack in the center. Brush the top of the loaf with a thin film of the beaten egg. Bake for 35 to 40 minutes, until the bread is golden brown and the internal temperature registers 200F on an instant-read thermometer. Transfer to a rack to cool completely. Slice with the serrated knife.

Monday, March 7, 2011

Almond Macarons with Chocolate Swiss Buttercream


Alert the press!
Strike up the band!
I'm celebrating here at Marzipan!

Why? Because I made fabulous French macarons!

I've bookmarked so many posts and tutorials about macarons that they have their own folder in my bookmarks. I tried them last year and the result was a flat, undercooked cookie that wouldn't let go of the Silpat they were sitting on. I was completely psyched out after that.

Until Irina from Pastry Pal published her free tutorial, Master the Macaron. Not only is it a drop dead gorgeous and comprehensive primer, but it works. And the first and most important thing she tells you to do is to stop being intimidated by these little confections! Those were the words I needed to hear. I am intimidated no longer. And neither should you be.  Get on over to Pastry Pal to download her e-book for the recipe for macarons.  

Chocolate Swiss Meringue Buttercream
From Martha Stewart's Cupcakes
Makes 5 cups

1 1/4 cups sugar
5 large egg whites
pinch of salt
1 pound (4 sticks) unsalted butter, cut into tablespoons, room temperature
1 teaspoon pure vanilla extract
4 ounces good-quality chocolate, melted and cooled, but still liquid

Combine sugar, egg whites and salt in mixer bowl, and set over a pan of simmering water. Whisk constantly until sugar is dissolved and mixture registers 140 degrees on an instant-read thermometer.

Transfer bowl to mixer; whisk on medium-high speed until whites are fluffy and the outside of the mixer bowl no longer feels warm to the touch, about 10 minutes.

Reduce speed to medium-low; add butter by the tablespoon, whisking well after each addition. The icing will look curdled for a bit after all the butter has been added, but just continue to beat until the icing is fluffy and smooth. Switch to the paddle attachment and add vanilla extract and melted chocolate and beat until smooth. Pipe the icing onto the macarons with a pastry bag fitted with a medium round tip.

Wednesday, March 2, 2011

Best Soft Dinner Rolls


Honestly, I've made these several times and they never disappoint!

Common problems with some of the other roll recipes I've tried:
1. They're dry
2. They're "yeasty"
3. They're bland
4. They stale quickly

But these dinner rolls:
1. They're moist with a wonderful texture
2. They have no strong yeasty taste
3. They're delicious
4. They stay moist for days in an airtight bag and refresh easily after a few more days if you microwave a few seconds or wrap in foil and reheat in a 350 degree oven.
5. The kids will devour them
6. They make really good little sandwiches
7. They are not hard to make - at all. In fact, it's kinda fun! The dough is soft and smooth and really nice to work with.   Try them!

Aunt Marie's Dinner Rolls
adapted slightly from Sortachef at woodfiredkitchen.com

Makes 32 rolls

4 ½ cups all-purpose flour, divided into two equal parts
1 cup milk
5 1/2 tablespoons salted butter, plus more for pan
¼ cup sugar
1 ¼ teaspoons of salt
1 package (2 1/4 teaspoons) of quick rise yeast (Rapid Rise and Perfect Rise are two types)
1 cup warm water (100°)
About ½ cup or more additional flour for kneading
Egg wash (1 egg mixed with a little water) for brushing on top of rolls

1.Heat one cup of milk in a medium saucepan until it’s hot but not boiling. Add the sugar, 5 1/2 tablespoons of butter and salt. Let the milk cool for a few minutes while the butter melts.

2. Pour the milk mixture into the mixing bowl, making sure to get all the sugar from the bottom as well. Add a cup of warm water, 2 ¼ cups of flour and sprinkle on the quick rise yeast. Attach the flat beater, and beat on medium speed for 4 or 5 minutes, until you have a smooth batter with no lumps. Scrape the bowl as necessary.

3. Now add another 2¼ cups flour, switch to the dough hook and beat for a further 5 minutes on medium low speed. The dough is ready for hand kneading once all the flour is fully incorporated and the dough is smooth and stretchy.

4. Transfer dough to a lightly floured work surface. Pull the edges of the dough in toward the center like an envelope, using the dough scraper at first and then your fingers as the dough gets less sticky. Continue kneading, constantly pulling and then pushing down on the center with your palms, adding a little flour as needed to prevent sticking. The dough should be tacky but not sticky. After a few minutes, you will feel the dough push back as the gluten develops. Knead for a minimum of 5 minutes altogether, and then form a ball.

5. Put the ball of dough into a bread bowl and let rise in a warm spot, lightly covered, for 45 minutes or until doubled in volume.

6. Coat the bottom and sides of a 10 x 15 inch lasagna pan with softened butter.

7. Spread the dough into a rough rectangle on a lightly floured surface and fold the rectangle in half. Spread out into a rough rectangle and fold in half again. Let the dough rest for 5 minutes and then spread it out into a rectangle the size of the lasagna pan. Put the dough into the lasagna pan and spread it out evenly.

8. Using a dough scraper, cut the dough into 32 small squares inside the pan. To do this, cut lengthwise in half, then in half again. Along the long side, cut the dough in half, then each of those halves in half and in half again to end up with an 8 x 4 grid. Picking up each of the small squares of dough in turn, stretch the top skin across and down, tucking it roughly under to make a small ball of dough. Put each piece back where it came from. No need to strive for perfection here: to do this to all the rolls should only take three or four minutes!

9. Let the rolls rise for 30 – 40 minutes in a warm spot, until at least doubled in size. Preheat the oven to 350° when the rolls are nearly risen. Just before baking, lightly brush a little of the egg wash on top of the rolls with a pastry brush.

10. Bake for 20 minutes at 350° or until they’re lightly browned on the top and the internal temperature is 195-200 degrees F. Allow to cool until just warm before serving.

Monday, February 28, 2011

A Closer Look at Cocoa Powder


In my last post, I showed you what can happen if you use the wrong type of leavener in a cake. To recap, I used baking powder instead of baking soda in this devil's food cake recipe. But then I realized that another great devil's food cake recipe (which I used for the homemade Ring Dings) used baking powder as its leavener. I was confused for a minute, but then realized there was another difference in the two recipes - each recipe specified a different type of cocoa.

There are two different types of cocoa - natural and alkalized, also known as Dutch-processed. Dutch-processed cocoa is darker in color and is harder to find in stores, but easily found online. Hershey's Special Dark cocoa, which is generally more available, is a combination of natural cocoa and a very heavily Dutched cocoa which makes it even darker (sometimes called black cocoa). Black cocoa is the cocoa that is used to make Oreo cookies.

I won't go into all the details here, but in general, natural cocoa reacts with baking soda and Dutch-process cocoa reacts better with baking powder. The devil's food cake made for the Ring Dings called for Dutch-processed cocoa, therefore using baking powder. The batter made for the cake called for natural cocoa, therefore using baking soda as the leavener.

It is still confusing though. The Baked cookbook that I bake a lot from, says not to get too hung up on the type of cocoa, just use one that smells richly of chocolate and has a nice deep color. However, their recipes call for a "dark unsweetened cocoa" (most darker cocoas are dutched) and they do mention that they primarily use Valrhona cocoa (found at Whole Foods or online) which is a dark Dutch-processed cocoa.

{As a side note: Often there is value in reading the front section of a cookbook and not just the recipes because you obtain information on the brands or types of ingredients the author used and the methods used to make the recipe a success. Ingredients, methods, and equipment can make a big difference.}


In the picture above, I have taken the four (!) kinds of cocoa I had in my pantry. They happen to be the types most commonly found in the grocery stores in my part of the world. You can see, there is quite a difference in the color of the dry cocoas. Oddly, the Ghirardelli natural cocoa and the Rodelle Dutched cocoa were almost identical, and the two natural cocoas were quite different looking.

I took a little of each cocoa and mixed it with a tablespoon or two of hot water and then compared the difference in color again. This time, the natural cocoas were most similar, the Dutched cocoa was slightly darker, and the black cocoa remained the darkest of the four.


Then I took a little taste of each. I have to say that I preferred the Dutched cocoa to the other three, but the difference wasn't that remarkable. The black cocoa was the most bitter tasting.

So what if a cake recipe doesn't specify which cocoa to use? It may have a little of both leavenings or, in recipes that call for less than 3/4 cup of cocoa, it may make less of a difference. In non-leavened recipes like those for chocolate sauce or custards, you could swap one kind of cocoa for another without any worry.

In short, I keep both natural and Dutched cocoas in my pantry and I'll be sure to use the kind the recipe specifies. And I'll try not to be distracted when following a recipe and use the right leavener too! Now I know that I have two great recipes for Devil's Food Cake, so if I run out of one kind of cocoa, I'll just use the recipe that calls for the other kind.

Friday, February 25, 2011

Baking Blunders - What happens when you use baking powder instead of baking soda


You've heard it before..."baking is an exact science" ... it's so true.

I was making a devil's food cake for my neighbor the other day - made the batter, poured it carefully in the pans and popped them into the oven. As I was putting the ingredients away, something hit me...I was putting away baking powder...did the recipe call for baking powder? or baking soda? Crap. The baking soda was tucked back in the cabinet. I didn't use the baking soda the recipe called for.

I didn't really know what this would do to my recipe. How different can they be? It was only 1 1/2 teaspoons after all. I googled it... The sinking feeling was getting stronger as I read. Better make another cake. Fortunately I still had time.

Turns out the difference is significant.

This is the cake made with baking soda...

The cake below, is made with the same exact ingredients, except with baking powder. Granted this one was made with a 9" pan and the other one was made with an 8" pan, so that makes up part of the height difference. But look at the difference in color and shape. (no editing was done on these photos)

Here's the insides of the good cake with baking soda...

and with inside of the bad cake using baking powder...

So it looks different, but how did they taste? The "good cake" was very good, chocolatey and moist. The "bad cake" was almost tasteless, kinda dryish - just not up to my high standards. I had figured we'd just eat the "bad" cake ourselves, but after tasting the cake, it ended up in the trash.

But here's the twist... the recipe for devil's food cake that I used for the retro ringers in my last post calls for baking powder and not baking soda. How could that be? Both are excellent recipes for the same kind of cake. Both have very similar ingredients.

You'll have to come back Monday to see how this story unfolds. I'll give you a hint: I'll be doing a cocoa comparison!

LinkWithin

Related Posts Widget for Blogs by LinkWithin