Wednesday, May 26, 2010

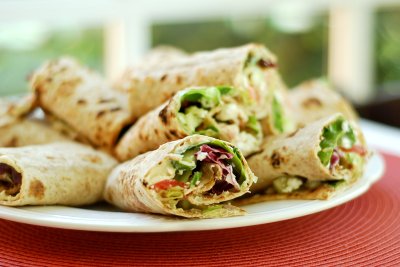
Whole Wheat Hummus and Veggie Wrap

Hummus Wraps

I am deviating from the sweet side of Marzipan to bring you a sample of what I like to eat when I'm not licking the batter from the bowl. These wraps are amazing and they're vegetarian and I like them so much that I've eaten one for lunch every day this week! And I served them at the girls' Confirmation/Communion Party. All of the ingredients were purchased at Costco but I know you can find them at your well-stocked supermarket as well.

Whole Wheat Hummus and Veggie Wraps
Makes one wrap

Ingredients:

Whole wheat lavash wrap
3 tablespoons of your favorite hummus - I used the Pine Nut Hummus by Sabra from Costco
a handful of Organic Baby Lettuce leaves
a handful of Diced Seedless Cucumber
a handful of Diced Tomatoes, seeds removed
a sprinkling of thinly sliced scallions (aka green onions), to taste
a sprinkling of crumbled Feta Cheese

Place the wrap on your work surface with the long side toward you. Spread with entire wrap with hummus and sprinkle with the other ingredients, leaving a border without filling along the far end. A little goes a long way, and too much filling will make it hard to wrap up. Starting with the edge closest to you, start rolling the wrap tightly. Cut in half and enjoy a healthy, delicious lunch!

Saturday, May 22, 2010

Cookie Bouquets!

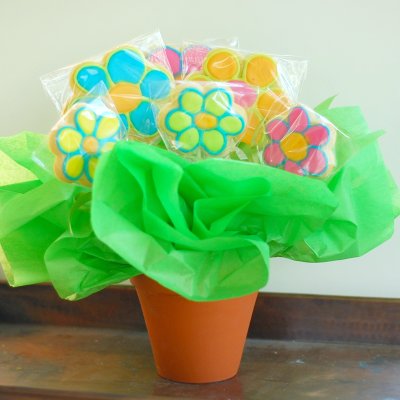
Flower Cookie Bouquet

Between family and school celebrations and my growing business, the month of May was busy - really busy. And now that it's slowing down, I can talk about all the things I've made. First up, cookie bouquets! These would be perfect for a Mother's Day gift or to display at a kids birthday party or even a garden party. I used these displays for a bake sale benefitting Phipps Conservatory's Botany in Action Program.

For the flower bouquet, take a new terra cotta pot and cut a block of floral foam to fit inside. Tuck some green tissue paper in the spaces between the floral foam and the inside of the pot and insert the flower-cookies-on-a-stick into the floral foam. If it needs more weight near the bottom, throw a few rocks under the floral foam to give it some stability.

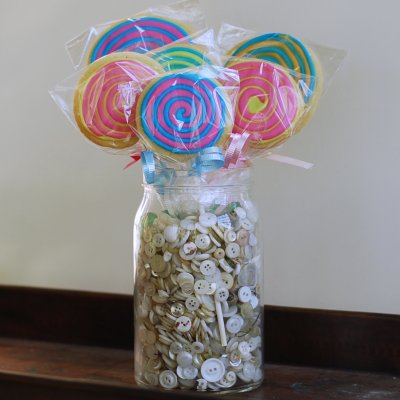
Lollipop Cookies

For the lollipops, get a tall, skinny-ish jar and fill it with marbles, buttons, shells, or rocks and insert the lollipop cookies into the jar. I tend to collect things like these and happened to have them in my craft room.

You can find the cookie and icing recipes here. I used Spectrum gel food colors in electric blue, electric pink, electric green and electric orange.

Wednesday, May 12, 2010

The Best Carrot Cake

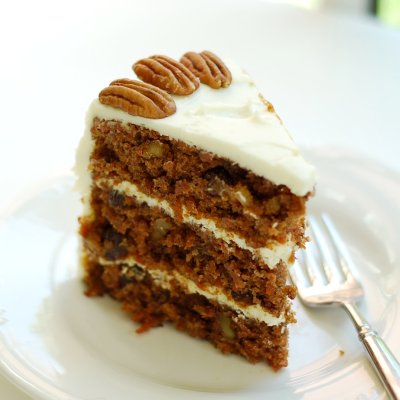
Carrot Cake

You know that you've found a great recipe when the cookbook you are perusing has a page or so with obvious wear and spills from repeated use. I borrowed Maida Heatter's Great Book of American Desserts from a soon-to-be neighbor of mine and she raved about his cake and I could see by the well-worn pages that she'd made this recipe numerous times. I've been searching for that one best carrot cake recipe and had to try this one.

Well, I'm so glad I did...

This is the cake I served at Ellen's Confirmation and Annie's First Communion party. It was hands down the best carrot cake I've ever had. And with a healthy dose of carrots, raisins, and walnuts, one could argue that it could be eaten in place of a meal (like I did for lunch today!). And it's a great make-ahead cake as it stays moist and delicious for at least three days and probably longer. In fact, it might be even better after one or two days than it is the day it's made. The cream cheese icing is delicious, but not too sweet - a perfect complement to the perfect carrot cake.

Carrot Cake
from Maida Heatter's Great Book of American Desserts

5 ounces (1 cup) dark raisins
1 pound carrots to make 4 cups shredded, firmly packed
2 cups minus 2 tablespoons all-purpose flour
2 teaspoons double acting baking powder
1 teaspoon baking soda
1 teaspoon salt
2 teaspoons cinnamon
1 tablespoon unsweetened cocoa powder
4 large or extra-large eggs
2 teaspoons vanilla extract
1 cup granulated sugar
1 cup dark brown sugar, firmly packed
1 1/4 cups vegetable oil
5 1/2 ounces walnuts, cut into medium-small pieces
Cream Cheese Icing, recipe follows
a handful of pecan halves, for garnish

Preheat the oven to 350 degrees F. Spray three 9-inch cake pans with cooking spray, line the bottoms with parchment, and spray the parchment.

Place the raisins in a vegetable steamer over shallow water in a saucepan and steam for 10 minutes. Uncover and set aside.

Grate the carrots using a food processor (I used the disc with largest holes, but you can grate them more finely if desired) or a standing metal grater. Measure and set aside.

Sift together the flour, baking powder, baking soda, salt, cinnamon, and cocoa, and set aside.

In the bowl of an electric mixer, beat the eggs. Add the vanilla, both sugars, and oil, and mix until well combined. Add the dry ingredients and mix on low speed only until combined. Stir in the carrots, raisins, and nuts.

Divide the batter evenly among the three pans and use a spatula to even out the batter. Bake the pans for 35 to 40 minutes or until the tops just spring back when gently pressed with a fingertip and the cakes begin to pull away from the sides of the pan. Remove from the oven and let stand 2-3 minutes in the pans on a cooling rack. Run a small knife around the perimeter of the cake and invert the cakes onto a cooling rack and allow to cool completely. It is not necessary to remove the parchment from the bottoms of the cakes at this time.

Brush any stray crumbs from the sides of the cakes and transfer the cakes to the freezer, unwrapped, for at least an hour, or until cakes are firm enough to handle. If you wish to freeze the cakes longer, wrap the frozen layers in plastic wrap and return to the freezer until you are ready to frost the cake. Do not thaw the layers before icing.

When ready to ice the cake, prepare a large, flat cake plate by lining it with four strips of wax paper to make a square. This wax paper will catch any crumbs and icing while frosting the cake. Remove the parchment paper from the bottoms of the cakes. Place one cold and firm cake layer upside down on the plate. Spread a thin layer (2/3 cup) of the icing evenly over the cake. Cover with the second layer, also upside down. Spread another 2/3 cup icing over the second layer. Place the third layer on top, also upside down and spread the remaining icing over the top and sides of the cake. Remove the wax paper strips carefully. Garnish the cake with pecan halves. Refrigerate the cake for a few hours or for a day or two. Serve cold right from the refrigerator.

Cream Cheese Icing
from Maida Heatter's Great Book of American Desserts

16 ounces cream cheese, at room temperature
4 ounces unsalted butter, at room temperature
1 teaspoon vanilla extract
2 cups sifted confectioners' sugar

In the bowl of an electric mixer, beat the cheese and butter until soft and smooth. On low speed beat in the vanilla and sugar, and then on high speed beat for a few moments until smooth.


Wednesday, May 5, 2010

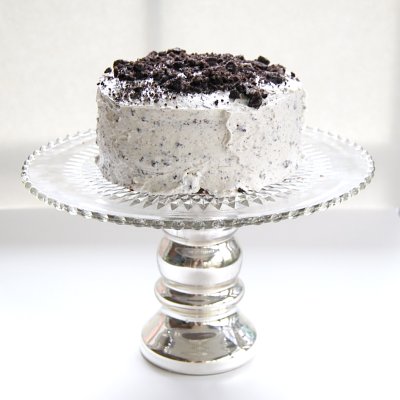
Devil's Food Chocolate Cake with Cookies 'n Cream Icing

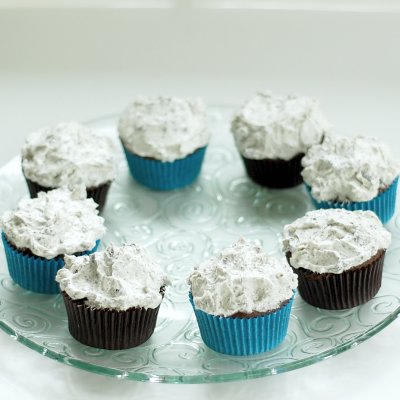
Cookies and Cream

Could the month of May get any busier? Seriously, this is crazy. First Communion, Confirmation, my son's birthday, parents visiting, husband traveling, craft sale, 5th grade Oklahoma! musical, making cookies for the 5th grade Oklahoma! musical cast party, 5th grade graduation, Faculty Appreciation Luncheon, hockey, lacrosse, piano, making scones for the church tea, renovating a kitchen, planning vacation...I'm certain I left out a dozen more things.

Even so, the baking must go on. (It's just the blogging about it that goes by the wayside.) This one, however, just couldn't wait.

Cookies and Cream

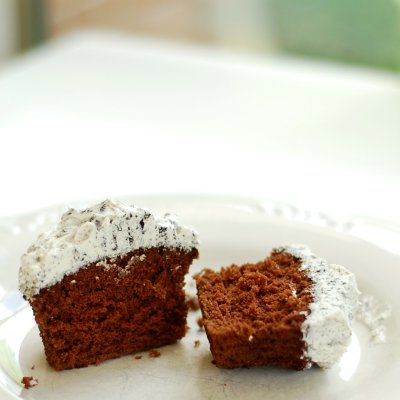
The devil's food cake recipe comes from the Sky High Cookbook. (Would you please just go out and get this book already!) The cake itself was so delicious! It was soft and light and moist, with a fine crumb. Unbelievably good. Just look at that crumb...(below)


Devil's Food Cake with Cookies and Cream Icing

There's no way you're getting that from a boxed cake mix.

And the icing - Light, creamy, smooth and delicious, it tasted just like cookies and cream ice cream. I used my favorite vanilla buttercream recipe and added crushed Oreos - maybe one row of the cookies in the package - don't be shy...I almost wish I had added more to the icing. I'll be dreaming about this in my sleep - oh, that's right- there's no time for sleep! It's May!


Devil’s Food Cake
From Sky High: Irresistible Triple-Layer Cakes by Alisa Huntsman and Peter Wynne
Makes an 8-inch triple layer cake

Note: I cut the cake recipe in half and made two 6-inch round layers and 8 cupcakes. Baking times need to be adjusted for different size pans.

1 cup of unsweetened cocoa, not Dutch process
1 ¼ cups of hot water
3 cups of light brown sugar; packed
2 2/3 cups cake flour
1 ½ teaspoons baking soda
¾ teaspoon of salt
9 ounces of unsalted butter at room temperature [2 sticks plus 2 tablespoons]
3 large eggs
1 ½ teaspoons of vanilla extract
¾ cup of cold water

Preheat the oven to 325 degrees F.

Butter the bottoms and sides of three 8-inch round cake pans. Line the bottoms of the pans with parchment paper and grease the paper as well.

Place the cocoa in a medium bowl and add the hot water. Whisk until smooth and let it cool to room temperature.

In the bowl of an electric mixer, combine the sugar, flour, baking soda, and salt. With the mixer on low blend to combine. Add the butter and the dissolved cocoa. Then raise the mixer to medium speed and beat for 2 minutes until light and fluffy.

In a medium bowl whisk together the eggs, vanilla, and cold water until combined. Add this liquid to the batter in three additions scraping down the sides of the bowl between additions. Divide the batter among the three pans.

Bake for 35-45 minutes or until a cakes tester inserted into the almost comes out clean. There should be a few crumbs attached still. Cool the cakes in the pans for 15 minutes. Then invert and remove parchment paper and cool completely on a wire rack.


Cookies and Cream Buttercream Frosting
adapted from Katherine Seeley/Fine Cooking

Note: I made a single batch of the icing and had some leftover. Not much is worse than not having enough icing. Better to make too much than have too little. The extra icing will keep in the freezer.

Yields 7-1/2 to 8 cups enough to fill and frost a 9-inch four-layer cake or about 5 dozen cupcakes

5 large egg whites
1-1/4 cups granulated sugar
1/2 cup plus 2 Tbs. light corn syrup
1 lb., 4 oz. (2-1/2 cups) unsalted butter, at room temperature
1 Tbs. vanilla extract
about 20 Oreo cookies, crushed with some bigger pieces remaining

Place the egg whites in the clean bowl of a stand mixer fitted with the whisk attachment and whisk on medium-high speed until foamy. Sprinkle in 6 Tbs. of the sugar and beat on high speed to medium peaks (the whites should be smooth, full, and shiny, and the peaks should curl a little). Turn off the mixer.

Combine the remaining 3/4 cup plus 2 Tbs. sugar and the corn syrup in a medium (3-quart) saucepan over medium high heat, stirring briefly to dissolve the sugar. Continue to cook just until the mixture comes to a rolling boil.

Immediately remove the syrup from the heat, turn the mixer onto medium-high speed, and slowly pour the syrup down the side of the bowl in a steady stream, being very careful not to let the syrup hit the whisk.

Reduce the speed to medium and continue whisking until the whites are barely warm, 5 to 7 minutes. Add the butter 1 Tbs. at a time. Add the vanilla and continue beating until the frosting is smooth and creamy. Fold in crushed Oreo cookies.

Saturday, April 24, 2010

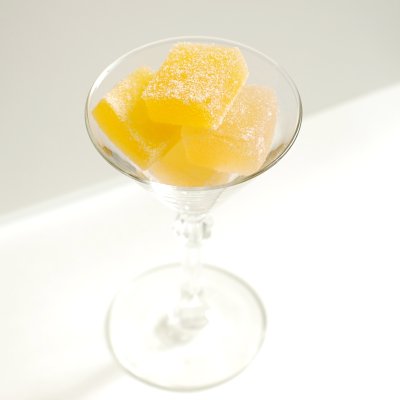
Lemon and Tangerine Pates de Fruit

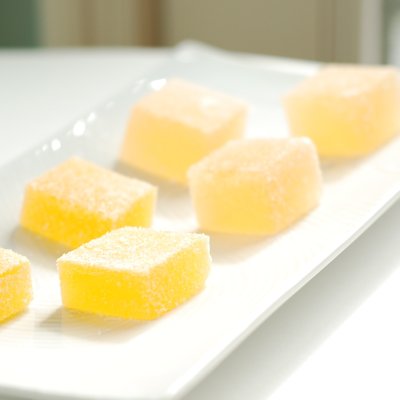
Pate de fruit


Silly, I know, but I debated over the title of this post. I made lemon pate de fruit and tangerine pate de fruit, so is the plural pates de fruit or pate de fruits? Or maybe it's pate des fruits. I wish I'd paid better attention in French class... either way, these were so fun to make!

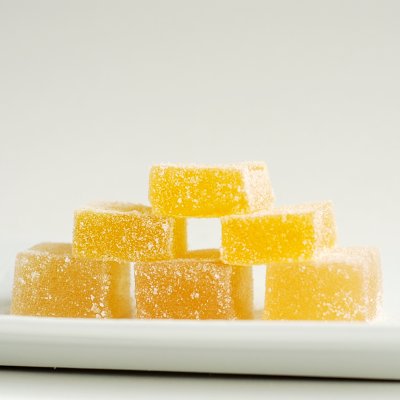
Pate de fruit

Let's talk about these delectable little pates de fruit.

First, they are delicious bites of real fruit juice mixed with sugar and pectin. The lemon are the thicker of the two (I used a slightly different sized pan) and I preferred them just a bit over the tangerine flavor.

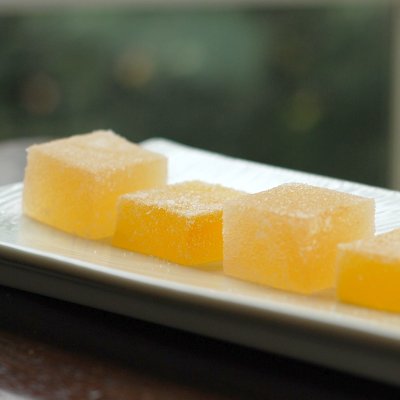
Pate de fruit

Second, they are fun to eat, fun to play with and beautiful to photograph as you can see from all the different photos here.

Pate de fruit


Third, they can be made with any fruit juice. Add a little citric acid (used in sour candies and can be found in candy-making supply stores) if you want to see your friends pucker their lips!

Sherry Yard in The Secrets of Baking makes one from a Blackberry Merlot sauce which I'd love to try. I'd love to bake my way through that entire book someday but then, instead of SMS for Sweet Melissa Sundays, or TWD for Tuesdays with Dorie, or DB for Daring Bakers, I'd have to name the group SOB for Secrets of Baking and that sounds more to me like cussing than a baking group. But I digress...

This recipe for pate de fruit, however, comes from cookbook author and editor of Dessert Professional magazine, Tish Boyle, and her delicious blog named Sweet Dreams.

Pâte de Fruit
from Tish Boyle, original recipe here
Makes 45 confections

2/3 cup fruit juice, such as fresh tangerine or pomegranate (or lemon)
6 tablespoons apple sauce (smooth, not chunky)
1 3/4 cups granulated sugar, divided
1 3-ounce envelope liquid pectin
2 teaspoons lemon juice

1. Lightly oil a 9-by-5-inch loaf pan. Line the pan with plastic wrap, letting it extend beyond the short ends of the pan, and lighlty oil the wrap.
2. In a medium, heavy saucepan, stir together the juice and apple sauce until well combined. Stir in 1½ cups of the sugar. Open the packet of liquid pectin and stand it up in a glass so it can be added quickly to the mixture when it’s ready. Cook the juice mixture over medium-high heat, stirring constantly, until the mixture registers 238°F on a candy thermometer. Add the pectin and continue to boil for 1 minute. Remove the pan from the heat and stir in the lemon juice. Immediately pour the hot mixture into the prepared pan. Sprinkle the top of the candy with a thin layer of granulated sugar. Let stand until set, about 1½ hours.
3. Using the ends of the plastic wrap as handles, carefully lift the confection out of the pan. Cut the pâte de fruit into 1 inch squares (or any size or shape you like) and roll them in the remaining sugar until they are well coated on all sides. Store the pâte de fruit in an airtight container at room temperature for up to 1 month.

Friday, April 16, 2010

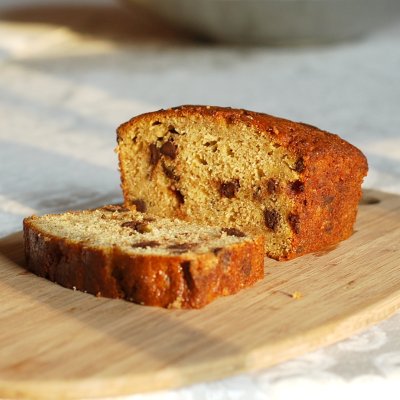
Chocolate Chip Banana Bread

Chocolate Chip Banana Bread

Here's another delicious way to use up those ripe bananas. My kids and I loved this recipe - a moist quick-bread with pure banana flavor with a little chocolate in every bite. Yum.

Chocolate Chip Banana Bread
adapted from Sarah's Cucina Bella
Makes one 9x5-inch Loaf

1/2 cup unsalted butter, softened to room temperature
1 cup packed light brown sugar
2 large eggs
2 tsp vanilla extract
3 ripe bananas, mashed
2 cups all-purpose flour
1 tbsp baking powder
1/2 tsp table salt
1/2 cup semisweet chocolate chips

Preheat the oven to 350 degrees. Spray a 9 inch by 5 inch loaf pan with cooking oil spray. Set aside. ( I always line the bottom of the loaf pan with parchment, and lightly spray the parchment as well.)

Combine the butter and sugar in the bowl of a stand mixer fitted with the paddle attachment. Mix on medium speed until the mixture looks light and fluffy. Add one egg at a time, beating well each time. Add the vanilla and bananas to the mixture and mix well on medium speed.

In a small bowl, sift together the flour, baking powder and salt. With the mixer running on its lowest speed, add the flour mixture to the bowl little by little, until just combined.


Add the chocolate chips to the batter and mix until just combined. Pour the batter into the prepared loaf pan and spread with a spatula to even it out.


Slide the pan into the preheated oven and cook for about 1 hour. The bread is done when a toothpick inserted in the center comes out clean. Let cool before slicing and serving.

Monday, April 12, 2010

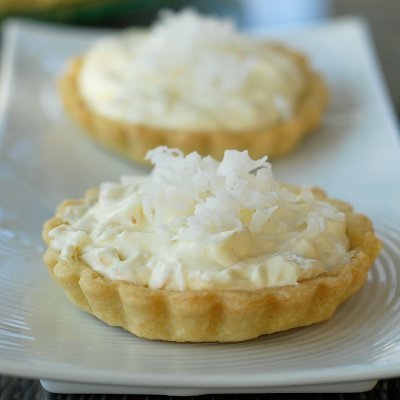
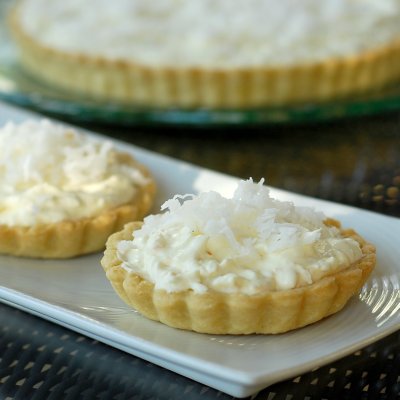
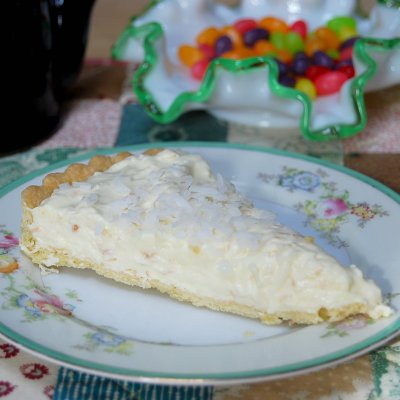
Coconut Cream Tart with Pecan Crust

Coconut Cream Tart

This past Easter is the last one we'll spend in this house, the house we built 10 years ago. What memories were made in this house - basically our kids grew up here. Annie, our youngest, is almost 8.

Usually on Easter, the Easter bunny will leave a note for the kids - a rhyming limerick with clues indicating where the baskets are hidden. My husband always comes up with clever plays on words which I've saved through the years.

Easter 2010

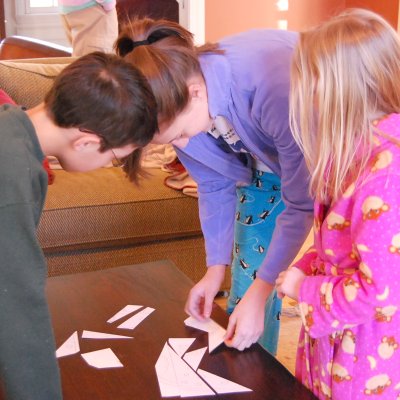
This year, the Easter bunny (you can see his shirt in the background - the traditional Easter rugby pulled out every year just for the occasion) thought of another idea. He commissioned his cartographer to draw a map of our yard with the house on it. The map was made into a puzzle and the pieces were hidden all over the house. The kids were to find the pieces, put the map together, and find out where their baskets were according to where their name was located on the map. I've never seen such teamwork! Not to mention the added bonus of sharpening their map-reading skills!

Easter 2010

It was the warmest Easter in recent memory, so he hid the baskets outside - Annie's by the hammock, Ben's by the basketball hoop, and Ellen's by her favorite flowering dogwood tree in the front of the house.
And voila! more memories are made - oh happiness!

Easter 2010

This coconut cream tart was unbelievably good. The filling was light and creamy, perfect for a Spring holiday dessert. The filling is made in two steps. First make a vanilla pastry cream and refrigerate overnight. Next add the chilled pastry cream to some heavy cream and sugar, essentially making a whipped cream filling with a bit more substance to it. Add the toasted coconut and fill the pre-baked tart shell.

Coconut Cream Tart

The original recipe is adapted from the recipe for Coconut Cream Pie with Pecan Crust in the cookbook Luscious Creamy Desserts by Lori Longbotham. I chose to use a plain tart dough only because I had the dough already made in the freezer, but I imagine the pecan crust would be fantastic.

A tart holds less filling than a pie therefore you get a higher crust to filling ratio - the perfect balance in my opinion. Only I had lots of extra filling leftover. I managed to get two tartlet shells out of the leftover dough and filled them, but still had extra filling.  To make a 9-inch tart, you might want to cut the filling recipe in half.

Coconut Cream Tart

Coconut Cream Tart with Pecan Crust
Serves 8 with extra filling left over
Adapted from Luscious Creamy Desserts by Lori Longbotham

For the filling:
1 1/4 cups finely shredded unsweetened coconut
3/4 cup sugar, divided
2 tablespoons cornstarch
2 3/4 cups whipping cream, divided
2 large egg yolks
1/2 teaspoon vanilla extract

Preheat the oven to 350 degrees F. Toast the coconut for 5-7 minutes on a baking sheet, stirring once or twice during that time.

Stir together 1/2 cup sugar and the cornstarch in a small bowl. Whisk 1/2 cup of the cream and and egg yolk in a medium bowl. Whisk in the sugar/cornstarch mixture.

Heat 1 1/4 cups cream in a medium heavy saucepan over medium heat until hot. Slowly pour the cream into the yolk mixture, whisking constantly. Return the mixture to the saucepan, reduce the heat to medium low and cook, whisking constantly for 5-7 minutes, or until thickened. Pour the pastry cream through a coarse strainer set over a bowl. Whisk in the vanilla, and place a piece of plastic wrap directly on the surface of the pastry cream to keep a skin from forming. Let cool to room temperature, then refrigerate the pastry cream for at least 2 hours, or up to one day.

Once the pastry cream is thoroughly chilled, place the pastry cream in a large bowl with remaining 1 cup of heavy cream and 1/4 sugar. Beat with an electric mixer until the mixture forms soft peaks when the beaters are lifted. Fold in the toasted coconut and spoon the mixture into the pie crust. Sprinkle with a small handful of sweetened shredded coconut. Chill the tart for at least 2 hours or up to 6 hours before serving.

For the crust:
Note: I used a basic pate brisee tart crust for this recipe 'cause I had it in the freezer. Use your favorite tart dough recipe or use the one below.  

1 cup pecans
1/2 cup flour
1/4 cup (1/2 stick) unsalted butter, at room temperature
1/4 cup sugar
1/4 teaspoon salt
1 egg yolk

Pulse the pecans and flour in a food processor just until the pecans are finely ground. With an electric mixer, beat the butter, sugar, and the salt until light and fluffy. Add the egg yolk and beat until well combined. Add the pecan mixture and stir with a rubber spatula until combined. Shape the dough into a disk, wrap in wax paper, and refrigerate for at least one hour or up to one day.

Roll out the dough between two sheets of wax paper to a 12-inch circle. remove the top shhet of paper and invert the crust into a 9-inch tart pan. Gently ease the dough into the pan, and remove the remaining wax paper. Trim the excess dough.

Press a piece of aluminum foil snugly into the bottom and up the sides of the pastry shell and fill with uncooked rice or dried beans. Bake for 15 minutes, remove the foil and beans, and bake for another 15 minutes until golden brown. Prick the dough with a fork if you see the dough starting to bubble. Let cool on a wire rack.


LinkWithin

Related Posts Widget for Blogs by LinkWithin