Thursday, January 31, 2013
Lentil Soup with Kale and Butternut Squash
It's a dreary and cold day in late January and maybe you have just spent the last couple of days unintentionally loading up on sugary carbs and now you're feeling sluggish and generally crappy. What do you do now?
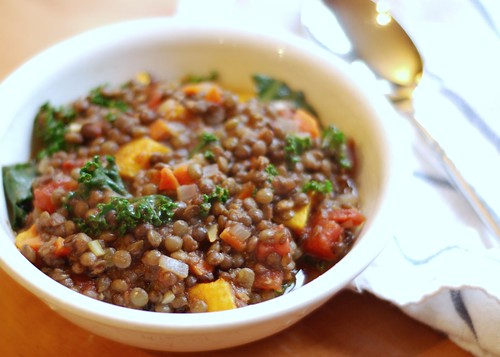
Make some of this lentil soup! It's meatless - vegan actually - unless you decide top with a poached egg which is also quite good. It's colorful and delicious and every bite gets you back to feeling good again, even though it's still late January and still cold and dreary.
A few important items about this soup:
1. Try to find French green lentils, also called Puy lentils, or black beluga lentils for this soup. They hold up to cooking and don't break apart and turn to unrecognizable mush like other lentils have a tendency to do when cooked. I have great luck finding these varieties in the bulk section of groceries like Whole Foods.
2. Substitute roasted sweet potato for the butternut squash if you desire.
3. Any hearty green will work. I prefer kale in this recipe, but I've also used swiss chard which is also quite good. The kale is just a bit heartier and chewier and stays defined in the soup a bit better.
4. The leftovers may not be quite as colorful as the kale tends to turn less green as it sits, but it will be just as delicious as the day it was made.
5. The leftover soup can be frozen quite successfully.
Lentil Soup with Butternut Squash and Kale
adapted from 101Cookbooks
Serves 6-8
1 medium butternut squash, peeled and diced to 1/2" cubes
2 cups black beluga lentils or green French lentils, picked over and rinsed
2 tablespoons extra virgin olive oil, divided
1 large onion, chopped
2 carrots, finely chopped
1 clove garlic, minced
2 tsp coarse salt
ground black pepper to taste
1 tsp dried marjoram
1 28-ounce can crushed tomatoes
2 cups water
3 cups of a big leafy green (chard, kale, etc), rinsed well, deveined, chopped
Preheat oven to 375 degrees F. Place the diced squash on a sheet pan lined with foil. Drizzle with olive oil and sprinkle with salt and pepper. Roast for 30 minutes or until tender. This can be done a day ahead.
Bring 6 cups of water to a boil in a large saucepan, add the lentils, and cook for about 20-30 minutes, or until tender. Drain and set aside. Meanwhile, heat the oil in a heavy soup pot over medium heat, then add the onion, carrots, garlic, salt, pepper and marjoram and sauté until tender, about 5 minutes. Stir in the tomatoes, lentils, and water and continue cooking for about 10 more minutes, letting the soup come back up to a simmer. Stir in the chopped greens and roasted squash, and simmer another minute or two until kale is wilted and squash is heated through. Adjust seasoning if desired.
Monday, January 28, 2013
Iced Lemon Ricotta Cookies
I love ricotta cheese. I prefer my lasagna without it, but I love to eat it on spaghetti squash and in these cookies. These cookies are light and delicious; sweet, but not too sweet. They are much like our favorite orange cookies, but a bit lighter. And the batter is unbelievably good! Don't ask me how I know this.
The recipe is from Giada DiLaurentis, so when you read the recipe, make sure to roll your "R" a little when you say "ricotta" in your head. You'll feel more Italian that way! Do you have any favorite ways to use ricotta cheese? If so, I'd love to hear about it!
{Kitchen Update: the floors and plaster are completed! Paint and cabinets come next...stay tuned!}
Lemon Ricotta Cookies
from Giada DiLaurentis and Food Network
Cookies:
2 1/2 cups all-purpose flour
1 teaspoon baking powder
1 teaspoon salt
1 stick unsalted butter, softened
2 cups sugar
2 eggs
1 (15-ounce) container whole milk ricotta cheese
3 tablespoons lemon juice 1 lemon, zested
Glaze:
1 1/2 cups powdered sugar
3 tablespoons lemon juice
1 lemon, zested
Directions:
Preheat the oven to 375 degrees F.
In a medium bowl combine the flour, baking powder, and salt. Set aside.
In your electric mixer bowl combine the butter and the sugar and beat until light and fluffy, about 3 minutes. Add the eggs, 1 at a time, beating until incorporated. Add the ricotta cheese, lemon juice, and lemon zest. Beat to combine. Stir in the dry ingredients.
Line 2 baking sheets with parchment paper or Silpat mats. Spoon the dough (about 2 tablespoons for each cookie) onto the baking sheets. Bake for 15 minutes, until slightly golden at the edges. Remove from the oven and let the cookies rest on the baking sheet for 20 minutes.
For the Glaze: Combine the powdered sugar, lemon juice, and lemon zest in a small bowl and stir until smooth. Spoon about 1/2-teaspoon onto each cookie and use the back of the spoon to gently spread. Let the glaze harden for about 2 hours.
Monday, January 14, 2013
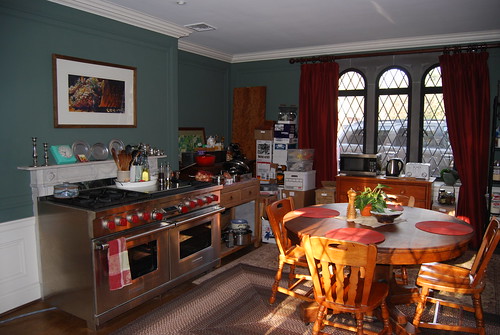
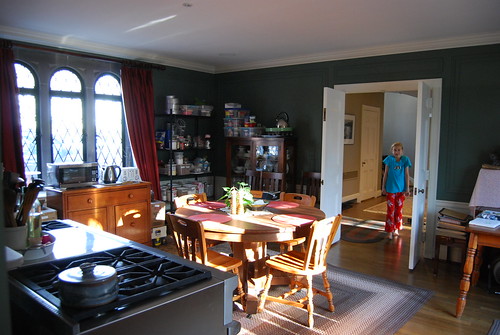
My Dining Room a.k.a. My Temporary Kitchen
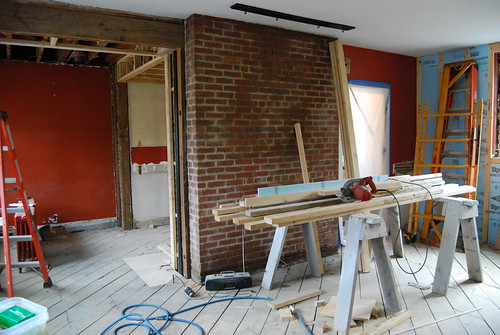
Since my kitchen currently looks like this...
...I've had to set up a temporary kitchen in the dining room. The plumber and electrician set up my range by hooking it up to the gas line from the fireplace and by running a temporary electric wire from around the corner. The range was not hooked up for the first 2 weeks and let me tell you - it's game changing. Trying to cook with only a tabletop oven and portable induction cooktop was not fun.
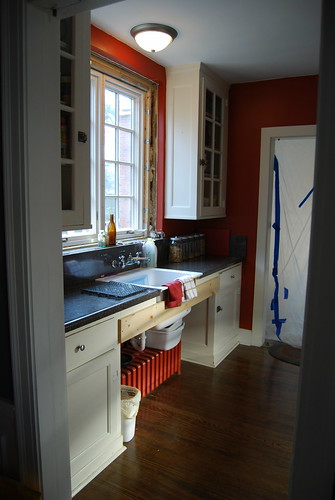
Another saving grace was being able to use the butler's pantry (which will also get a makeover when the main kitchen is complete). The original sink was a small bar sink and too small to do any dishes in, so at first I had to take the dishes in a bin to the basement to wash them. But the builders were able to install a large utility sink which will eventually be installed in the garage. I still miss my dishwasher and disposal, but I'm so grateful that I don't have to haul dishes to the basement anymore! Note the plastic on the doorway - it's the only thing separating me from the construction - and the dust finds it's way into the rest of the house and blankets everything! Thank goodness for swiffer cloths.
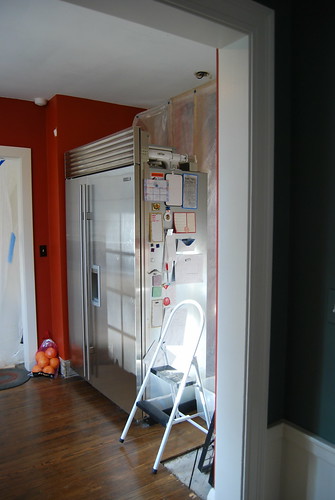
Opposite the sink is the refrigerator which will eventually be moved into the main kitchen area.
We had to get a little creative with storage space. This cabinet on the right used to be filled with serving dishes and cake stands. It's now called the "snack cabinet" and serves as a little pantry. In the background you'll see that we covered the piano with a tablecloth and it's being used as a bookshelf for essential cookbooks. {Annie didn't want the kitchen to get all the attention. She's not at all camera shy!}
I also moved a shelving unit from the basement to hold baking pans and ingredients and I have boxes of kitchen non-necessities stacked in every available space. Oh, hello again Annie!
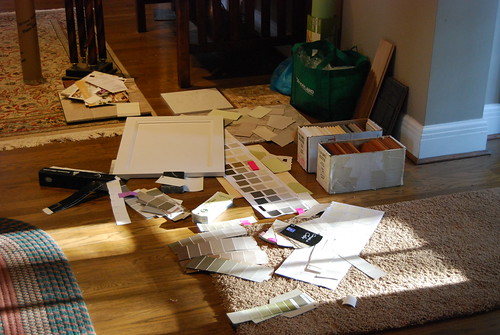
Below is what my foyer looked like just before Christmas. Choosing paint colors and coordinating cabinet and tile is the most painful part of the process for me.
The kitchen has made some progress since these photos were taken and I'll show you some of those pics next time! It's getting closer to the finish line!
Sunday, January 6, 2013
Pizzelles and Making Ice Cream Cups
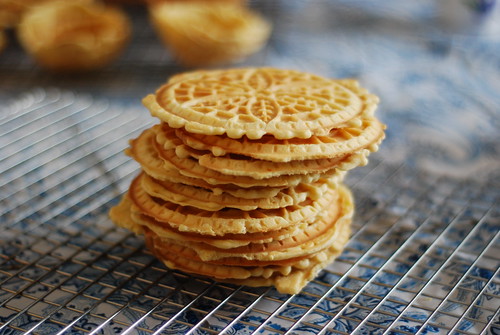
I'm getting ready to show you my temporary kitchen, but before I do that, I'd like to share with you a cookie that requires NO oven - the pizzelle! My daughter missed having pizzelles at Christmas this year, so we spent a little time yesterday making them.
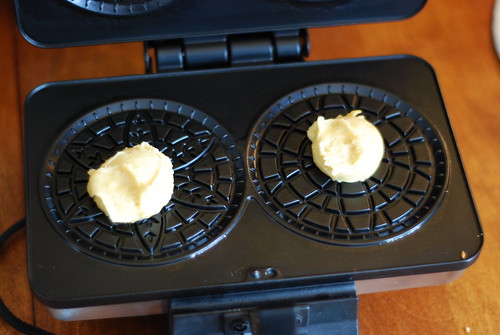
The only caveat is that you need a pizzelle iron, or ice cream cone maker. Pizzelle irons make small 4" rounds and ice cream cone makers make 7" rounds. Otherwise they are essentially the same thing. For this recipe it is also useful to have a small cookie scoop for portioning the batter.
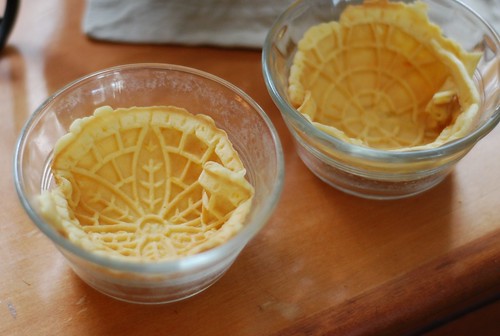
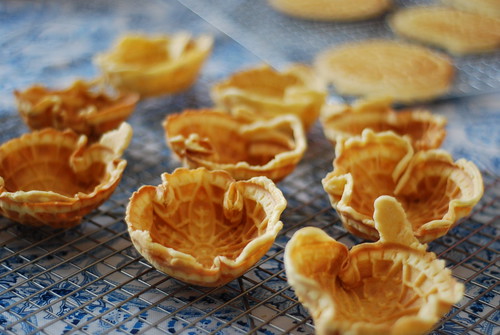
I liked the idea of having these cookies with ice cream, but the rounds were too small to make cones so we improvised a bit and made small ice cream cups. I used small custard cups to mold them, but you could use a bigger bowl like a cereal bowl or even drape the cookie over the bottom of the upside-down bowl to make bigger, wider cups. The trick is to immediately place the warm cookie right from the iron into the bowl. Keep the bowls next to the iron and don't hesitate, because as soon as the cookies cool for a few seconds, they get crispy and are unable to press into the bowl without cracking.
After the cups cool, they will hold their shape. You can change the flavorings in the recipe to suit your taste and to suit the ice cream flavors and toppings you will serve it with. For eating just plain cookies, I like to use anise and vanilla extracts with lemon and orange zests. The anise is not at all overpowering and it will smell stronger in the batter than it will in the finished cookie. For eating with vanilla ice cream, strawberries and chocolate sauce like we did, you might want to omit all flavorings except the vanilla so the flavors don't compete. These little cups take your ice cream dessert to a whole new level and provides an impressive presentation with very little effort - and without turning on your oven!
Pizzelles
Makes about 20-25 cookies
3/4 cup sugar
1/2 cup unsalted butter, melted and cooled slightly
3 eggs
1 tsp anise extract
zest of 1/2 a lemon
zest of 1/2 an orange
1 T vanilla
1 1/2 cups flour
1 1/2 tsp baking powder
1/4 tsp salt
Whisk together the flour, baking powder and salt and set aside. Cream together the sugar and melted butter. Add the eggs, one at a time, and mix well. Add the extracts and zests. Add the flour mixture and stir until just incorporated. Scoop batter onto pizzelle iron with a small cookie scoop or according to your pizzelle maker's instructions and bake until golden. Transfer to a cooling rack. Cookies will become crispy as they cool.
If shaping your pizzelles into bowls, immediately place the hot pizzelle into a bowl, pressing very gently, but working very quickly before the cookie has a chance to cool. Let cool in the bowl before removing. Store cooled pizzelles in an airtight container up to 5 days.
Subscribe to:
Posts (Atom)