Sunday, August 29, 2010

Maida Heatter's Cinnamon Rolls

Cinnamon Rolls

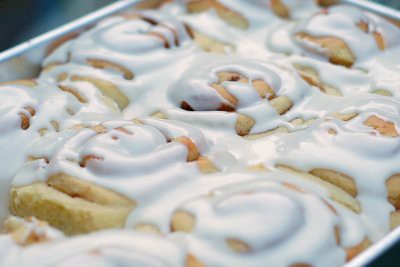
Just like brownies, I've never met a cinnamon roll I didn't like. I keep trying new recipes and I can't decide which one I like the best. This recipe comes from Maida Heatter's Great American Desserts Cookbook. The dough is easy, doesn't contain an exorbitant amount of butter (like brioche dough seems to). This recipe call for 2 sticks of butter for 12 rolls, and the one today has only 1/2 stick. And this recipe has mashed potatoes in it which keeps the dough moist for days.

I made these rolls exactly as written, except I used a 9x13 pan instead of a 10 1/2 X 15 jelly roll pan and I omitted the raisins (forgot them actually). I thought the almond extract in the icing was unusual and I'm glad I tried it, although I'd most likely stick with plain vanilla next time, or maybe substitute orange or maple flavoring. I will definitely make these again, but next time I will add more cinnamon filling, omit the nutmeg, and use a thinned cream cheese icing like the one I used here.


Cinnamon Buns
from Book of Great American Desserts by Maida Heatter

Note: Maida goes into great detail when writing out her recipes with helpful tips and hints. I have shortened the instructions to include just the basics...

1 cup mashed potatoes, instant or real, from about 3/4 lb potatoes
1 cup milk
1/2 cup plus 1 tablespoon sugar
1/2 teaspoon salt
2 ounces (1/2 stick) unsalted butter, cut up
1/4 cup warm water or potato cooking water, 105-115 degrees F
2 1/4 teaspoons active dry yeast
1 large egg
1 teaspoon vanilla extract
about 4 1/2 cups all-purpose flour

Heat the mashed potatoes and milk in a small saucepan. Stir in the 1/2 cup sugar, the salt, and the butter. Heat and stir until the mixture is 105-115 degrees F. The butter does not need to melt completely.
In a 1-cup glass liquid measuring cup, stir the warm water with the remaining 1 T sugar, sprinkle on the yeast and stir briefly with a knife. Set aside for about 10 minutes or until the mixture rises to the 3/4 cup line.
In a small bowl, beat the egg and vanilla.
Transfer the potato mixture to the bowl of an electric mixer fitted with the paddle attachment. Add the yeast mixture and the egg. On low speed, gradually add 3 cups of flour. Beat on low speed for a minute or two. Remove the paddle attachment and replace with the dough hook. Add and additional 1 1/4 cups flour. Continue to knead on low speed for about 5 minutes, adding up to 3/4 cup additional flour to make a dough that is not too dry and not too sticky. The dough should stick to the bottom of the bowl, but not to the sides of the bowl while kneading.
Place the dough in a bowl sprayed with Pam and then lightly spray the top of the dough as well. Cover with plastic wrap and place it in a warm place to rise for 1 to 1 1/2 hours until the dough has doubled in volume.
Punch the dough down and transfer to a floured board. Cover it loosely with plastic wrap and let rest for 10 minutes. Meanwhile, spray a 9x13 pan with cooking spray.
Roll the dough to an 18-inch square with floured rolling pin. Spread the dough with butter and sprinkle on the cinnamon sugar and the raisins, if using. Roll the dough like a jelly roll and pinch the seam to close. Shape the log with your hands to obtain an evenly thick log. With a sharp knife (floured if sticking), cut the dough into 12 even pieces. Place the rounds into the 9x13 pan with 3 rows of 4 buns. Cover loosely and allow to rise for one hour. Meanwhile, preheat the oven to 375 degrees F. Bake the buns for 20 minutes until the buns are nicely but lightly browned. Let stand for 5 minutes. Drizzle with glaze.

Filling
note: this is the original recipe, and next time I will double the cinnamon and sugar and omit the nutmeg.

2 tablespoons granulated sugar
1 1/2 teaspoons cinnamon
1/4 teaspoon nutmeg
1 ounce butter, melted
5 ounces dark raisins, steamed

Melt the butter in a bowl. In another bowl, combine the cinnamon, sugar, and nutmeg.

Glaze
1 tablespoon unsalted butter at room temperature
1 cup confectioners sugar
pinch of salt
1/2 teaspoon vanilla extract
a few drops almond extract
about 2 tablespoons cream

Beat or whisk all ingredients together until smooth. Add more cream or confectioners sugar to adjust the consistency. It should be thick but pourable.

Thursday, August 26, 2010

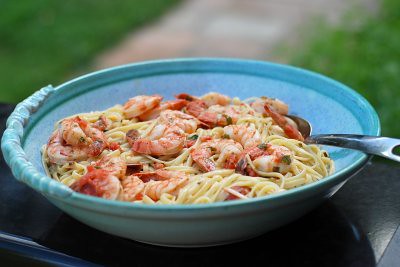
Fettuccine with Shrimp in Basil Cream Sauce

Fettuccini with Shrimp in Basil Cream Sauce

I know some of your kids have gone back to school already. My kids have a precious 10 days left. We are trying our best to enjoy the last days of summer before crazy school schedules take over. We're squeezing in a trip to Kennywood tomorrow (our local amusement park) and we are planning a long weekend to Maryland's eastern shore next week. The back to school angst always seems to be in the back of my mind though. I'll miss these carefree days!

We've had some beautiful weather this week - cooler temperatures and light breezes - and we've been eating outside on the patio every night. A nice breeze funnels through our outdoor dining area and the whole family has a chance to catch up with each other. And when everyone enjoys the meal I spent time making, well that's a bonus!

This is a wonderful pasta dish which takes full advantage of the two things that you probably have in great supply right now if you have a garden or belong to a CSA - basil and tomatoes. I have made it twice this week - the first time with grilled chicken tenderloins and this time with shrimp. My family loved it and ate it all - both times!

This recipe is from one of the cookbooks I owned before I really started collecting cookbooks. The Junior League Centennial Cookbook was given to me by a friend who recommended it wholeheartedly. I still refer to it from time to time and it rarely lets me down. I think I was looking for a fettuccini alfredo recipe and happened upon this one. It will now be a recipe in my regular rotation for this "basil and tomatoes" time of year. I hope you will try it too!

If this recipe sounds good to you, check out these other family favorite recipes for Shrimp fra Diavolo and Linguine with Shrimp Scampi too!

Fettuccine with Shrimp in Basil Cream Sauce
adapted from The Junior League Centennial Cookbook

3 tablespoons olive oil
3 tablespoons butter
2 garlic cloves, minced
1/4 to 1/2 teaspoon red pepper flakes, optional
8-10 fresh roma or other small tomatoes, peeled, seeded and chopped, or a 15-ounce can whole tomatoes, chopped
1/2 cup dry white wine, such as Sauvignon Blanc
1/2 cup finely chopped fresh basil leaves
salt and pepper to taste
about 15-18 large uncooked tail-on shrimp
1/2 cup heavy cream
1 pound fettuccine or linguine, fresh or dried
freshly grated Parmesan cheese

In a large pot, cook the pasta in boiling salted water until al dente.

Meanwhile, heat the oil and butter in a large saute pan over medium heat. Gently saute the garlic and red pepper flakes, if using, until fragrant, about one minute.

Increase the heat to medium high and add the tomatoes, wine, basil, and salt and pepper. Bring to a simmer and add the shrimp. Cook the shrimp, turning them halfway through, until they have turned pink and begin to curl. Try not to overcook them or the shrimp may become tough. Remove the shrimp and keep warm in a covered bowl. Continue to simmer the sauce 5-10 more minutes or until the sauce has thickened. Add the heavy cream and simmer a few more minutes, adding the shrimp back to the pan during the final minutes to warm through. Adjust seasonings if necessary. Add cooked pasta to the saute pan and toss to coat. Transfer to a serving bowl, sprinkle with grated parmesan, and serve immediately.


Tuesday, August 24, 2010

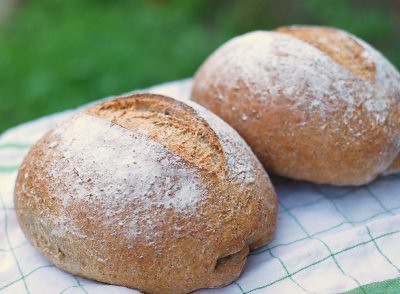
Multi-Grain Sandwich Bread

Multi grain sandwich bread

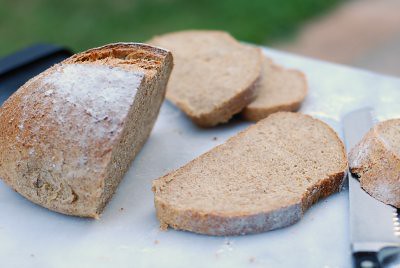
I've been into bread baking lately. Not plain old white bread (sorry kids!), but bread with a little more substance. 100% whole wheat bread tends to be a bit heavy and strong-tasting in my opinion, but bread made with a combination of white and whole wheat flour is a great compromise.

Multi grain sandwich bread

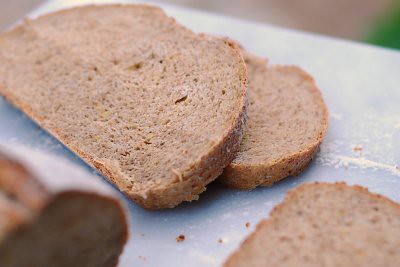
Bob's Red Mill and King Arthur Flour are two great websites to go to for whole grain bread recipes. A feature that I like about the Bob's Red Mill website is that it allows you to search for a recipe depending on what you have on hand. I happened to have some 7-grain hot cereal that I wanted to use up and so I searched the recipe database on the website and it gave me several options, including this bread. The grains give the bread a nice flavor and texture. The inside of this bread is soft and makes a great sandwich bread and it's wonderful toasted.

Multi grain sandwich bread

Easy Multigrain Sandwich Bread
from Erika Bruce via www.bobsredmill.com

1 1/4 cups 7-Grain Cereal
2 1/2 cups Boiling Water
3 cups Unbleached All Purpose Flour (plus extra for dusting)
1 1/2 cups Whole Wheat Flour
4 Tbsp Honey
4 Tbsp Unsalted Butter, melted and cooled slightly
2 1/2 tsp Instant Yeast
1 Tbsp Salt
3/4 cup Raw Pumpkin Seeds or Sunflower Seeds (Raw Shelled), optional
1/2 cup Oats, Rolled, Regular Old fashioned, optional

1. Place cereal mix in bowl of standing mixer and pour boiling water over it. Let stand, stirring occasionally, until mixture cools to 100°F and resembles thick porridge (about 1 hour). In a separate medium-sized bowl, whisk flours together.

2. Once grain mixture has cooled, add honey, melted butter and yeast. Stir to combine. Attach bowl to standing mixer fitted with the dough hook. With mixer running on low speed, add flours ½ cup at a time, and knead until dough forms ball (1-1/2 to 2 minute); cover bowl with plastic and let dough rest 20 minutes.

3. Add salt and knead on medium-low speed until dough clears sides of bowl, 3-4 minutes (if it does not clear sides, add 2-3 Tbsp additional all-purpose flour and continue mixing); continue to knead dough for 5 more minutes.

4. Add seeds and knead for another 15 seconds. Transfer dough to floured work surface and knead by hand until seeds are dispersed evenly and dough forms smooth, taut ball. Place dough into greased container with 4-quart capacity; cover with plastic wrap and allow to rise until doubled, 45 to 60 minutes.

5. Adjust oven rack to middle position; heat oven to 375°F. Spray two 9” x 5” loaf pans with nonstick cooking spray. Transfer dough to lightly floured work surface and pat into 12” x 9” rectangle; cut dough in half crosswise with knife or bench scraper.

6. To shape loaves, start with one half of the dough. With short side facing you, start at farthest end, roll dough piece into log. Keep roll taut by tucking it under itself as you go. To seal loaf, pinch seam gently with thumb and forefinger. Repeat with other dough. Spray loaves lightly with water or nonstick cooking spray. Roll each dough in oats to coat evenly. (I formed the bread rounds, dusted them with flour, and cut a slit 1/4" deep in each loaf before setting the loaves aside to rise again.) Place loaf seam-side down in a greased loaf pan, pressing gently into corners. Cover lightly with plastic wrap and let rise until almost doubled in size, 30-40 minutes. (Dough should barely spring back when poked with knuckle.)

7. Bake until internal temperature registers 200°F on an instant-read thermometer (35-40 minutes). Remove loaves from pans and cool on wire rack before slicing, about 3 hours.

Friday, August 20, 2010

Peppermint Brownie Chunk Ice Cream


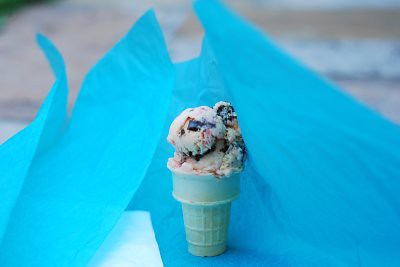
Eating ice cream in August - easy. Photographing ice cream in August - not so easy. Allow me to paint the picture for you...

It's 88 degrees and the light is best outside, but I've got a plan.
I scoop out the ice cream and place it just so in the cone and then place it very carefully back in the freezer.
I set up the backdrop, in this case a piece of colorful tissue paper. I take the cone out of the freezer and to the back yard to photograph. But what's happening? My camera is not working as it should! I mess around with the settings for what seems like an eternity and finally fix the problem (don't ask me which button I pushed) and now the ice cream is melting and dripping all over. gah!

Back to the freezer. Dish out another cone, ignore the oven timer as it starts ringing, take the cone outside, cover up the drippings with a white napkin, and shoot. I snap a few pictures and things are going fine - the ice cream is starting to melt, but it's not major. Then a breeze blows the tissue paper around and I start to panic that the cone will tip, but the cone stood still and suddenly I have the Marilyn Monroe shot of ice cream. Cool.

Peppermint Brownie Chunk

I think peppermint ice cream might be my favorite flavor - you know, the kind with little bits of crunchy peppermint candy throughout? It's hard to pick a favorite ice cream flavor, but I think peppermint might be it for me.

I have really good memories of eating some delicious peppermint ice cream in Annapolis at the harbor when we sailed there on my dad's boat. That was maybe 25 years ago? Is that even possible? Man, I feel old.

Anyway, it's been too long! I had this idea to make peppermint ice cream with those fudgy brownies that I talked about the other day. The combination was wonderful! And I only spent about 5 minutes searching for the candy canes that I hauled from the old house to the new house (a true miracle considering I've been looking for my stick blender for days now...)

The cream-colored ice cream base (made with egg yolks) mixed with red candy canes, made the ice cream sport a bit of a peachy hue. This confused the troops when I asked them to fetch the peppermint ice cream from the freezer. "Mom, I can't find it! All I see is this orange stuff!" Ok then...

I'll tell you the troops didn't mind the orange color after they took a taste. It was pronounced the best ice cream yet!

The fudgy brownies stayed chewy in the ice cream and when combined with the cool crunch of peppermint, this made for the perfect combination of rich and refreshing! Did I mention that eating ice cream in August is easy? oh yeah!

Peppermint Brownie Chunk Ice Cream
adapted from Christmas Sweets by Georgeanne Brennan via Cookstr

2 cups heavy cream
2 cups whole milk
3/4 cup granulated sugar
1/4 tsp salt
4 egg yolks
1 teaspoon peppermint extract
4 ounces hard peppermint candies, or about 6 candycanes, crushed into small pieces
about a cup or so of chopped brownies (mine were frozen)

In a medium, heavy saucepan, combine the cream, milk, sugar, and salt. Cook over med-high heat, stirring often, until the sugar has dissolved and the mixture is hot but not boiling.

In a medium bowl, whisk the yolks until their color lightens to a lemon color. Whisk the egg yolks while gradually adding about 1 cup of the hot milk into the yolks. Then whisk the hot milk while pouring the yolk mixture back into the hot milk mixture. Continue to cook and stir constantly until the mixture thickens enough to coat the back of a spoon.

Pour the mixture through a strainer into a container with a lid. Refrigerate for 3 or more hours. Add the peppermint extract and mix to combine.

Freeze the mixture in an ice-cream maker (mine took about 20 minutes). The ice cream will be frozen but very soft. Add the crushed peppermint candies and the brownie pieces and stir to combine. Transfer to a container and freeze until hardened, about 4 hours.

Saturday, August 14, 2010

Special Fudgy Brownies

Brownies

It's been 4 weeks since we moved into our new house and 3 weeks since I got my new stove. I worked like crazy to get our kitchen unpacked - the necessities at least. 

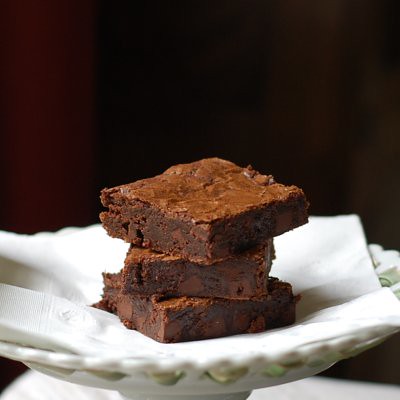
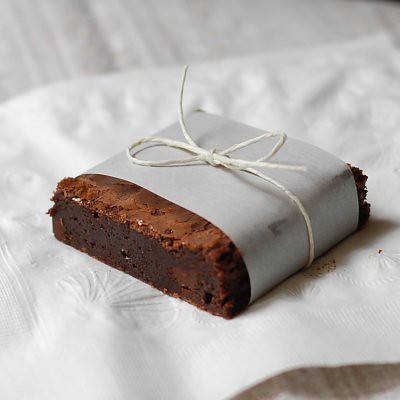
The rest of the house is going a little slower. Well, because things like yummy fudgy brownies get in the way. Can you blame me? I had these brownies on the brain ever since Tish Boyle blogged about them in her post for Chocolate Caramel Brownie Chunk Ice Cream. (I have some of these brownies tucked away in my freezer ready to be mixed into some homemade ice cream too!)

These are very delicious and rich, almost like eating a bar of pure chocolate. You only need a little piece to be satisfied - unless you're unpacking boxes too numerous to count, and then you'll need a larger piece - and you'll need to smear some creamy peanut butter on top - you know, for extra energy and protein.

These brownies are on your brain now, aren't they? You'll have to stop what you're doing right now and go bake some! Sorry 'bout that!

Brownies


Very Special Fudgy Brownies
from Sweet Gratitude by Judith Sutton
makes 48 brownies

Note: I halved this recipe and used an 8x8-inch pan. I used my favorite Callebaut chocolate.

1/2 pound (2 sticks) unsalted butter, cut into chunks
6 ounces high-quality unsweetened chocolate (such as Ghirardelli), coarsely chopped
2 ounces bittersweet chocolate, coarsely chopped
4 large eggs
1 3/4 cups granulated sugar
1/2 cup packed light brown sugar
1/4 teaspoon salt
1 1/2 teaspoons pure vanilla extract
1 cup unbleached all-purpose flour
7 ounces bittersweet or semisweet chocolate, coarsely chopped or cut into shards about 1/4 inch wide by 1/2 inch long, or 1 1/2 cups semisweet chocolate chunks or large semisweet chocolate chips (omit for a slightly less intense brownie)

1. Put a rack in the middle of the oven and preheat the oven to 350°F. Line a 9-by-13-inch baking pan with foil, leaving an overhang on the two narrow ends.


2. Combine the butter, unsweetened chocolate, and 2 ounces bittersweet chocolate in a medium heavy saucepan and melt over low heat, stirring frequently until smooth. Remove from the heat. 


3. In a large bowl, beat the eggs and both sugars with an electric mixer on low speed just until smooth. Beat in the salt. Beat in the melted chocolate mixture, then beat in the vanilla. Scrape down the sides of the bowl. Beat in the flour in two additions (the batter will be thick). Stir in the chopped chocolate.


4. Scrape the batter into the prepared pan and smooth the top. Bake for 23 to 25 minutes, or until the top is set but still soft and the edges are puffed and just beginning to pull away from the sides of the pan; a toothpick inserted in the center will come out still gooey (be brave!—underbaking the brownies is one of the secrets to their fudgy texture). Transfer the pan to a wire rack to cool completely.


5. For the neatest cuts, refrigerate the brownies for about 20 minutes before slicing. Using the foil, lift the brownies out of the pan. Carefully peel off the foil, and put the brownie slab on a cutting board. With a large sharp knife, cut the brownies into 48 squares.

Tuesday, August 10, 2010

My Favorite Creamy Corn and Queso Fresco Cheese

Creamed Corn

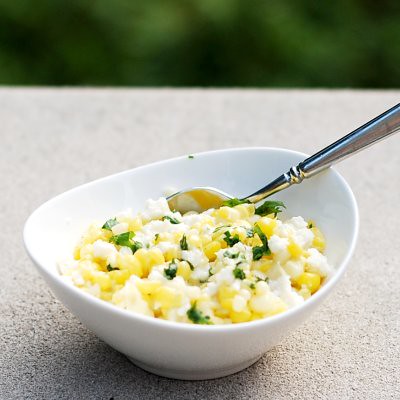
While fresh corn is still in season, I thought I'd share with you my favorite corn recipe.

Aside from the corn itself, the major players in this recipe are cilantro and queso fresco cheese. Queso Fresco is a mexican cheese that has the texture of feta cheese but it has a milder taste. It would be great for taming hot peppers in a mexican dish and I could see it working perfectly in a spicy enchilada.

Depending on where you live, queso fresco cheese may be hard to track down. My closest grocery stores don't carry it. In fact, they didn't have the slightest idea what I was talking about when I asked. But the Wal-mart which is 20 minutes from our new place has 3 or 4 varieties - an entire shelf just for this cheese!

This corn recipe isn't spicy, but the cheese melts into the corn and makes it creamy and delicious. If you like hot peppers, add a finely chopped jalapeno to the recipe. 

Cheesy Creamed Corn
adapted from Gourmet | September 2009
Makes 6 servings

3 tablespoons unsalted butter
1 1/2 cups chopped scallions (about 6 large)
1 large garlic clove
12 ears corn, kernels cut from cobs
1 jalapeno, seeded and finely chopped (optional)
2/3 cup heavy cream
2 teaspoons cornstarch
6 ounces queso fresco or mild feta, crumbled (1 1/3 cups)
1 cup cilantro sprigs (could substitute basil if you're not a cilantro fan)

Heat butter in a deep 12-inch heavy skillet over medium-high heat until foam subsides, then cook scallions, stirring occasionally, until softened, about 5 minutes. Add garlic, jalapeƱo, and corn and 1/2 teaspoon each of salt and pepper and cook, stirring occasionally, 5 minutes.

Stir together cream and cornstarch in a small bowl until thoroughly combined, then add to corn and simmer, stirring, until slightly thickened, about 3 minutes.

Transfer corn to a large shallow serving bowl and sprinkle cheese and cilantro on top.

Sunday, August 8, 2010

Lemon and Basil Pasta with Grilled Chicken

Lemon Basil Chicken and Pasta

Summertime is the time to make simple, light meals made from fresh ingredients - perfect for eating outside on the patio when the hot days are just beginning to cool a bit.


This recipe uses fresh basil and has bright notes of freshly squeezed lemon. It's a dish the entire family will love!

Grilled Chicken with Lemon and Basil Pasta
Adapted from The Pioneer Woman
Serves 6

For the grilled chicken:
6 Chicken cutlets pounded to an even thickness or
about 12 chicken tenderloins - make more and use the leftovers to put over salad the next day
1/3 cup olive oil
Juice of four lemons
1 tablespoon Dijon mustard
A tiny bit of honey
A dash of salt

Marinate the chicken for at least an hour or overnight in the fridge. Cook over a hot grill and keep warm until the pasta is ready.

For the pasta:

1 pound Penne Pasta or Linguine, Cooked Until Al Dente
6 Tablespoons Butter
3-4 whole Lemons, Juiced
1 cup Heavy Cream
¼ cup Half-and-half
1-½ cup Grated Parmesan Cheese (or Romano)
Salt And Freshly Ground Black Pepper, To Taste
20 whole Basil Leaves, Chopped

Cook pasta, reserving 1 cup of hot pasta water when you drain. Set pasta aside in a colander.
In the same pot, melt butter over medium heat. Squeeze in the juice of 3 to 4 lemons. Whisk together. Pour in cream and half-and-half. Whisk together and simmer until it starts to thicken. Add the cheese and whisk until melted. Add salt and pepper. Check consistency, adding some of the hot pasta water to loosen the sauce if needed.
Pour pasta and sauce into a large serving bowl. Sprinkle basil all over the top, then add sliced chicken breasts. Serve immediately.

Monday, August 2, 2010

Creamy Rice Pudding

Rice Pudding

When I was growing up, if we had some extra cooked white rice, we'd pour a bit of hot milk or cream over the rice and then sprinkle sugar and cinnamon on top for a quick dessert. It was the ultimate cheater's rice pudding. Dessert in about a minute!

But if you want the real thing - creamy, sweet, thick rice pudding, it'll take a little longer.

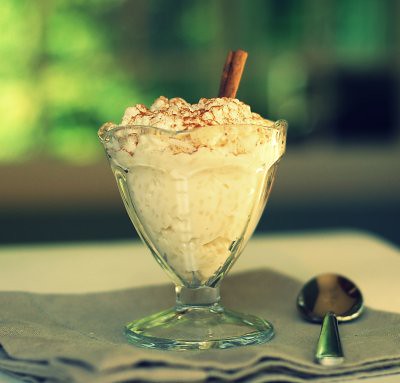
I love this rice pudding. It is simple to make, only requiring a bit of time, and some stirring here and there. I'm a purist when it comes to flavoring my rice pudding. I prefer only vanilla and cinnamon, but you could add just about any flavors you'd like, a little orange zest perhaps?

When I made the recipe as written and tasted it, I was thinking..."it's good, but it needs a little something". I was also thinking... "how do the people at Kozy Shack make such good rice pudding??" (I love that stuff! - it's just a little too sweet.)

Then I stirred in a splash of heavy cream after the pudding had cooled. It is the secret for bringing this pudding to a new level of richness and creaminess! "Now that's what I'm talking about!"

(If you like rice pudding, check out this David Lebovitz recipe for Rice Gelato too!)

Rice Pudding
adapted from The New Best Recipe/Cook's Illustrated

2 cups water
1/4 teaspoon table salt
1 cup white medium-grain rice
2 1/2 cups whole milk
2 1/2 cups half-and-half
2/3 cup granulated sugar
1 1/4 teaspoons vanilla extract
1/4 cup heavy cream
Cinnamon for garnish

INSTRUCTIONS
1. Bring 2 cups water to boil in large, heavy-bottomed pot (at least 3 quarts). Stir in salt and rice; cover and simmer over low heat, stirring once or twice until water is almost fully absorbed, 15 to 20 minutes.

2. Add milk, half-and-half and sugar. Increase heat to medium-high to bring to simmer, then reduce heat to maintain simmer. Cook uncovered, stirring frequently, until mixture starts to thicken, about 30 minutes. Reduce heat to low and continue to cook, stirring every couple of minutes to prevent sticking and scorching, about 15 minutes longer or until thickened. The pudding will continue to thicken as it cools.

3. Remove from heat and stir in vanilla extract. When the pudding is cooled, stir in the heavy cream. This pudding may be served cold or at room temperature. Divide among serving dishes and sprinkle with cinnamon to taste.

LinkWithin

Related Posts Widget for Blogs by LinkWithin