Friday, February 15, 2013

Pittsburgh Penguins Cake


Hockey is back in Pittsburgh!

And what's better for a hockey fan's birthday than the team's logo on a traditional yellow cake with chocolate icing?

I decided to use the royal icing transfer method to make the decorations on the cake.  The advantage is that the design can be made ahead of time so you don't have to worry about decorating at the last minute.

It's just like decorating a cookie with royal icing, except you are piping directly onto waxed paper instead of onto a cookie.  The design can be printed out on paper and placed under the waxed paper so you know exactly where to pipe.

Outlines of the design need to be piped with stiff-consistency icing, allowed to dry, and then the spaces are "flooded" with 10-second icing.   10-second icing is stiff icing to which water has been added a few drops at a time until a spoon can be drawn through the icing and the icing becomes completely smooth in 10 seconds.  A good video for learning how to get the right consistency for flooding can be found here.

Let's Go Pens!


Monday, February 4, 2013

Cute Monster Party Brownie Pops


I made these cute monster brownie pops for a little boy's birthday party.  I love the way they turned out!  If you want to try these yourself, I have listed the supplies I used to make them below.

Note:  Have all the decorations ready because they need to be applied while the dipped brownie pop is still wet.  Use water and a small paint brush to attach the fondant teeth to the fondant mouth.

Red Monster - red candy melts for coating, upside down confetti hearts for horns, nonpareils, candy eyes (purchased from a baking supply store), fondant mouth and teeth
Green Monster - green candy melts for coating, green decorating sugar, candy eyes and fondant mouth/teeth
Yellow Monster - yellow candy melts for coating (use a toothpick to make him furry), red string licorice for horns, candy eyes, fondant mouth/teeth
Blue Monster - blue candy melts for coating (use a toothpick to make him furry), candy eye, fondant mouth/teeth

Happy Baking!

Thursday, January 31, 2013

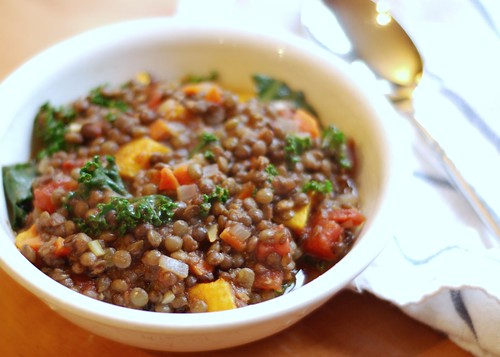
Lentil Soup with Kale and Butternut Squash

Lively Yourself Up Lentil Soup

It's a dreary and cold day in late January and maybe you have just spent the last couple of days unintentionally loading up on sugary carbs and now you're feeling sluggish and generally crappy.  What do you do now?

Make some of this lentil soup!  It's meatless - vegan actually - unless you decide top with a poached egg which is also quite good.  It's colorful and delicious and every bite gets you back to feeling good again, even though it's still late January and still cold and dreary.

A few important items about this soup:

1.   Try to find French green lentils, also called Puy lentils, or black beluga lentils for this soup.  They hold up to cooking and don't break apart and turn to unrecognizable mush like other lentils have a tendency to do when cooked.  I have great luck finding these varieties in the bulk section of groceries like Whole Foods.

2.  Substitute roasted sweet potato for the butternut squash if you desire.

3.  Any hearty green will work.  I prefer kale in this recipe, but I've also used swiss chard which is also quite good.  The kale is just a bit heartier and chewier and stays defined in the soup a bit better.

4.  The leftovers may not be quite as colorful as the kale tends to turn less green as it sits, but it will be just as delicious as the day it was made.

5.  The leftover soup can be frozen quite successfully.

Lentil Soup with Butternut Squash and Kale
adapted from 101Cookbooks
Serves 6-8

1 medium butternut squash, peeled and diced to 1/2" cubes
2 cups black beluga lentils or green French lentils, picked over and rinsed
2 tablespoons extra virgin olive oil, divided
1 large onion, chopped
2 carrots, finely chopped
1 clove garlic, minced
2 tsp coarse salt
ground black pepper to taste
1 tsp dried marjoram
1 28-ounce can crushed tomatoes
2 cups water
3 cups of a big leafy green (chard, kale, etc), rinsed well, deveined, chopped

Preheat oven to 375 degrees F.  Place the diced squash on a sheet pan lined with foil.  Drizzle with olive oil and sprinkle with salt and pepper.  Roast for 30 minutes or until tender.  This can be done a day ahead.

Bring 6 cups of water to a boil in a large saucepan, add the lentils, and cook for about 20-30 minutes, or until tender. Drain and set aside. Meanwhile, heat the oil in a heavy soup pot over medium heat, then add the onion, carrots, garlic, salt, pepper and marjoram and sauté until tender, about 5 minutes. Stir in the tomatoes, lentils, and water and continue cooking for about 10 more minutes, letting the soup come back up to a simmer. Stir in the chopped greens and roasted squash, and simmer another minute or two until kale is wilted and squash is heated through.  Adjust seasoning if desired.

Monday, January 28, 2013

Iced Lemon Ricotta Cookies

Lemon Ricotta Cookies

I love ricotta cheese.  I prefer my lasagna without it, but I love to eat it on spaghetti squash and in these cookies.  These cookies are light and delicious; sweet, but not too sweet.  They are much like our favorite orange cookies, but a bit lighter.  And the batter is unbelievably good!  Don't ask me how I know this.

Lemon Ricotta Cookies

The recipe is from Giada DiLaurentis, so when you read the recipe, make sure to roll your "R" a little  when you say "ricotta" in your head.  You'll feel more Italian that way!  Do you have any favorite ways to use ricotta cheese?  If so, I'd love to hear about it!

{Kitchen Update:  the floors and plaster are completed!  Paint and cabinets come next...stay tuned!}

Lemon Ricotta Cookies
from Giada DiLaurentis and Food Network

Cookies:
2 1/2 cups all-purpose flour
1 teaspoon baking powder
1 teaspoon salt
1 stick unsalted butter, softened
2 cups sugar
2 eggs
1 (15-ounce) container whole milk ricotta cheese
3 tablespoons lemon juice 1 lemon, zested

Glaze:
1 1/2 cups powdered sugar
3 tablespoons lemon juice
1 lemon, zested

Directions:
Preheat the oven to 375 degrees F.

In a medium bowl combine the flour, baking powder, and salt. Set aside.

In your electric mixer bowl combine the butter and the sugar and beat until light and fluffy, about 3 minutes. Add the eggs, 1 at a time, beating until incorporated. Add the ricotta cheese, lemon juice, and lemon zest. Beat to combine. Stir in the dry ingredients.

Line 2 baking sheets with parchment paper or Silpat mats. Spoon the dough (about 2 tablespoons for each cookie) onto the baking sheets. Bake for 15 minutes, until slightly golden at the edges. Remove from the oven and let the cookies rest on the baking sheet for 20 minutes.

For the Glaze: Combine the powdered sugar, lemon juice, and lemon zest in a small bowl and stir until smooth. Spoon about 1/2-teaspoon onto each cookie and use the back of the spoon to gently spread. Let the glaze harden for about 2 hours.

Monday, January 14, 2013

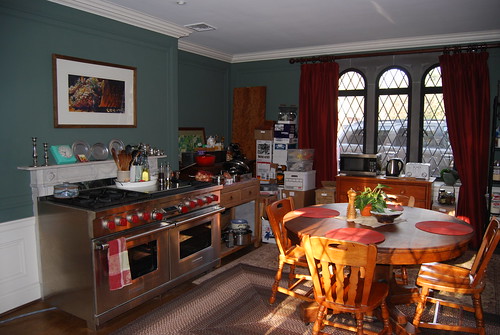
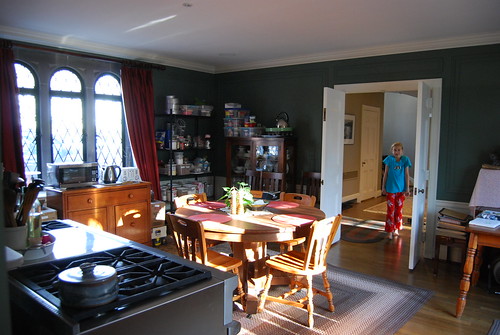
My Dining Room a.k.a. My Temporary Kitchen

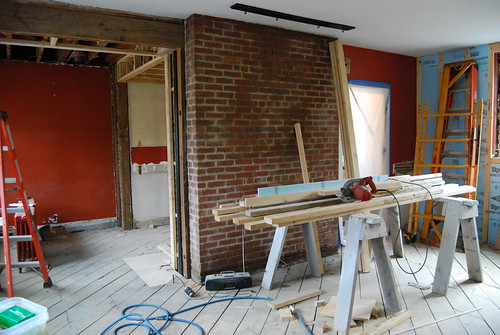
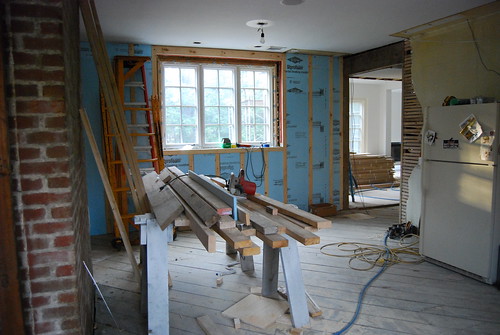
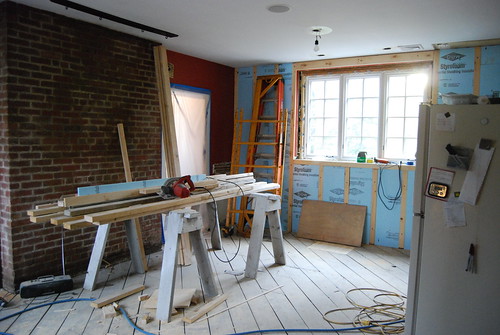
Since my kitchen currently looks like this...

DSC_0243

...I've had to set up a temporary kitchen in the dining room. The plumber and electrician set up my range by hooking it up to the gas line from the fireplace and by running a temporary electric wire from around the corner.  The range was not hooked up for the first 2 weeks and let me tell you - it's game changing.  Trying to cook with only a tabletop oven and portable induction cooktop was not fun.

   DSC_0208

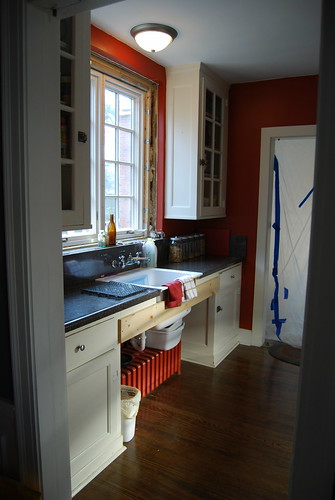
Another saving grace was being able to use the butler's pantry (which will also get a makeover when the main kitchen is complete).  The original sink was a small bar sink and too small to do any dishes in, so at first I had to take the dishes in a bin to the basement to wash them.  But the builders were able to install a large utility sink which will eventually be installed in the garage.  I still miss my dishwasher and disposal, but I'm so grateful that I don't have to haul dishes to the basement anymore!  Note the plastic on the doorway - it's the only thing separating me from the construction - and the dust finds it's way into the rest of the house and blankets everything!  Thank goodness for swiffer cloths.

DSC_0227

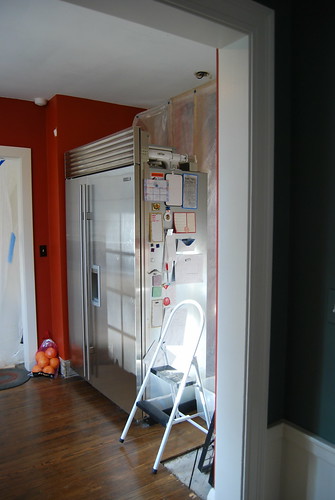
Opposite the sink is the refrigerator which will eventually be moved into the main kitchen area.

DSC_0228

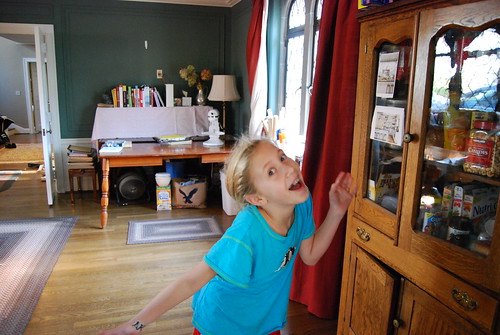
We had to get a little creative with storage space.  This cabinet on the right used to be filled with serving dishes and cake stands.  It's now called the "snack cabinet" and serves as a little pantry.  In the background you'll see that we covered the piano with a tablecloth and it's being used as a bookshelf for essential cookbooks.  {Annie didn't want the kitchen to get all the attention.  She's not at all camera shy!}

DSC_0215

I also moved a shelving unit from the basement to hold baking pans and ingredients and I have boxes of kitchen non-necessities stacked in every available space.  Oh, hello again Annie!

DSC_0213

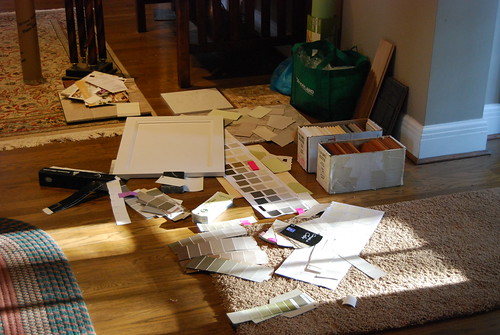
Below is what my foyer looked like just before Christmas.  Choosing paint colors and coordinating cabinet and tile is the most painful part of the process for me.

DSC_0216

The kitchen has made some progress since these photos were taken and I'll show you some of those  pics next time!  It's getting closer to the finish line!


Sunday, January 6, 2013

Pizzelles and Making Ice Cream Cups

DSC_0401

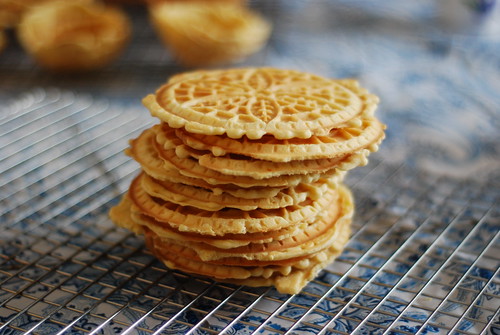
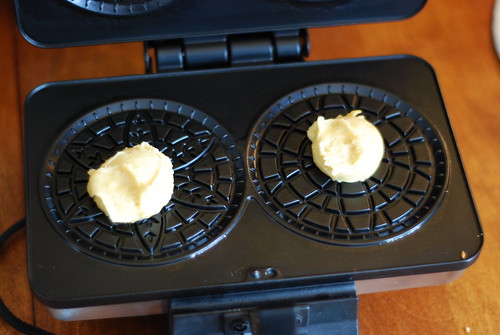
I'm getting ready to show you my temporary kitchen, but before I do that, I'd like to share with you a cookie that requires NO oven - the pizzelle!  My daughter missed having pizzelles at Christmas this year, so we spent a little time yesterday making them.

The only caveat is that you need a pizzelle iron, or ice cream cone maker.  Pizzelle irons make small 4" rounds and ice cream cone makers make 7" rounds.  Otherwise they are essentially the same thing.  For this recipe it is also useful to have a small cookie scoop for portioning the batter.

DSC_0396

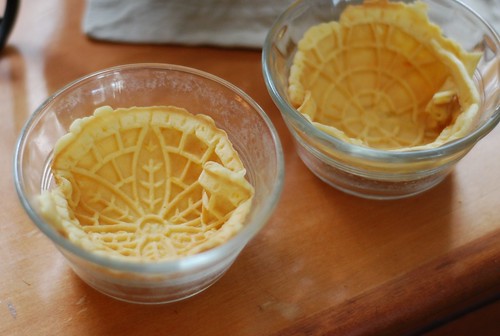
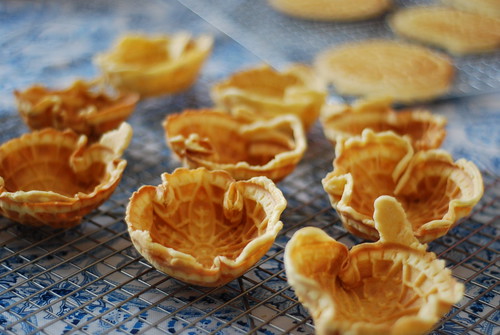
I liked the idea of having these cookies with ice cream, but the rounds were too small to make cones so we improvised a bit and made small ice cream cups.  I used small custard cups to mold them, but you could use a bigger bowl like a cereal bowl or even drape the cookie over the bottom of the upside-down bowl to make bigger, wider cups.   The trick is to immediately place the warm cookie right from the iron into the bowl.  Keep the bowls next to the iron and don't hesitate, because as soon as the cookies cool for a few seconds, they get crispy and are unable to press into the bowl without cracking.

Pizzelle Bowls

After the cups cool, they will hold their shape.  You can change the flavorings in the recipe to suit your taste and to suit the ice cream flavors and toppings you will serve it with.  For eating just plain cookies, I like to use anise and vanilla extracts with lemon and orange zests.  The anise is not at all overpowering and it will smell stronger in the batter than it will in the finished cookie.  For eating with vanilla ice cream, strawberries and chocolate sauce like we did, you might want to omit all flavorings except the vanilla so the flavors don't compete.  These little cups take your ice cream dessert to a whole new level and provides an impressive presentation with very little effort - and without turning on your oven!

DSC_0399 

Pizzelles
Makes about 20-25 cookies

3/4 cup sugar
1/2 cup unsalted butter, melted and cooled slightly
3 eggs
1 tsp anise extract
zest of 1/2 a lemon
zest of 1/2 an orange
1 T vanilla
1 1/2 cups flour
1 1/2 tsp baking powder
1/4 tsp salt

Whisk together the flour, baking powder and salt and set aside.  Cream together the sugar and melted butter.  Add the eggs, one at a time, and mix well.  Add the extracts and zests.   Add the flour mixture and stir until just incorporated.  Scoop batter onto pizzelle iron with a small cookie scoop or according to your pizzelle maker's instructions and bake until golden.  Transfer to a cooling rack.  Cookies will become crispy as they cool.

If shaping your pizzelles into bowls, immediately place the hot pizzelle into a bowl, pressing very gently, but working very quickly before the cookie has a chance to cool.  Let cool in the bowl before removing.  Store cooled pizzelles in an airtight container up to 5 days.

Saturday, December 15, 2012

Goodbye Old Kitchen


044

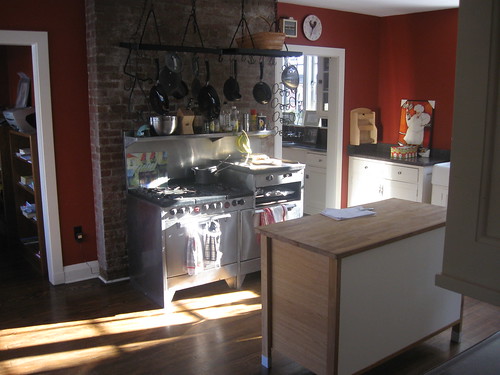
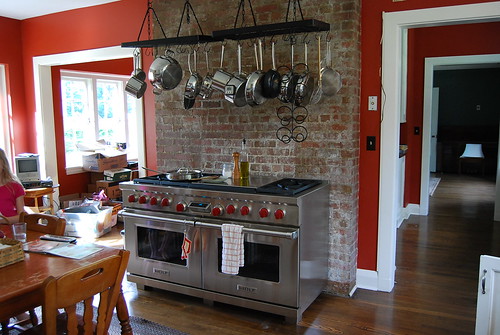
Take a look inside my old kitchen.  Above is a photo I took before we bought the house.  The owners had a small island in the center.  The family had already moved out, so everything was pretty barebones.

DSC_0362

After we moved in, the first thing I did was replace the range.  The old Magic Chef was a classic, but knobs were missing and it was in pretty bad shape - and not what I needed for all the baking I do.  I love everything about my Wolf range!

DSC_0352

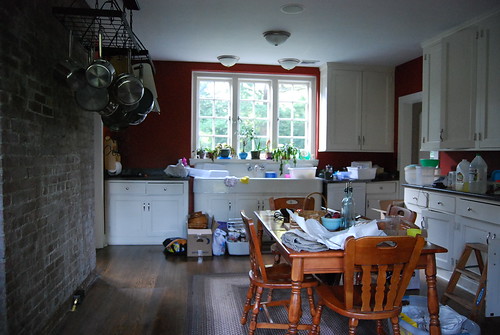
Above is a photo of the kitchen while we were moving in (two and half years ago).  We think the cabinets are original to the house, which means they are 80 years old.  They held up pretty well considering their age, but most of the doors were warped and wouldn't close completely and many of the drawers were broken or didn't slide well anymore.

The lighting was simply awful!  So many times I looked up to the ceiling to see if the lights were on.  They were - it was just so dark!  Fortunately during the daytime, there is a lot of natural light coming in from both sides of the room.

The one thing I came to love was the old enamel farmhouse sink.  The faucet dripped but I loved the large bowl with drainboards on both sides.  I love to look out on the back garden when I wash the dishes (which is quite often).

kitchen

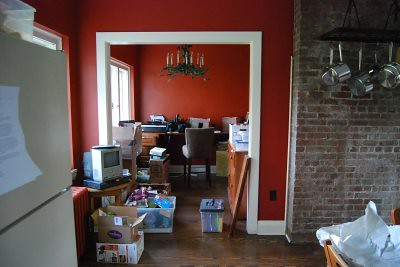
Still unpacking...to the left of the range, I made my office in a small alcove.  Anyone in the market for a metal green ivy chandelier?  I'm sure that would be right up someone's alley - it's just not my style.  I have to say, it provided some much needed carryover light into the kitchen, so I was grateful for it.

IMG_0108

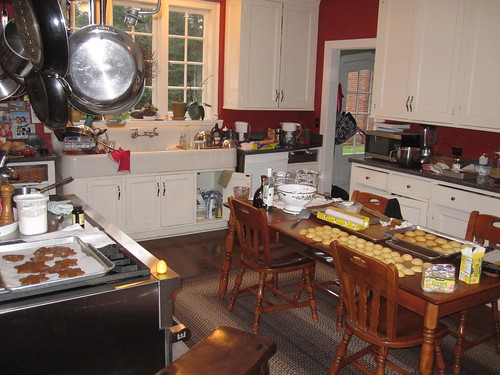
Here's the old kitchen in action.  Hey, just keepin' in real - this was Dec 23rd of last year and I had orders to fill - making trifles and orange cookies, and gingerbread cookies - things were crazy that day!
Perhaps you've been wondering if I dropped off the face of the earth - well there's not much baking going on here lately, and therefore not much to blog about because...

DSC_0247

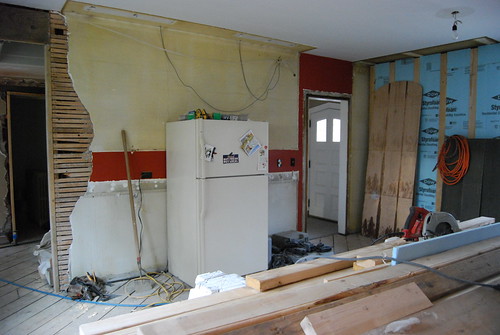
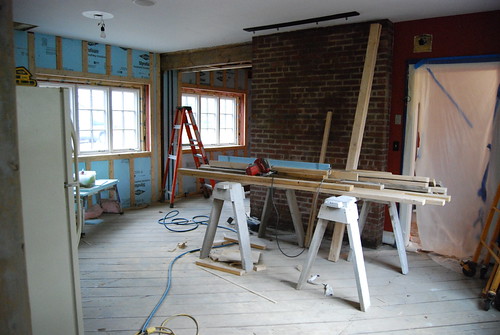
...here's my kitchen today - completely gutted! To the right of the window you can see where the door to the outside used to be.  It now leads into the new the family room.  The new addition was phase one and its progression is ahead of the kitchen (phase two).  It's all very exciting!

DSC_0246

Above is where the range was.  We are keeping the brick wall exposed and the range will have a home there once again.

DSC_0245

In this photo, you can see how the walls were constructed.  The walls are hard as rock, which is why the contractor decided to keep them mostly intact and build over them.

DSC_0244

Above and below are photos of the space that used to be my office.  We have great plans for this space, but you'll have to check back to see what we do with it!  My new office will be in a separate room just off the kitchen.

DSC_0243

Did I mention that we're living in the house during all this construction?   Most of my living is done just on the other side of that very thin piece of plastic over the doorway.  There's noise (sometimes so loud you can't hear yourself talk) from 7 am sharp to 3:30.  Somehow I've managed not to lose it, although I've had moments of temporary insanity.   In my next post, I'll show you my temporary kitchen set-up!

LinkWithin

Related Posts Widget for Blogs by LinkWithin